Home Site Map - Techniques - Structure -
Carnation Walling - Angle Bracing
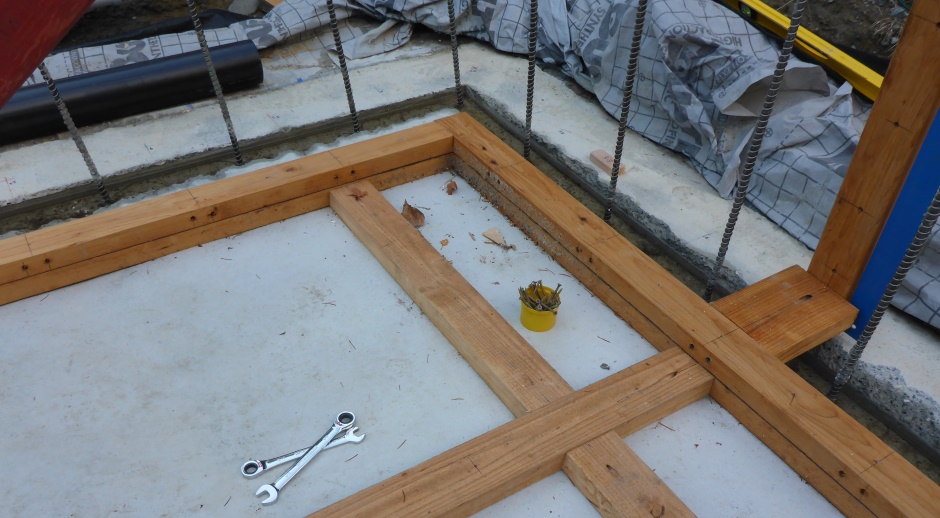
![]() Hold the walls vertical with some adjustment capability.
Hold the walls vertical with some adjustment capability.
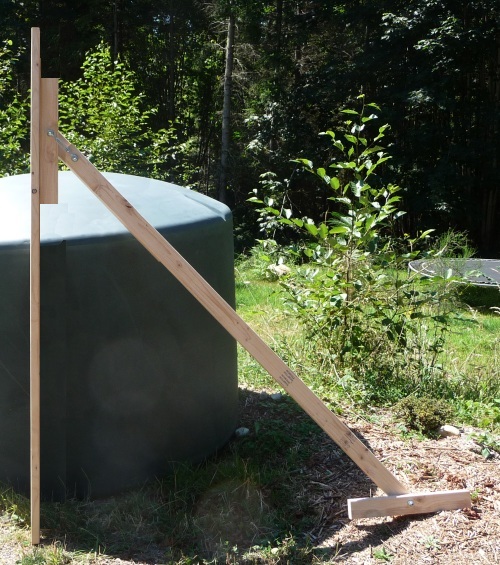
It is necessary to angle brace a concrete wall (both an ICF wall and a Carnation Walling wall) to hold it straight and true while the concrete is being poured and is setting. There are various manufacturers of ICF bracing systems, but they are expensive to buy and expensive to rent. The other problem with renting is that you are working against the clock, whereas I prefer to take my time to get the concrete walling exactly right and so that I have time to make all the conduit openings etc.
My solution was to design my own low cost angle bracing system using regular 2x4s.
The bracing with the 45 degree 2x4s is used on the inside of the building. On the outside are attached vertical face-on 2x4s. In the case of the external vertical 2x4 batons they do not need any 45 degree 2x4s because they are attached via the wall ties to the internal vertical 2x4 batons that are held vertical by the angle bracing.
The average length from hole to hole of the angled bracing is 8' 0-1/2", but the length is variable by +/-1.5".
These are the pieces of 2x4 that makeup an angle brace...
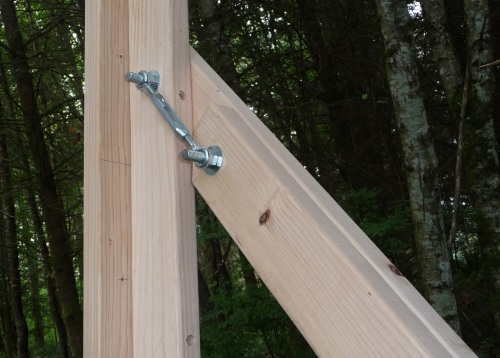
The design supports the temporary adding of turnbuckles to provide adjustment prior to tightening the 1/2" nuts, but in practice it is easy enough to adjust them without fitting the turnbuckles.

The vertical bracing is installed about every 6 feet, but that spacing can vary in plus or minus 2' increments to accommodate where the window and door openings are and to avoid clashes with other walls. Angle wall bracing only ever goes on primary 1' markers.
Prior to pumping the concrete into the wall, the angle braces are adjusted to get the wall vertical and the bolts are tightened to fix everything in place. Immediately after the concrete has been poured (before it sets) you could if needed go round and re-adjust whatever bracing is necessary to ensure that the wall sets perfectly vertically (in practice this adjustment is rarely required).
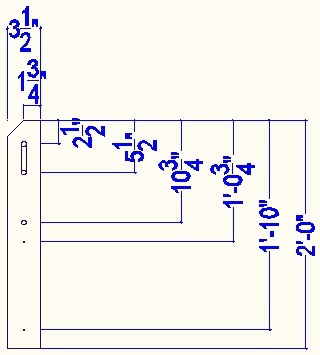
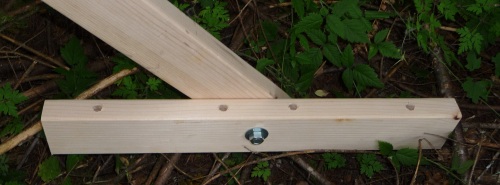
Edge-on pieces
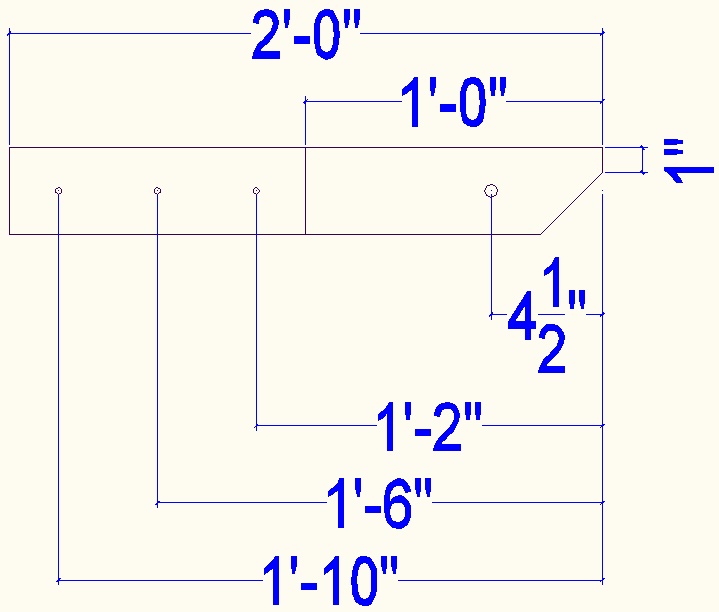
Edge-on 2' long 2x4 lumber is attached to the vertical face-on baton lumber and provides a 1/2" hole. For Carnation Walling there are also additional 1/2" holes. Measured from the bottom of the 2' long 2x4 lumber these holes are at 4-1/4", 9-7/8", and 1' 7-3/4". The bottom of the 2 foot 2x4 is the reference and it is ok if the length of the 2' 2x4 is fractionally short so you can make four from an 8' length of 2x4.
The extra 1/2" holes are to support the vertical 2x4 batons when they are temporarily installed where the concrete will go.
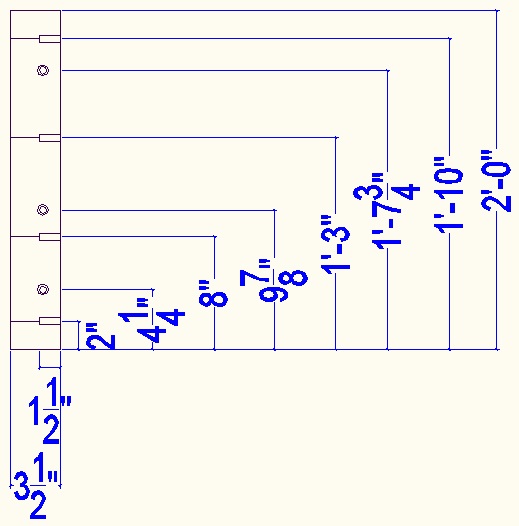
The holes in the edge-on 2x4 are clearance drilled (2" of wood left) so that they can be screwed to the face-on 2x4 vertical baton. Use a 6" long 3/16 drill in a hand held power drill (after first using a regular length 3/16 drill in a drill press) to drill all the way through and then drill with a depth set 1/2" drill.. Don't screw from the other side or you will not be able to easily add or remove the edge-on pieces with the vertical batons in place. From the bottom of the 2' long 2x4, the holes are at 2", 8", 1'3", and 1'10".
Screw on the edge-on piece to the vertical 2x4 baton where angled bracing is needed. The bottom of the 2x4 piece goes 4' 3-3/4" from the bottom of the vertical 2x4 baton.
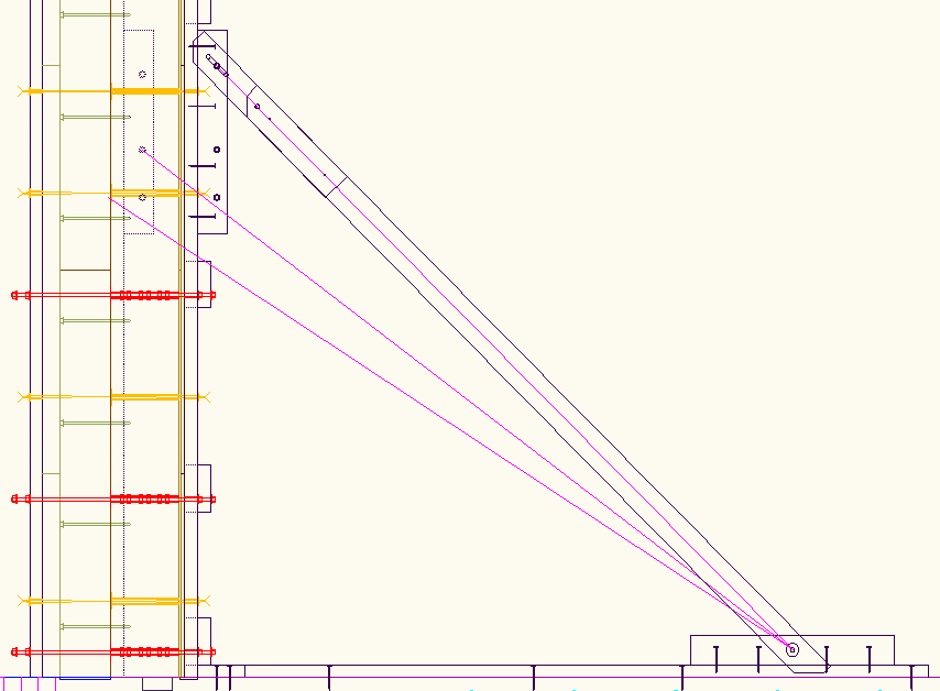
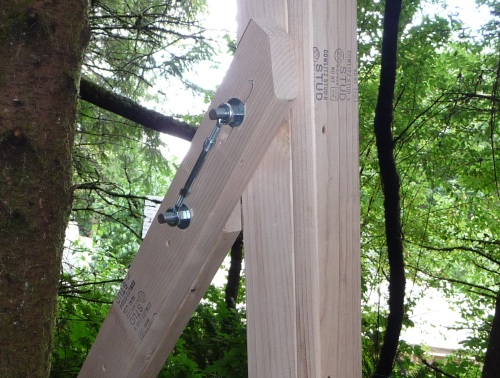
Angled bracing
The edge-on vertical 2x4 baton has an approximately 45 degree 2x4 attached using a bolt in a slot arrangement. The slot is what allows the vertical-ness of the wall to be adjusted. Half inch zinc plated threaded rod (6" long) is used on both ends of the slot moving parts. Turnbuckles can optionally be fitted between these and are used to set the vertical-ness of the wall. The nuts on the half inch studding can then be tightened in position and then the turnbuckles are no longer required (saves the cost of lots of turnbuckles).
Some angle braces are assembled with a right hand configuration and some with a left hand configuration. This should be shown on your CAD drawing.
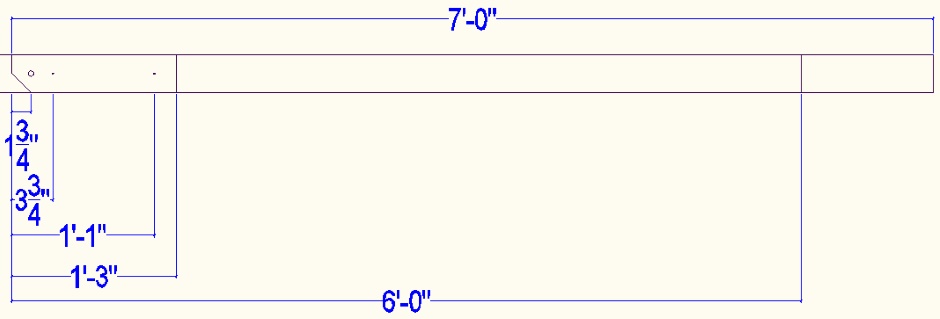
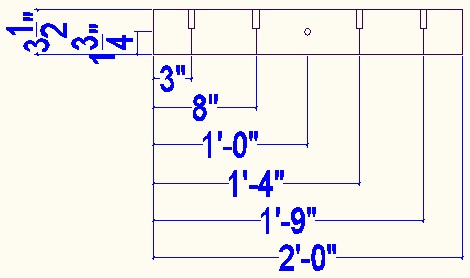
Edge-on base pieces
The bottom of the 45 degree 2x4s are bolted to 2' long pieces of 2x4. The holes (that are 3/16" but bored to 1/2" to leave 2" of wood) are at 3", 8", 1'4", and 1'9". If the 2x4 is fractionally less than 2' long that's fine but mark one end as the reference.
The 1/2" hole for the angled bracing is in the middle, ie 1-3/4" from both sides (and 1' from the reference end of the 2' 2x4).
These edge-on pieces are screwed to longer lengths of 2x4 that are flat on the concrete slab.
Make the on-flat base pieces
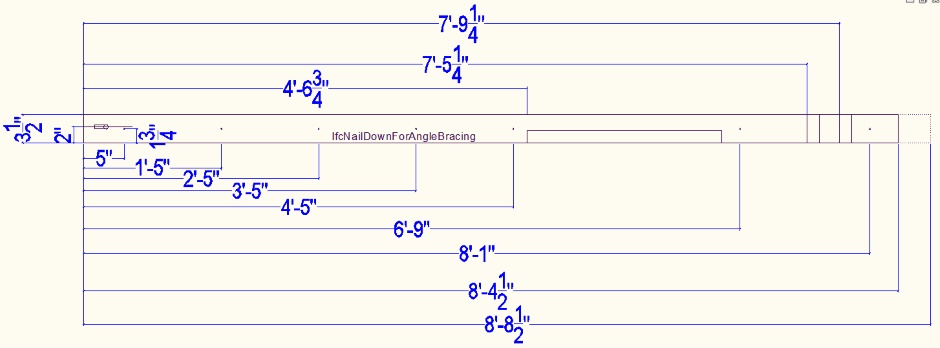
These can be made from 2x4s. The base pieces can if needed be nailed to the concrete floor using the 3/16" holes to get the nail to go in straight. Typically the aim is to connect the pieces with screws and connector 2x4s to form a lattice. The lattice can be weighted down with paving slabs to stop it lifting or moving. I try to avoid actually nailing them down in order to make them re-usable from house level to house level.
The base pieces extend horizontally all the way to the nailed down kicker planks and then to other pieces to help ensure the kickers cannot move laterally with wet concrete pressure. It is useful to have a Kreg jig hole at the end for attaching to the kicker board and other pieces.
Put a mark at 4' 6-3/4" so you know where to screw on the edge-on base pieces.
At the building corners it is typically necessary to cut 3.5" gaps in some of the pieces to allow them to cross over each other. Use kreg holes at each side of the cut pieces to allow them to screw together.
If the distance between walls is small then the base pieces need to be shared with the opposite wall.
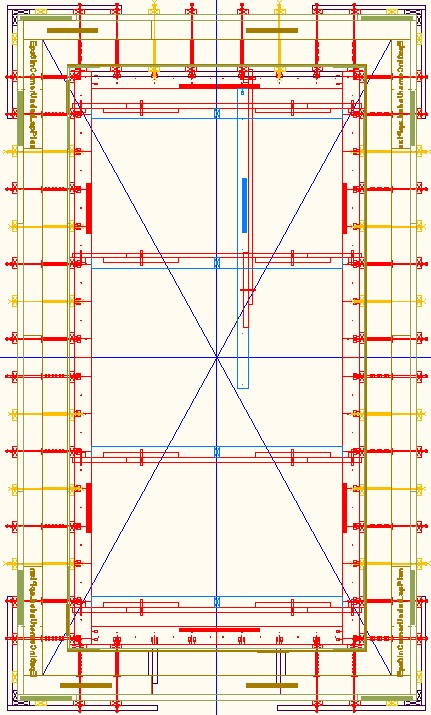
It is good to have the brace positions worked out and drawn on your CAD drawing. This will help you establish what pieces you need to make.
The orientation of the vertical batons determines whether you need a left or right hand variant of the bracing. The rule to follow when placing the vertical 2x4 batons is that the 2" edge (from the holes) goes towards the corner (away from the center of the building quadrant divider cross). This better overlaps with the EPS joins that are 1" from the holes.