


Home Site Map - Techniques - Structure -
Columns - Round Column Implementation
![]() How to form round concrete columns for balconies and porticos.
How to form round concrete columns for balconies and porticos.
Round Column Implementation
Lots of stacked EPS squares
Get uniform squares, eg 2' square and 6" high. The squares can be all braced together as a square column. In each square, cut a circle using a CNC hotwire cutter that is the outside diameter of the column at that height (minus between 1/8" and 1/16" to allow for stucco). The inside of the concrete tube is formed by a 4" PVC drainpipe. After the concrete pour the polystyrene is all stripped away. Stucco is applied to take out the steps (the steps are less than 3/16"). The same technique (using 3/8" thick sheets) can be used to form the bases and tops.
EPS profile cutting
Using the AutoCAD DWG template file from the EPS supplier, make a file with the different diameters.
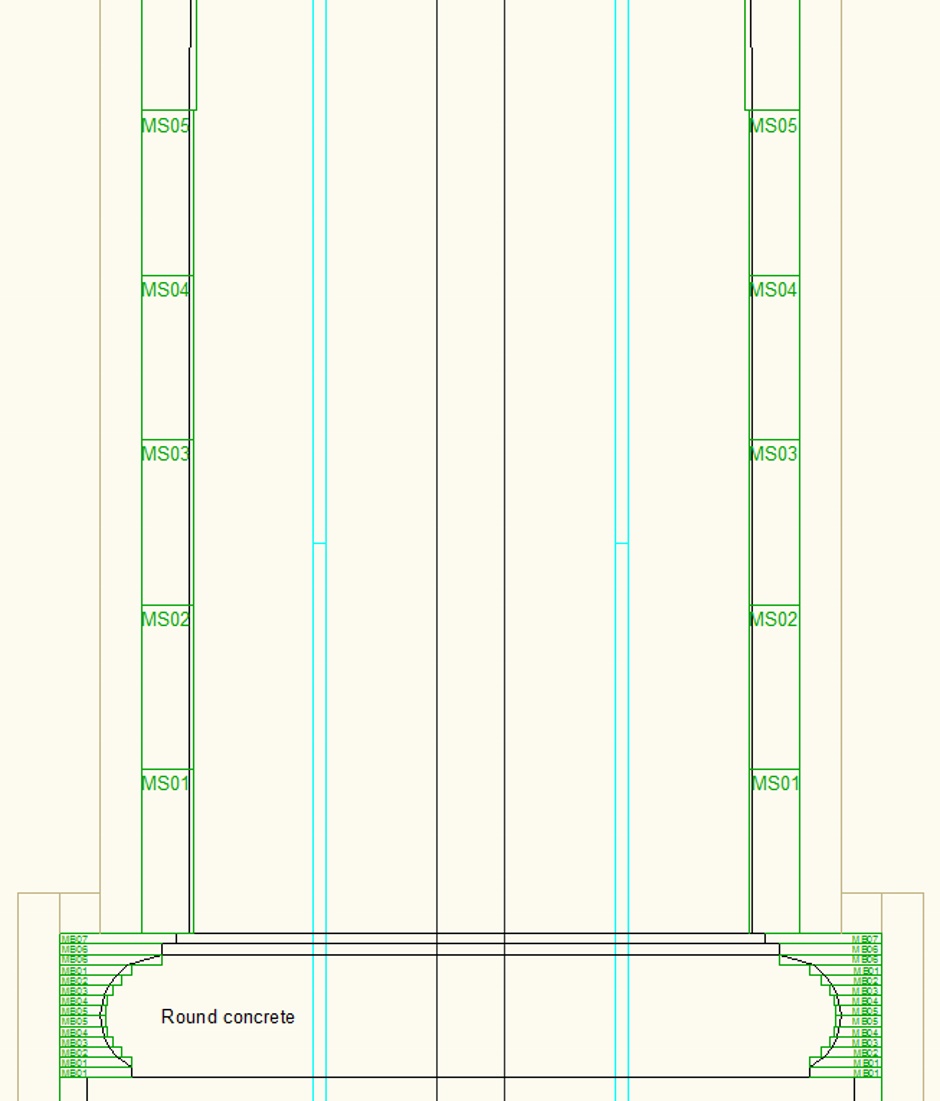
My EPS supplier can cut the tubes from the 8' CNC cutter into short sections. They do this by rotating the cut block on the CNC machine. This is not expensive to do. For the column stem this will be 6", and for the base and capitals much finer resolution (3/8").
The steps help support the stucco, but the step is only about an 1/8".
Cutting sequence for column stem 6" sections
Initially the 8x4x3 ingot is cut with an 8 foot long Carnation Flooring profile. This reduces the ingot to 8x4x2.
Next the block is cut in half to make a block that is 4x4x2.
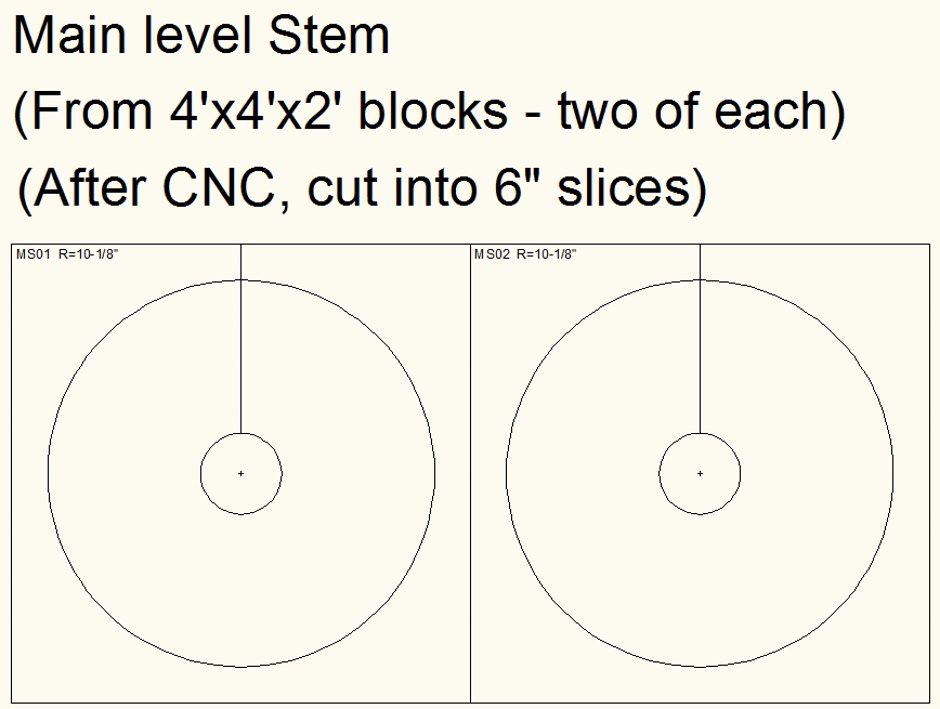
The blocks are then cut with one of the CNC profiles. A 4x4x2 can make 8 of the 6" sections. Each 4' wide block gives two different section types.
After CNC profile cutting the block is sliced in the other dimension into 6" wide slices. This provides 8 of each 6" CNC profile, ie enough for 8 columns. For the main level 16 columns are required so the quantity needs to be doubled.
Here's an example EPS CNC profile...
The following are the different EPS CNC profiles required for one column...

Cutting sequence for 3/8" sections
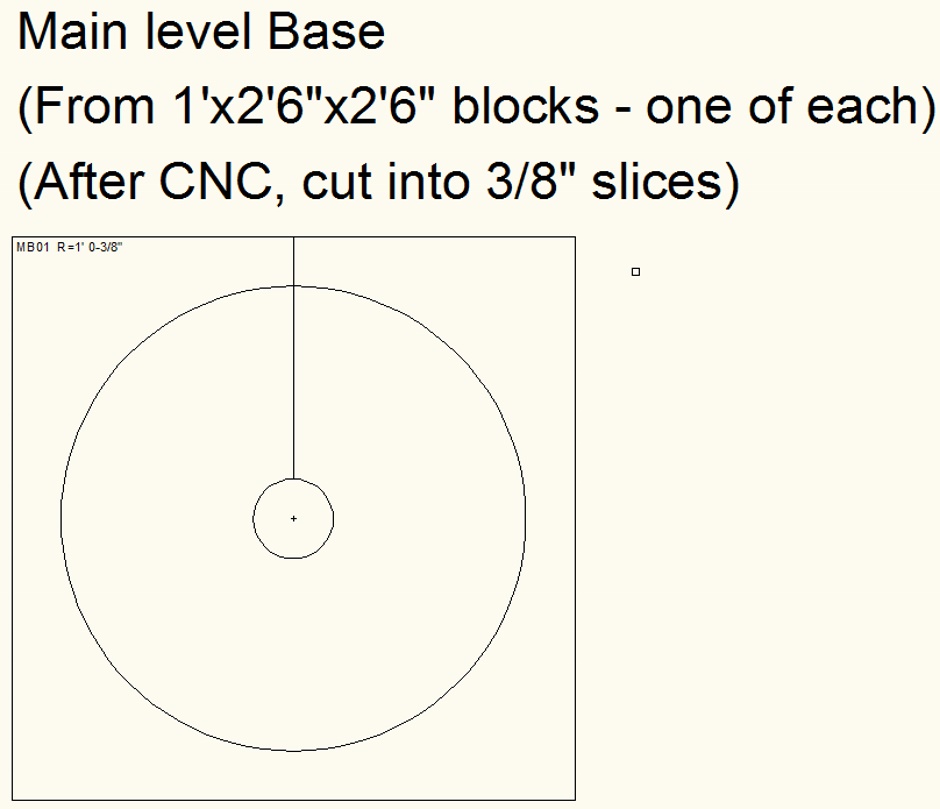
Initially a 6" thick 8'4' sheet (for Carnation Walling) is cut from the top. This makes a block that is 8'x4'x2'6".
From the side cut three pieces that are each a 6" thick sheet of dimensions 1'6"x8'. These will be used for roof insulation. The resulting block is 2'6"x2'6"x8'.
Cut the block in the other dimension to make eight blocks that are each 2'6x2'6"x1'. Each block can make 32 of each 3/8" CNC profile type. At most each profile is used twice on each column, so that means there will be enough items to make 16 columns.
After CNC profile cutting the block is sliced in the other dimension into 3/8" wide slices.
Here's an example EPS CNC profile...
The following are the different EPS CNC profiles required for one column...

Thermal isolation
This subject is covered in more detail in the section on Balconies . The upshot is that the concrete of the columns needs to be isolated from the concrete of the building. Rubber load blocks, as used on some road bridges, are used to achieve this thermal isolation.
Bracing
The 2x4 bracing will be rectangular and not tapered so is easy to implement.
Put vertical L shaped double 2x4s at the corners of the squares. Screw horizontal bits of 2x4 (with 2x4 padding) between the corner pieces. Also brace with 2x4s between the columns and back to the wall to keep everything in alignment and avoid getting bowed columns.
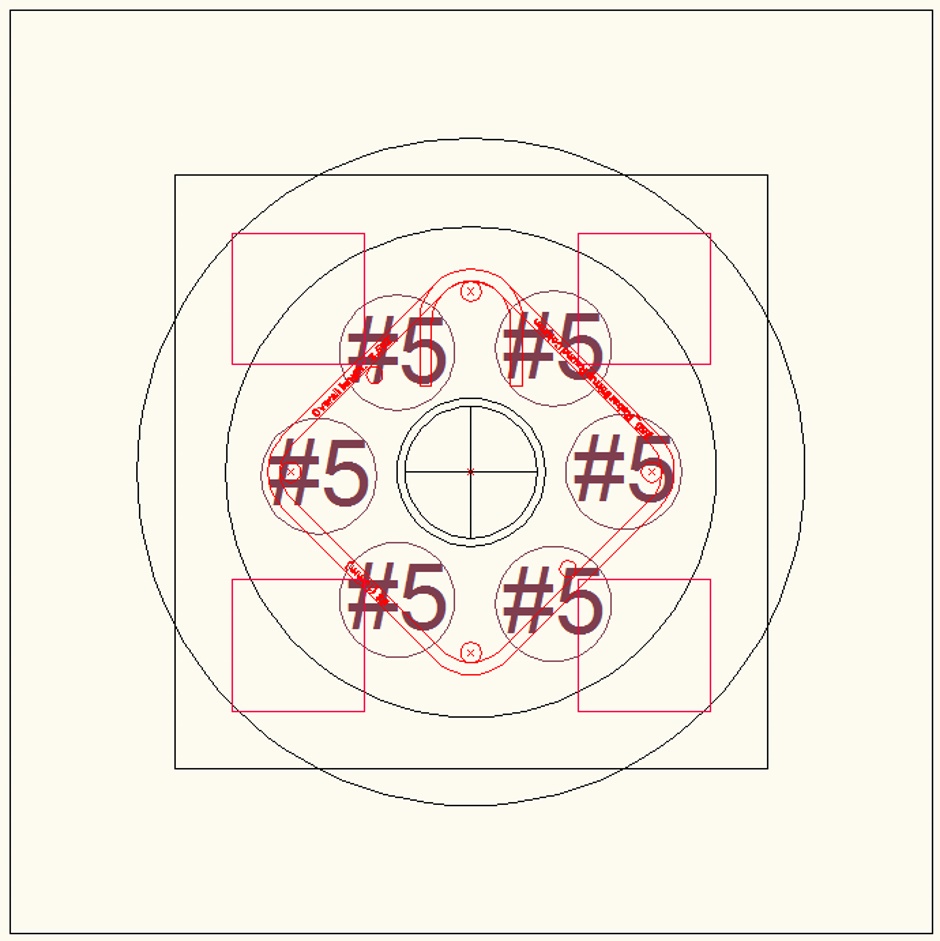
Rebar etc
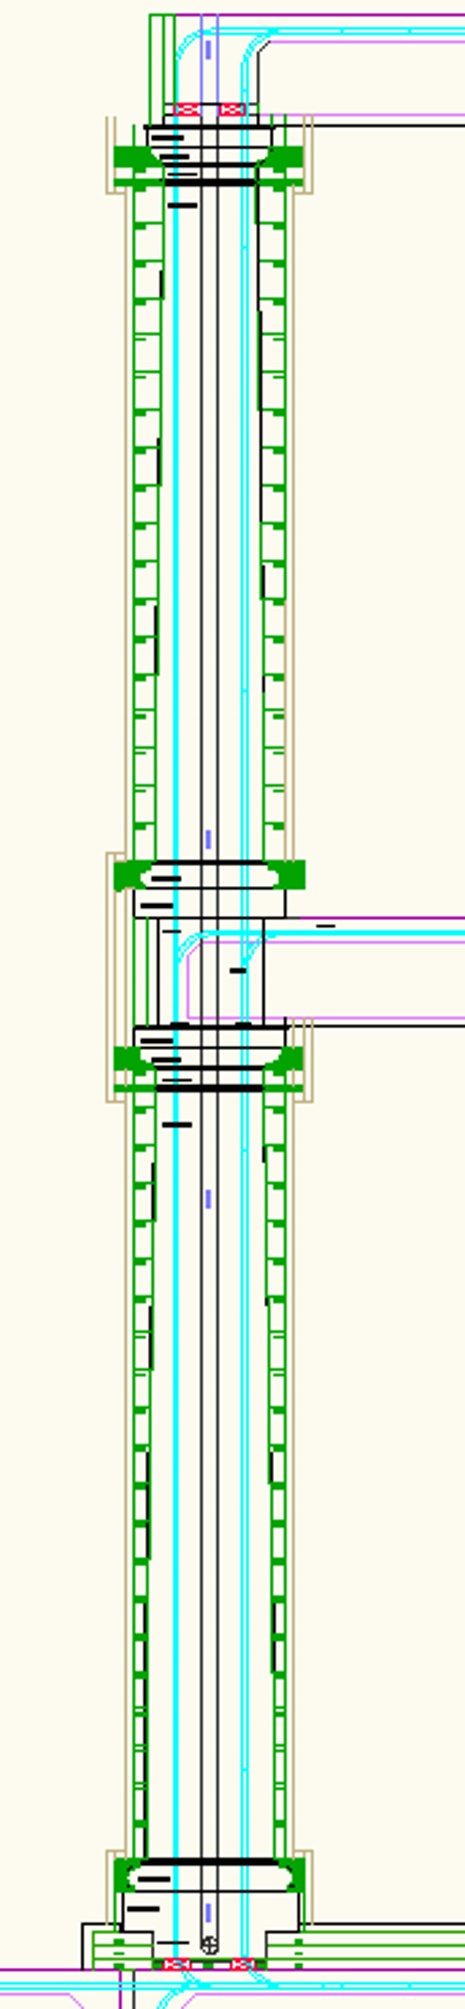
The rebar placement is shown in the diagram below together with the rebar stirrups that are every 12" up the column. The red squares are bridge support load blocks used to provide thermal isolation for the columns.
Using the EPS offcuts
The EPS cut out from the center can be used to make EPS columns for eg a pagoda or Roman temple in the yard. A PVC pipe in a hole in the center is used to align the EPS circles to form the column. The pipe is then filled with bag mixed concrete and a piece of rebar is pushed down into the wet concrete. Typically a galvanized U is set into the concrete at the top to take a wooden roof beam. Assuming you get the EPS circles in the right order it will form a Tuscan column that conforms to the correct classical dimensions. Stucco is added to the outside to finish the column. The EPS columns are not hugely structural but as it is 15psi EPS with a 4" concrete center they are perfectly capable of supporting a wooden roof and will not get blown over by high winds.
Any unused EPS is broken up into small pieces and used for backfilling geofill.