Home Site Map - Techniques - Structure -
Carnation Walling - Inner Kickers
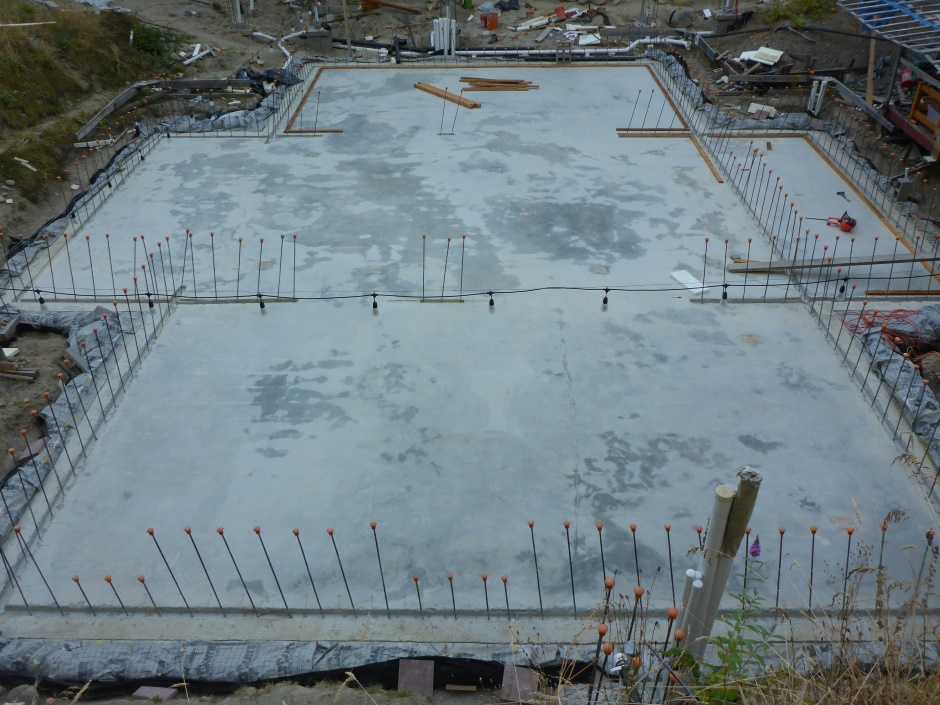
![]() Nail and screw the kicker planks on the inside of the walls for the
vertical batons and wainscotting.
Nail and screw the kicker planks on the inside of the walls for the
vertical batons and wainscotting.
Make nailed kicker planks
No particular measuring is required for the lengths of these nailed down kicker planks as their job is to provide a nailed down spacer base for the screwed kicker planks. They do need to be accurately 3-1/4" wide. When installing, what is important is that they accurately are aligned with the inner marker pen line on the slab. The ends need to go butt to butt (to avoid concrete leaks). They require pre-drilled holes for the nails. Put a pair of nail holes about every 6" and 1" from each edge. Holes of 3/16" diameter are drilled (using a drill press) to make the nails go in straight.
Arrange the nailed down kickers such that the overlap ones correspond to the underlap screwed down kickers.
You also need the nailed down kickers on both sides of internal walls, even when there is an opening through the internal wall.
Paint with clear wood preserver because the wood will get wet during the construction process and it needs to live long term in the house as the base for the wainscotting.
Nail down the nailed kicker planks
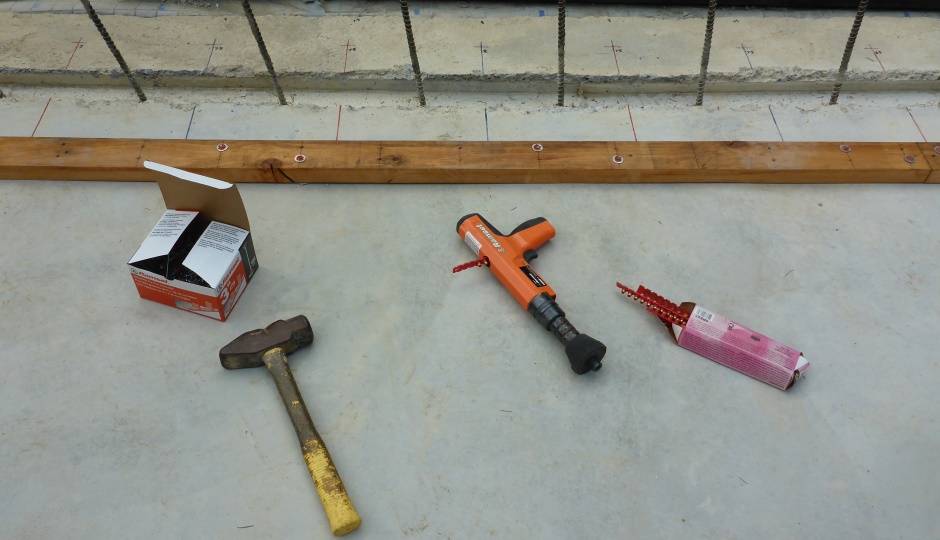
Once you are sure, nail the nailed kicker planks to the concrete, flat side down and with the wall facing edge accurately on the inner drawn sharpie felt pen line. Use the drilled holes for the nails. You will need the most powerful (red) caps in the gun to penetrate the concrete. Use 3" nails with washers.

You don't need a nail in all the holes, so add as needed to use about a fifth of the holes. Use equal numbers of nails in each edge. If the gun does not get the nail all the way in, use a large club hammer to finish it off.
On internal walls there are kicker boards on both sides of the wall (even when there are openings).
Make screw kicker planks
These marked and drilled 1.5"x3.25"s are made from 8' long 2x4 lumber.
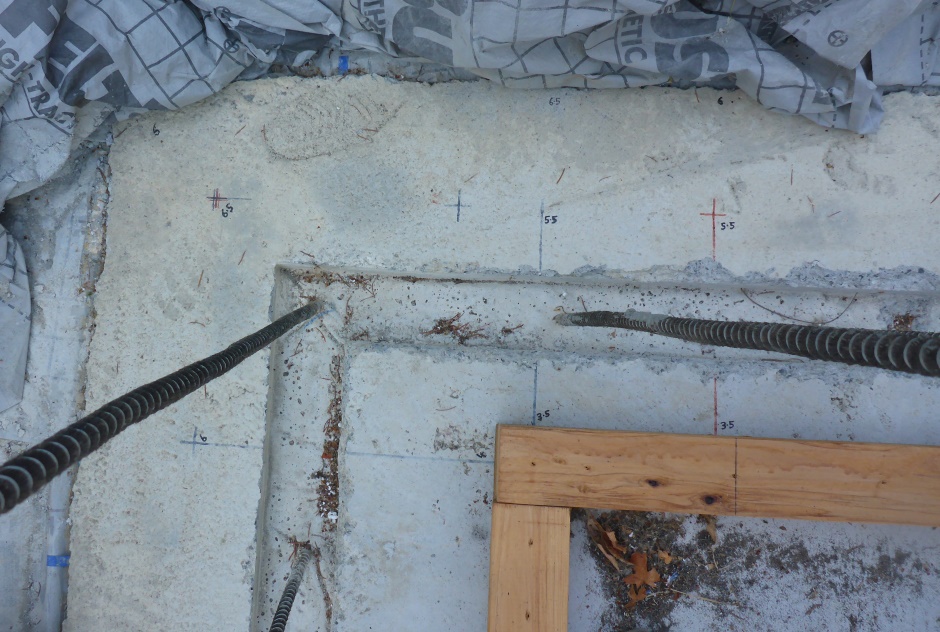
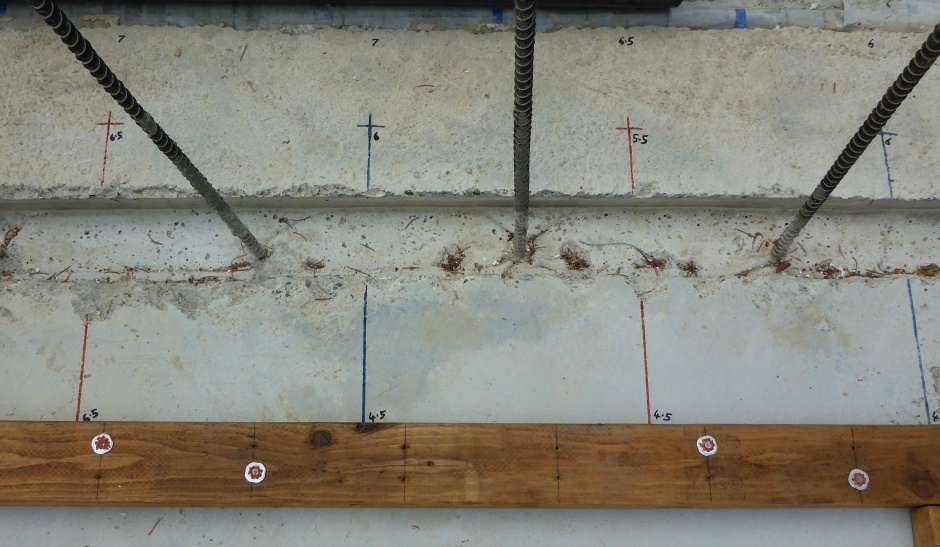
Mark the 1' grid positions along the length of the plank. It is good to also number. 0 is the outside edge of the concrete at the corner (so is not on the kicker board) and then 1, 2, 3, etc. In the case of a 12" cavity, the first marker on the kicker board is 2. If you want you can put a red mark to show primary positions (even numbers) and a blue mark to show secondary positions (odd numbers).
For attaching to the in-cavity spacers, and then later the vertical 2x4 batons, drill TWO 3/16" holes from the kicker planks 3/4" either side of the 1' grid markers. You will need to finish the hole with a long bit in a hand drill. With a 1/2" drill, countersink where the screw head will be to a depth of 1-1/4" (2" of wood remaining).
The small holes are for screws to fix to the nailed down kicker planks.
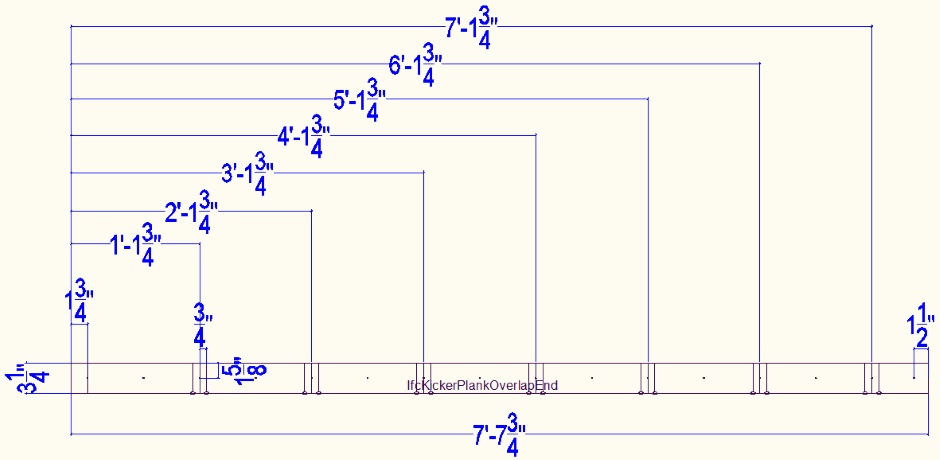
Here is the corner over-lap case for an 8" cavity...
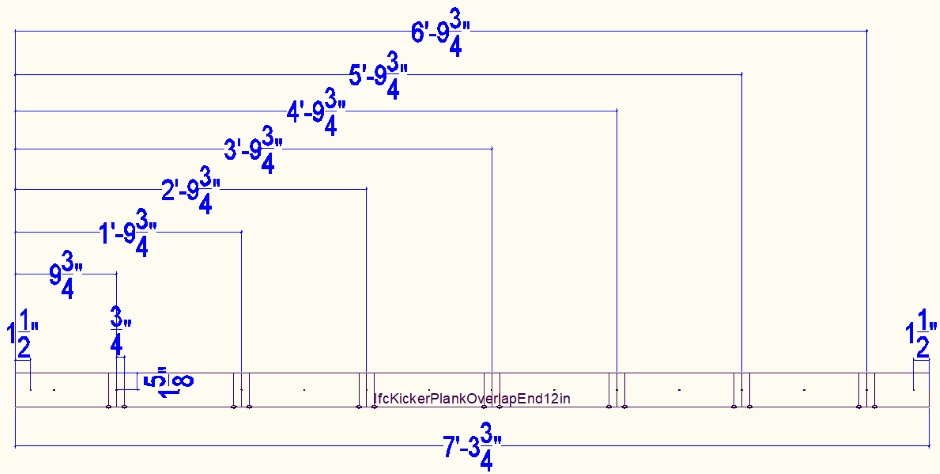
Here is the corner over-lap case for a 12" cavity...
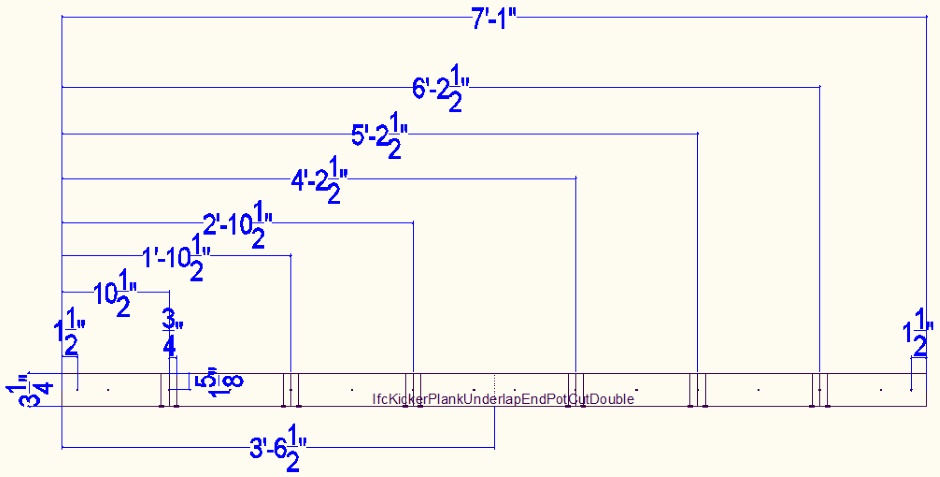
Here is the corner under-lap case for an 8" cavity...

Sometimes, eg for my potting shed, the distance to the wall half way crossover point is very short. In this case it is good to make the plank twice the length and make it a mirror image of the hole patterns. In the drawing below, the dotted line shows the wall half way crossover point.
Similarly on a larger house you will need a custom plank to span the center cross point of the house. You can make sure you have this correct by making sure the marked tie rod positions on the screwed down kickers corresponds to the markings on the slab. It is not impossible that at the crossover point you might have eg an 1/8" error so you may need to adjust the plank at the crossover point by that small error to get everything to line up with the slab markings.
Here is the corner under-lap case for a 12" cavity...
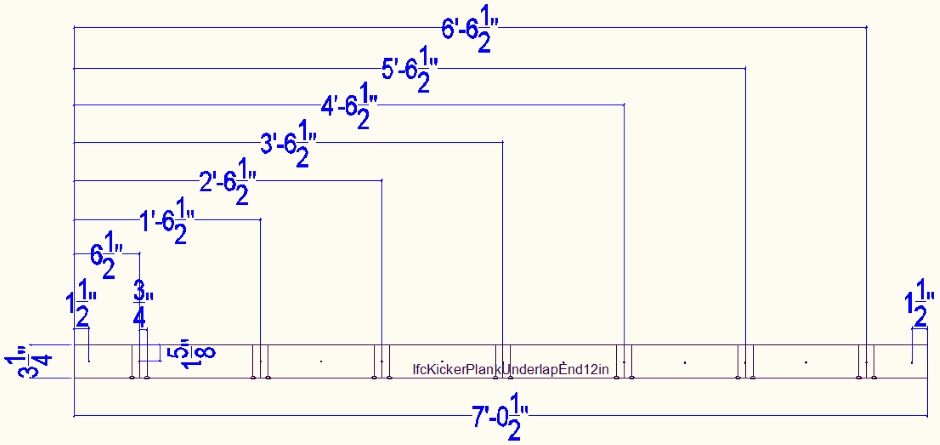
If the corner pieces are longer than half the wall section length then cut them at a marker+6" point. When not at a corner, the kicker planks are some integer number of feet long with the first of the 1' markers 6" from the end.
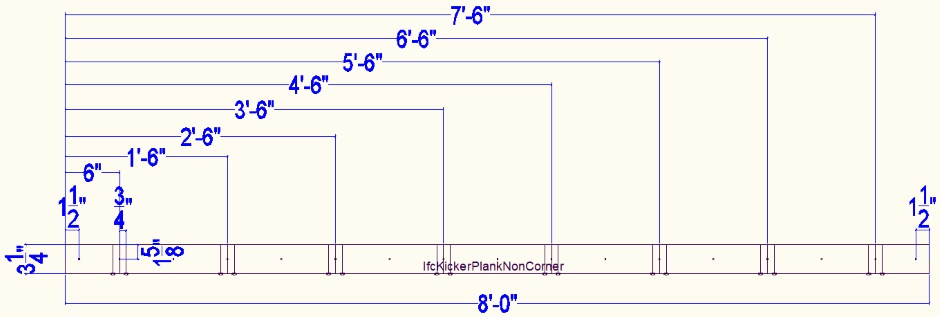
In practice you will want to cut off about 1/16th from the plank ends to get them to fit properly and provide some position adjustment to get them to line up with the slab markings.
Paint with clear wood preserver because the wood will get wet during the construction process and it will remain in the house to mount the wainscotting.
Screw on the screw kicker planks
Make sure the nail heads in the nailed down kickers are all about the same height (and adjust with a large hammer if necessary).
Use 2.5" wood screws in all hole positions to attach them onto the nailed down planks. There will be a small gap between the planks due to the nail heads, but in practice they will not rock when the screws are tight down.

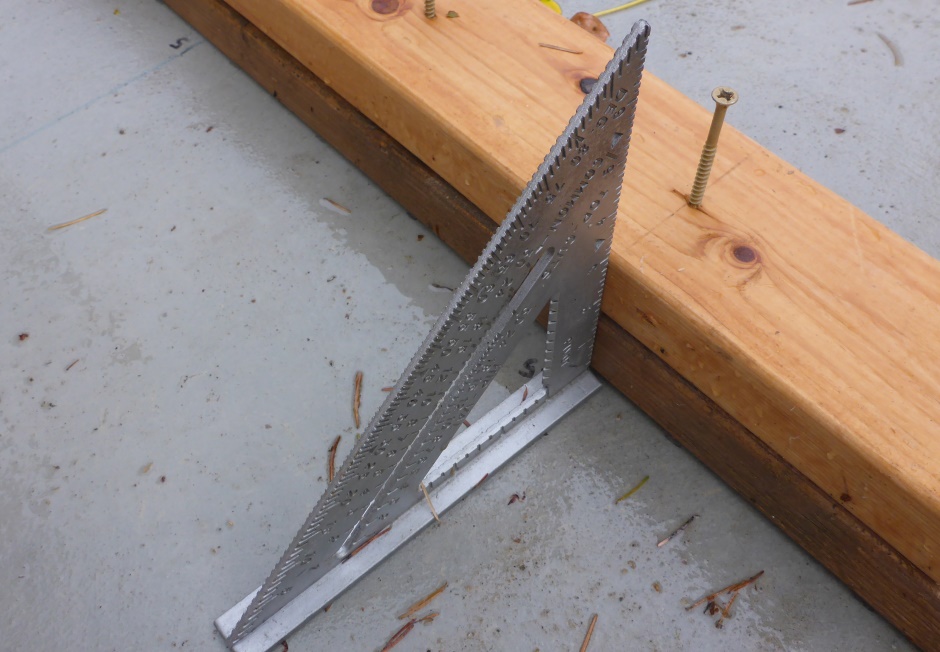
Use a triangle square to make sure the lines on the kickers match up with the marks on the slab.
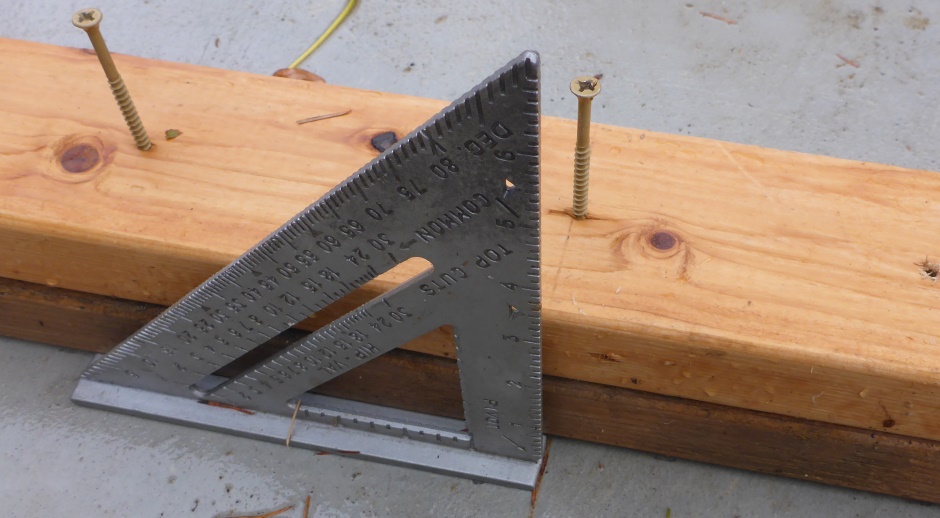
Use a triangle square to align the screw down kickers with the nailed down kickers (which are accurately on the line marked on the slab).