


Home Site Map - Steps - Foundations -
Under Slab Plumbing
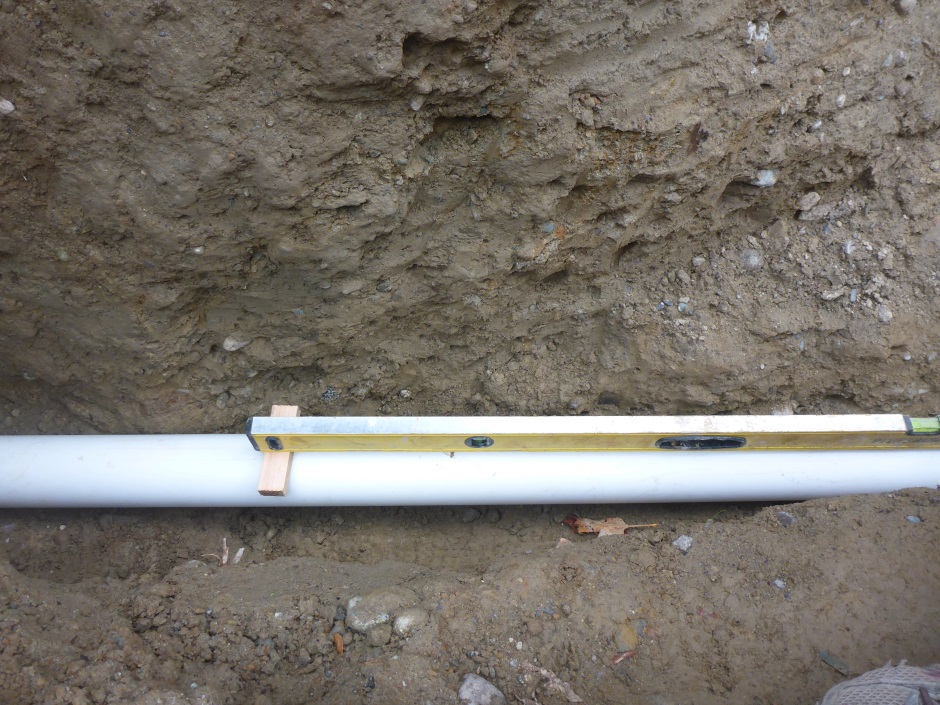
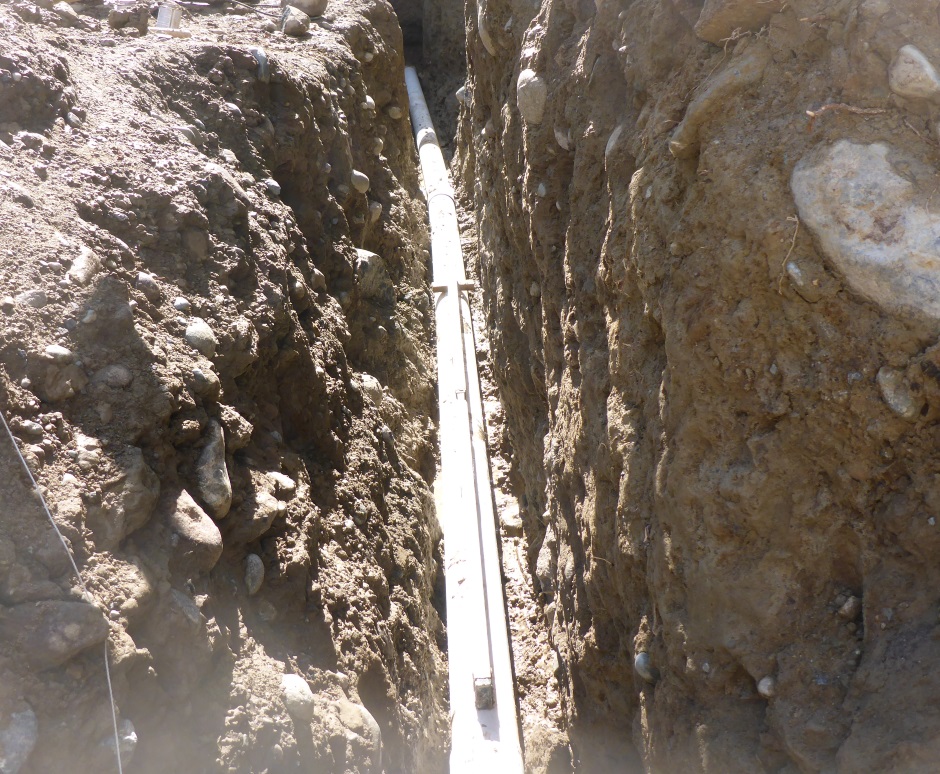
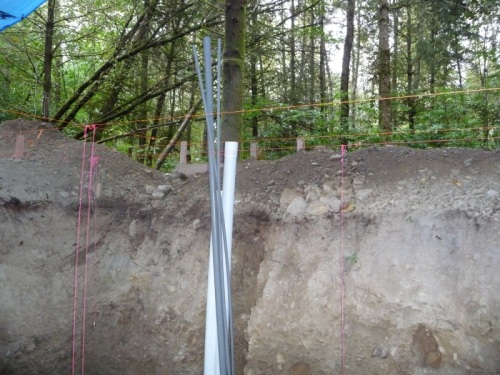
Properly sloped trenches
Story so far
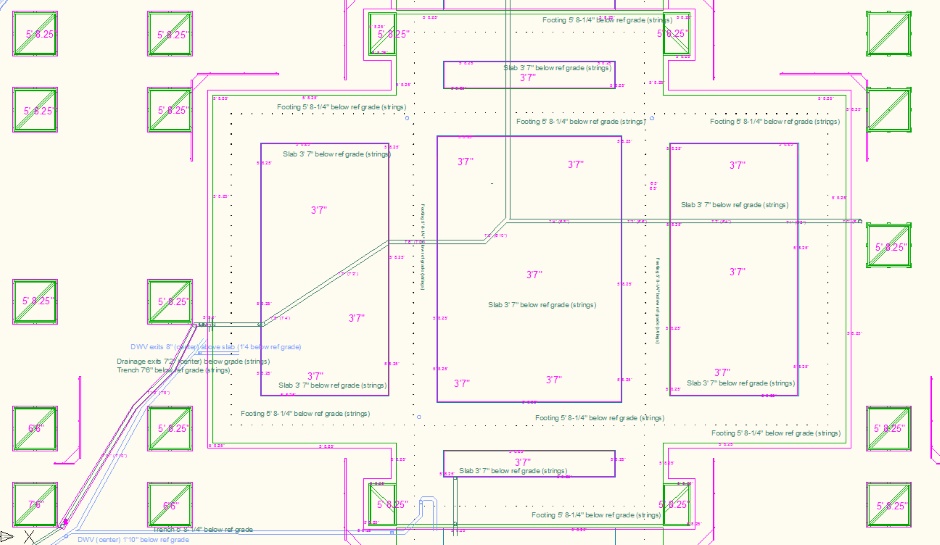
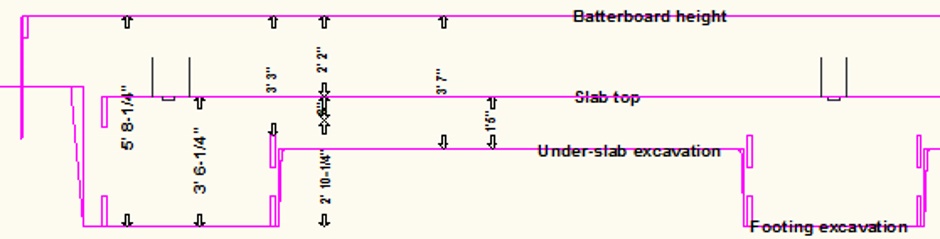
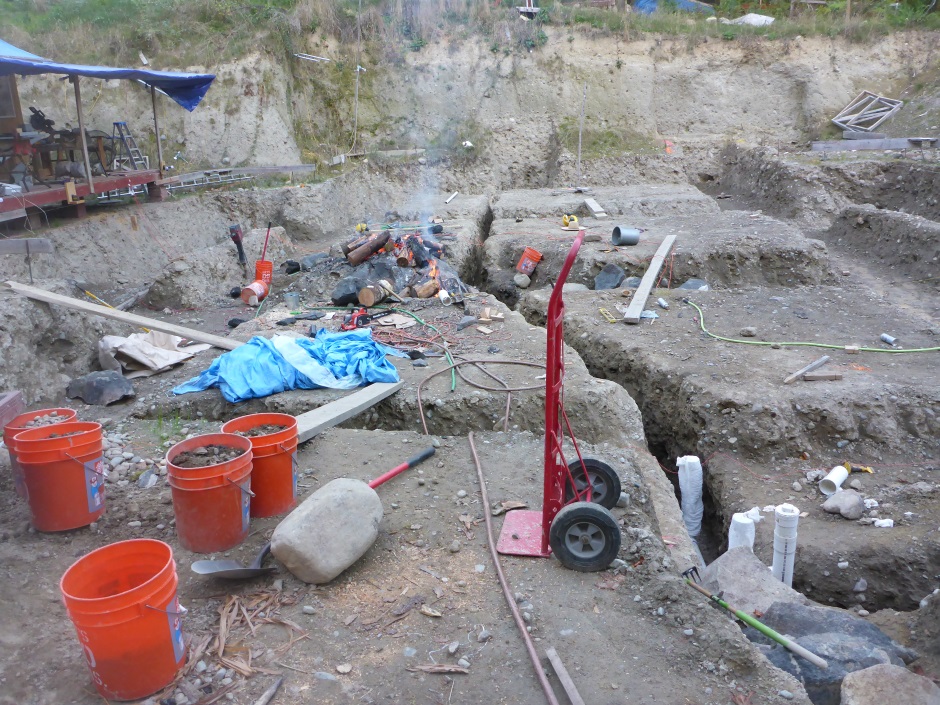
In the previous step you will have dug the drainage trenches to the right depths and very importantly will have made them the right 1/4" per foot (1/8" per foot minimum) slope. The trenches will have been dug as per your foundation drawings and your Excavation cross-section drawing. Here are my drawings for the main house...

Also a drainage ditch
It is further assumed that you have dug from the house (using the digger) a drainage ditch to carry away the water collected by the foundation drainage system. The drainage pipe needs to maintain a downward gradient of 1/4" per foot (1/8" per foot minimum) all the way to its destination (the rain water runaway area).
Install drainage pipe
Solid PVC pipe
The drainage pipes that carry the water away are solid pipes (no holes).
Always use the rigid pipe rather than the flexible type with crinkles because dirt gets trapped in the crinkles. Some building inspectors will not allow the flexible crinkle type to be used.
How water will get from Form-a-drain to drainage pipe
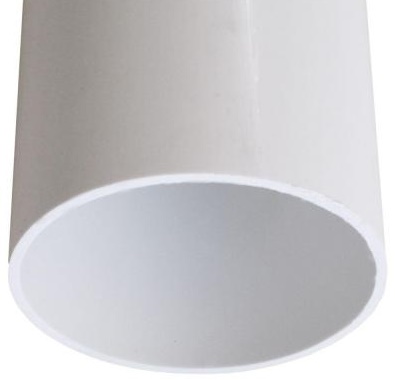
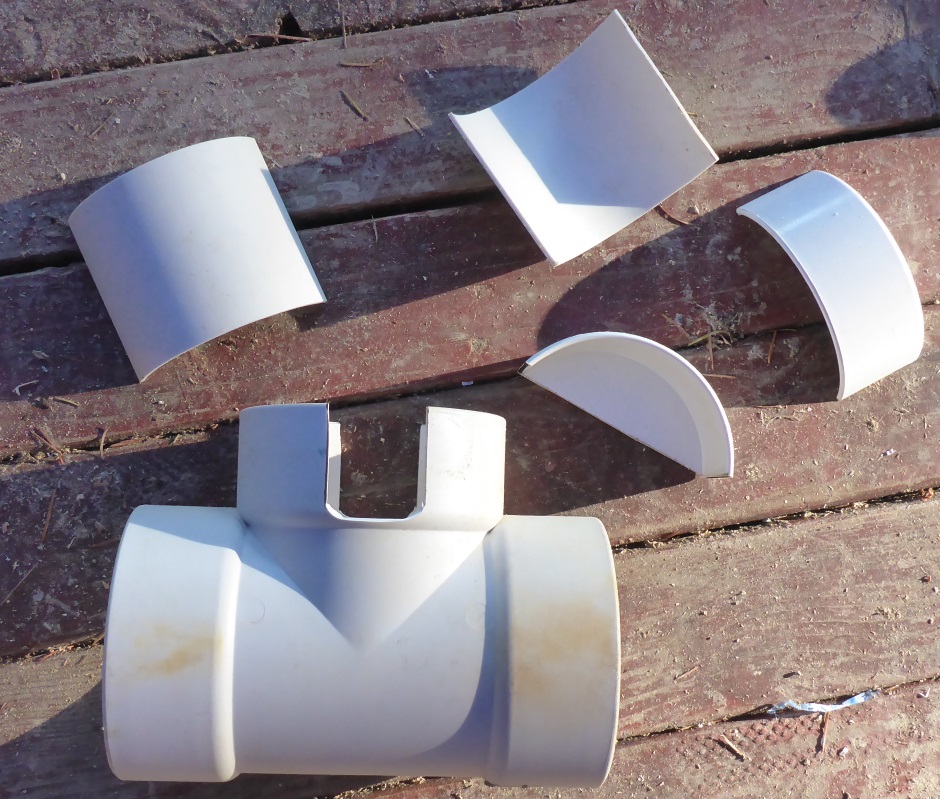
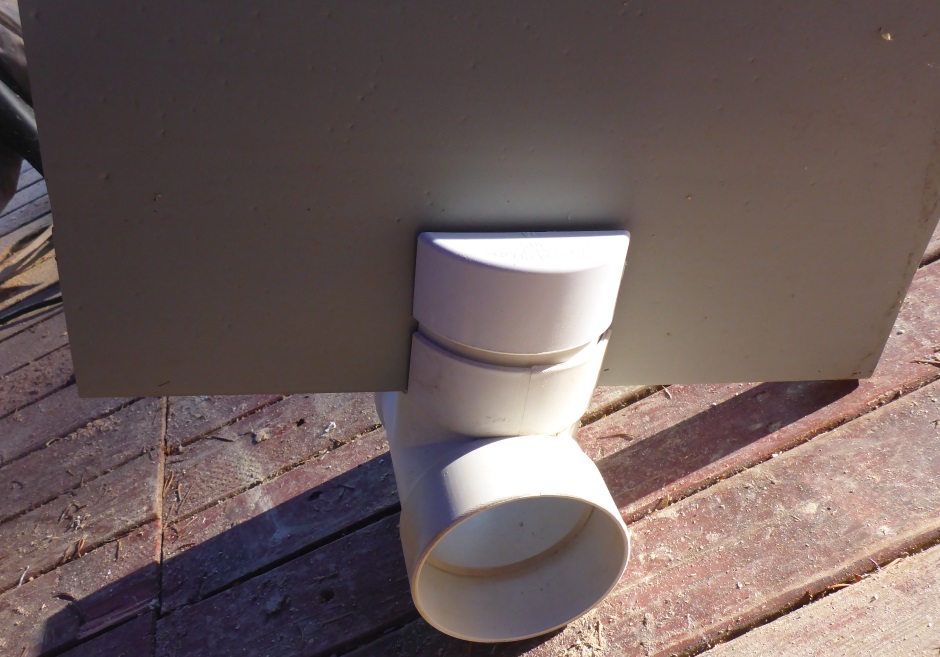
There will be a hole drilled in the bottom of the Form-a-drain as it passes over the drainage pipe. To catch the water, the drainage pipe will have upward facing T pieces. To guide the water from the Form-a-drain to the T pieces, short pieces of solid wall 4" drainage pipe cut with a 1.5" slot will be used. A cap piece cut in half with a 1.5" gap completes the assembly.
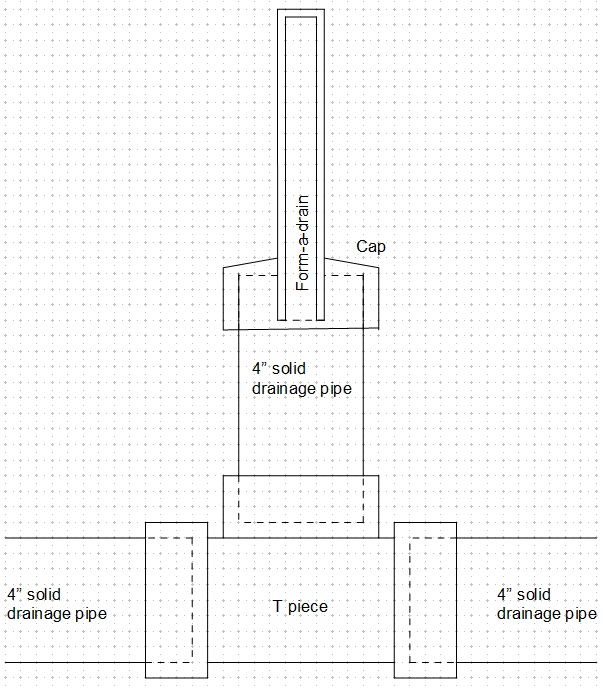

At the far end of the pipe a slightly different arrangement can be used to allow the 4" pipe to be slightly higher...
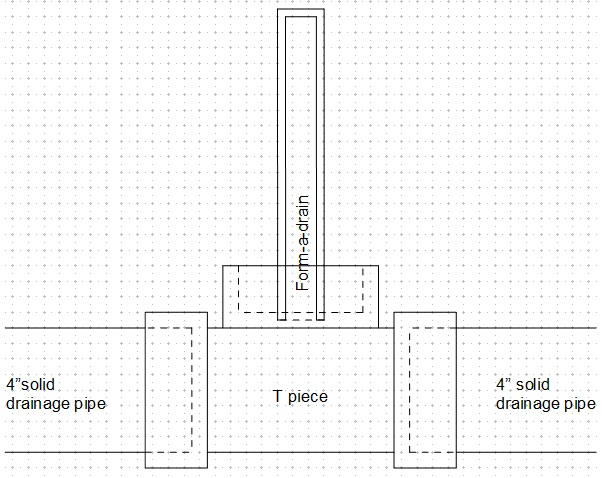
The design is relevant at this stage because the T pieces need to be installed directly under where the Form-a-drain will be. The outer edges of the inner and outer Form-a-drain are known because that is what the batter board strings indicate. Temporarily attach plumb bobs down from the batter board strings above the drainage pipe position, and then the center of the T piece upward facing hole needs to be 3/4" from the position indicated by the plumb bob (half the 1.5" width of the form-a-drain ).
![]()
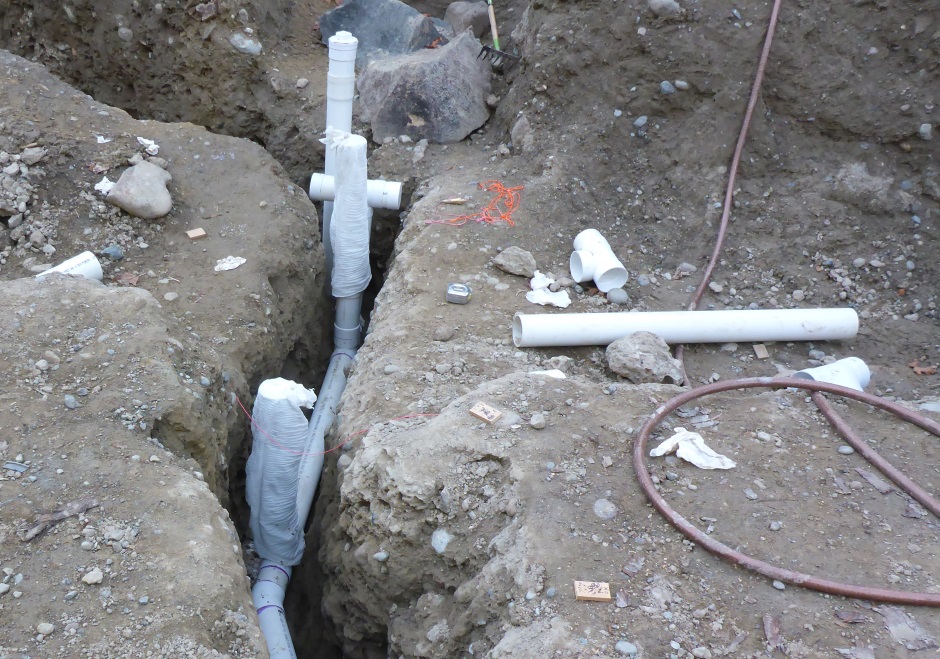
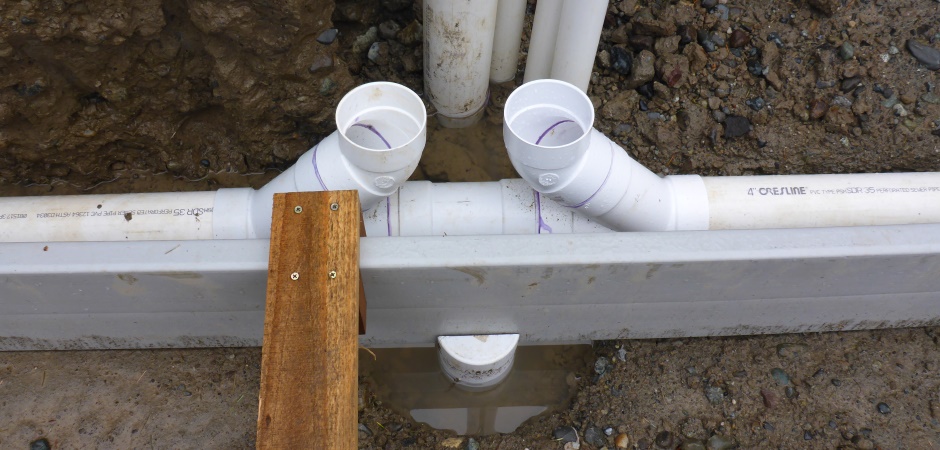
Pipe implementation
T pieces are used under where the Form-a-drain will be so that water can flow from the Form-a-drain to the pipes that will carry the water away.
Set the position of the T-pieces using a plumb bob from the batterboard string. As the string denotes the outside edge of the Form-a-drain (which is 1.5" wide) the center of the T-piece should be 3/4" from the plumb bob.
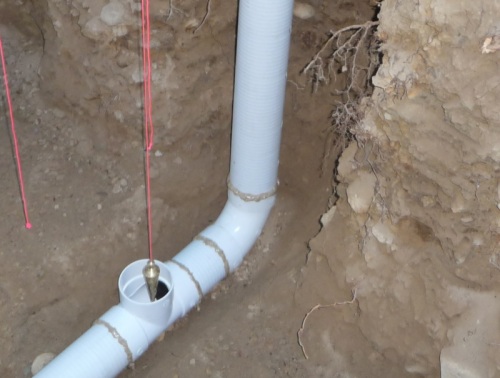
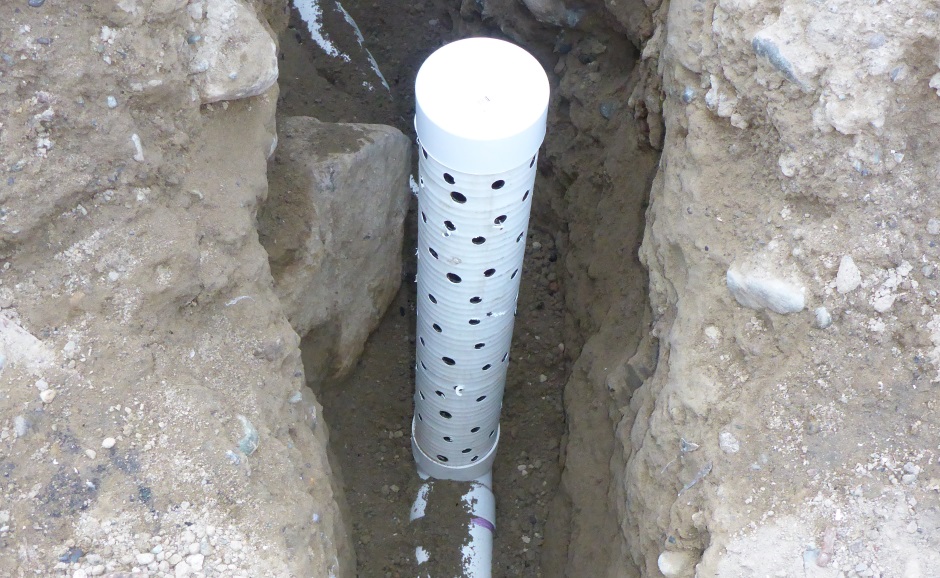
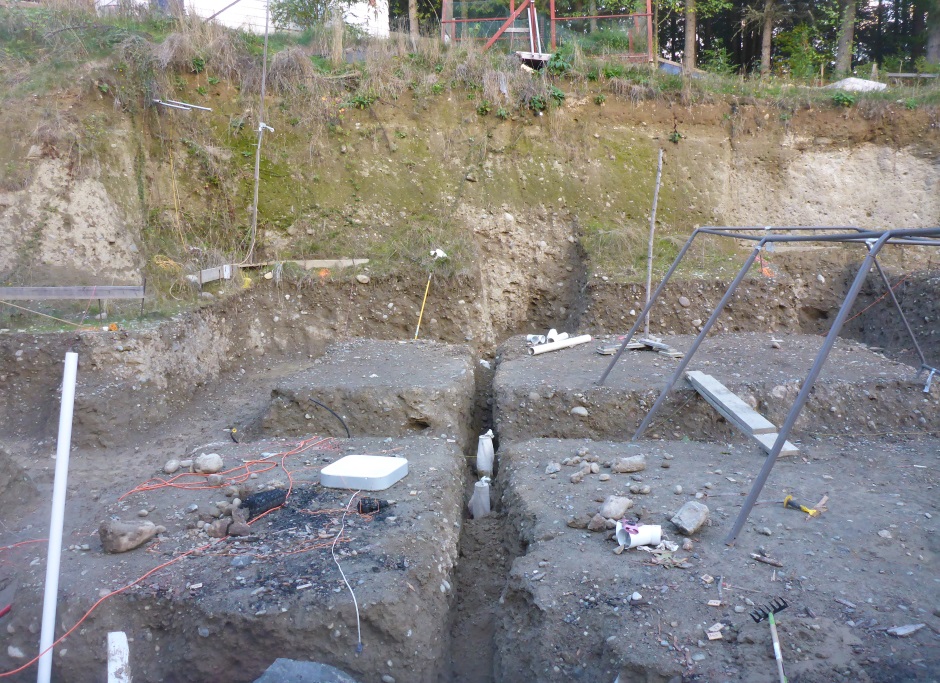
At this stage it is good to temporarily fit pieces of vertical perforated pipe with filter sock over. This will stop soil falling into the pipe and will allow the build site to drain well.
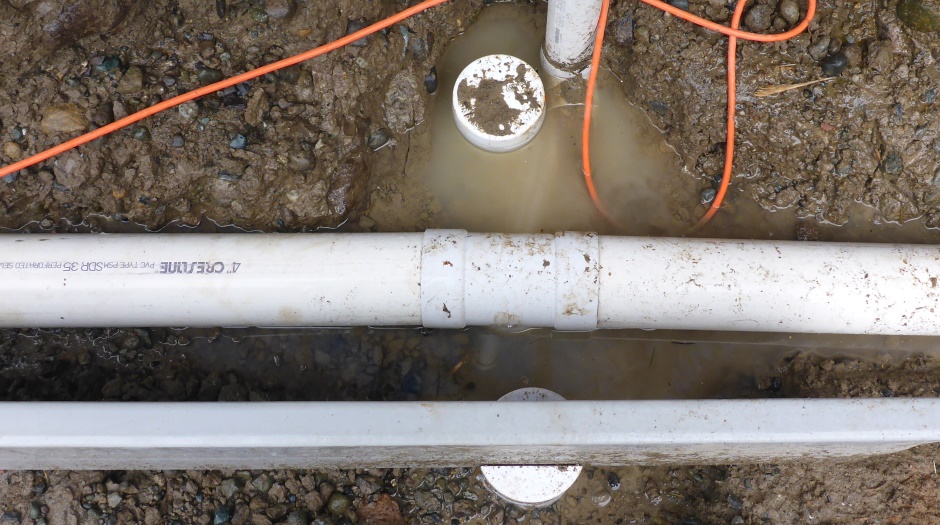
Implement T pieces for perimeter 4" pipe
At the place where the pipe exits the building area, implement a pipe T piece that will pickup the water from the 4" pipe that goes round the outside footing. Do the same at the place there the pipe starts on the far side of the building.
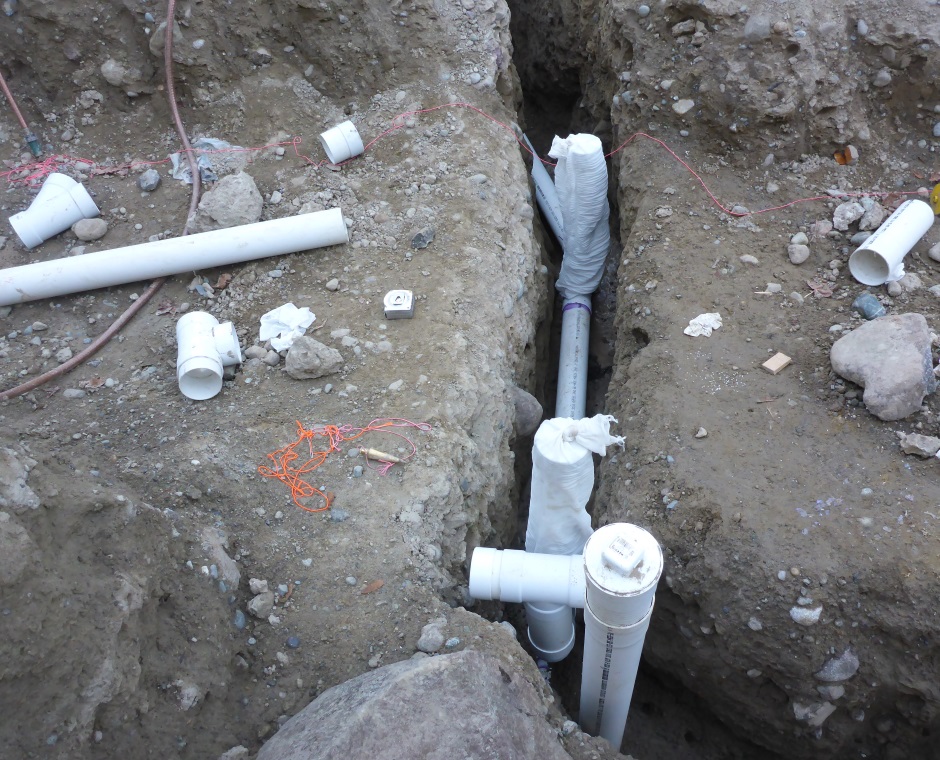
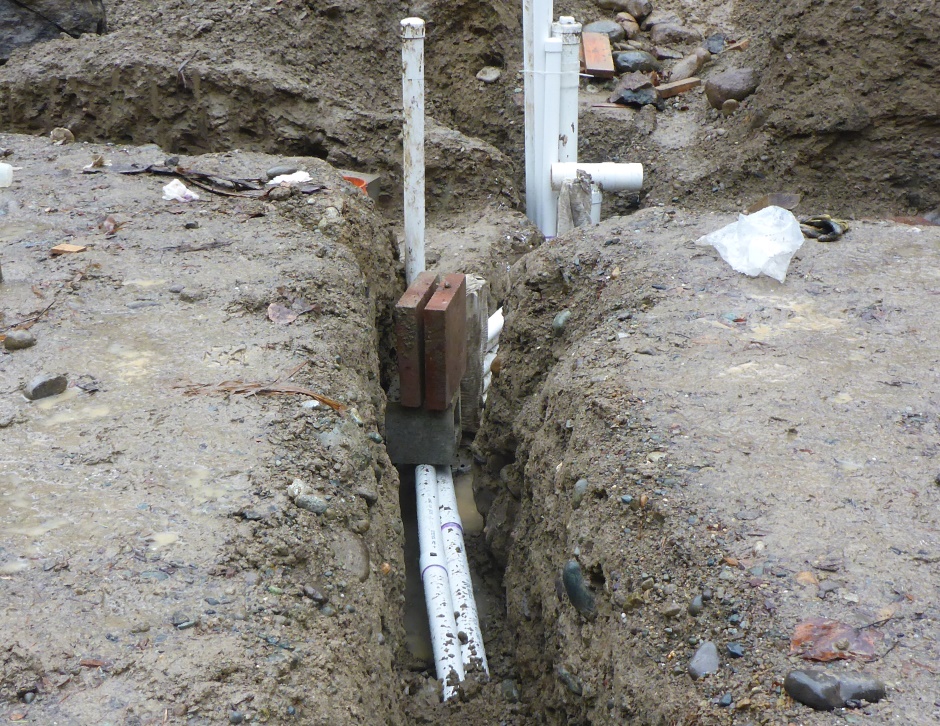
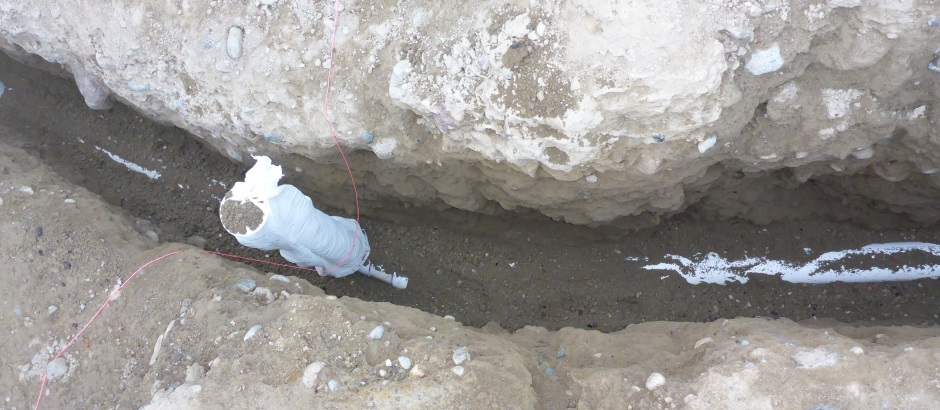
Until the trenches are fully filled with soil, keep the pipe weighted down with concrete slabs or blocks so that rain does not cause the pipe to float up and soil fill underneath it.
Install Flush Pipes
My house is not in an area that has a Radon gas problem and as such I have not implemented an upwards vent pipe from the areas under the slab. An upward vent is not nice because it involves making a hole through the waterproof membrane that is under the house. I do however still want a way that I could get the radon out if it were to ever occur. I also want a way to flush out any crap that has collected in the Form-a-drain. I have implemented a set of 2" pipes such that I could inject compressed air or water and use a vacuum cleaner on the other side to suck out it out. I'm not suggesting this is a wonderful way to do it, but it does avoid puncturing the waterproof membrane. It also provides a bit on insurance for the future, and pipes under the slab are not something that can be retrofitted later.
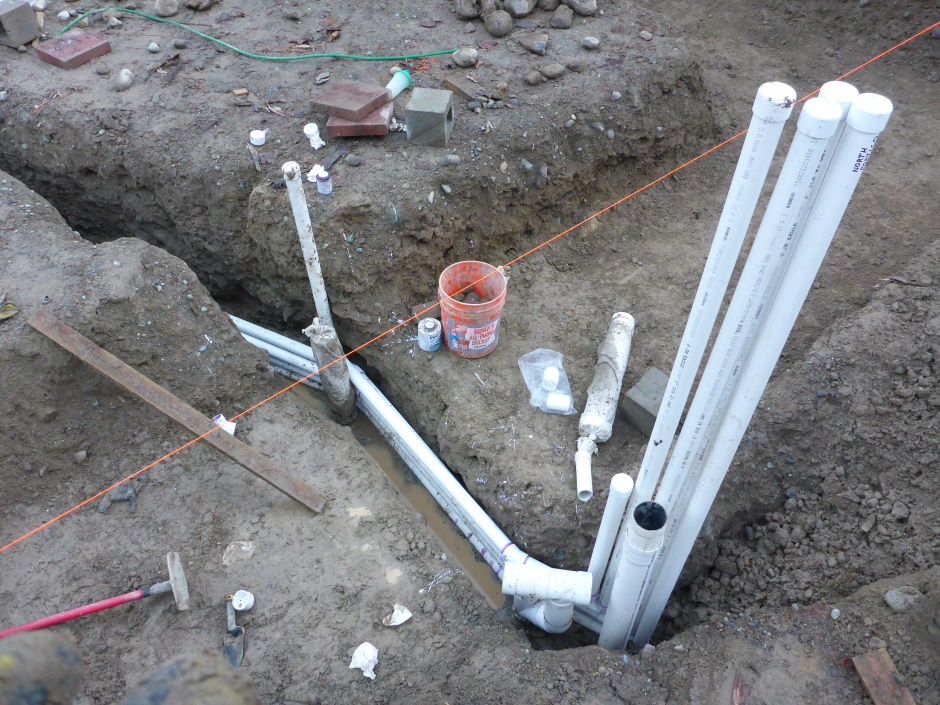
Each under-slab foundation area has an input pipe and an output pipe (on opposites sides of the area).

They are done using 2" PVC water pipe. The extra ones you can see in the diagram go off at a right angle to the northern foundation area of the building.

Once past the edge of the foundation they turn upwards and form the above ground cleanouts with caps on the end.
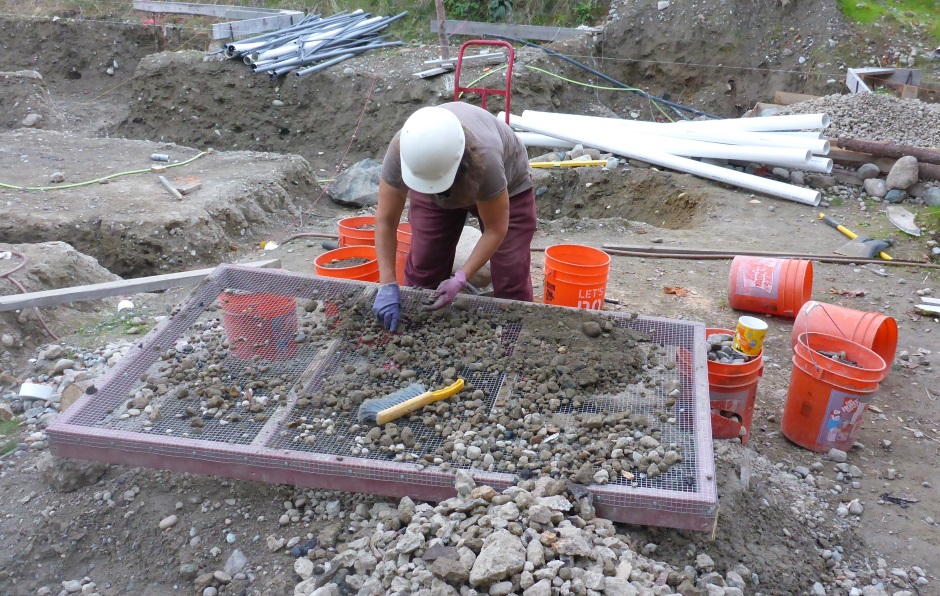
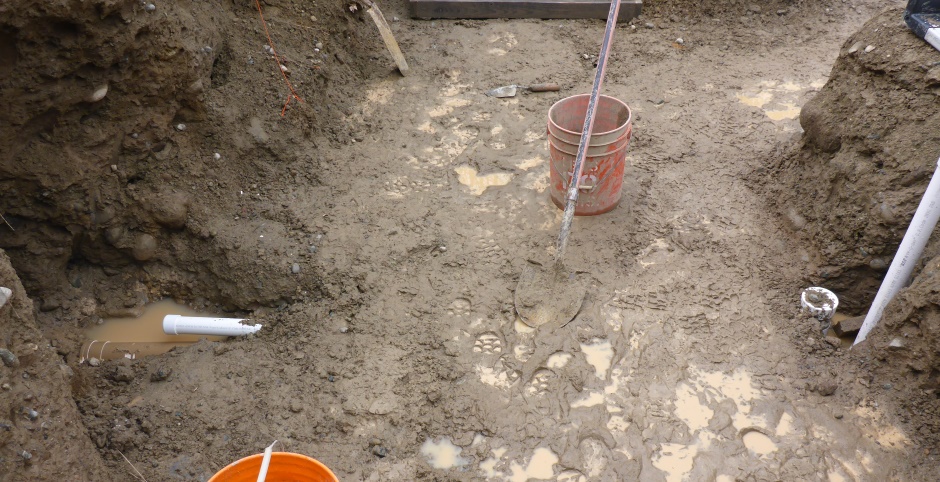
Fill trenches with non-organic soil
The ditches are filled with non-organic soil. The reason for avoiding any organic matter in the soil is so that it forms a solid fill rather than being spongy.
It is best to filter out rocks so you can save the rocks for other things such as drainage ditches and backfilling, but it is not essential to filter the soil as long as you pick out any sharp rocks.
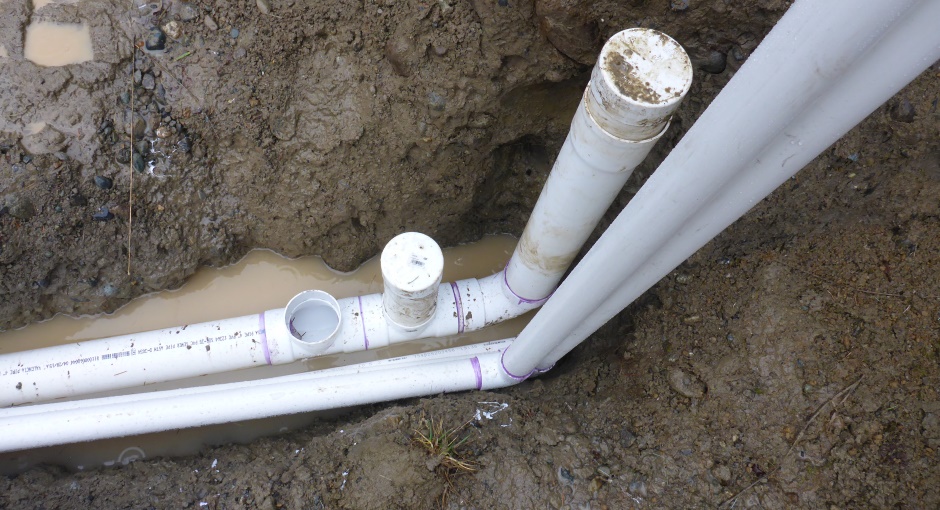
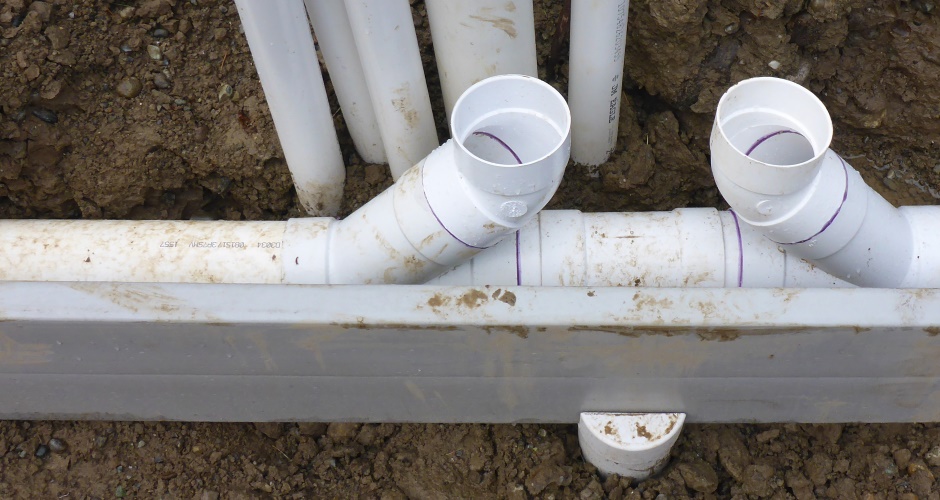
Here's how things look after the drainage pipes that will be under the footing have been glued. The extra T-piece is for connecting the 4" drainage pipes round the outside of the footings. At the end of the drainage pipe it turns up into a vertical pipe for cleanout.
Peripheral drainage pipes
Round the outside of the outside wall footings there will be a 4" perforated pipe. Installing this is covered in the section on Form Footing but it is worth looking at a few pictures of how it will be so that you can make sure there is enough room in the footing excavation to accommodate it.
East side
North side
West side
Special Case Drain South Portico
In the case of the south portico just a small drain is used rather than routing it to the main house drain. This avoids digging more trenches across the main house area.
Sewer pipe (if needed)
Not under the slab
Often sewer pipe is also installed under the slab, but that is not my preferred approach. I have opted to route the 4" sewer pipe through the wall just above the slab rather than through the slab. This reduces the chance of water leakage. The down-side is that a raised floor (or wall bulge) is needed to hide the sewer pipe as it routes through the basement. The raised floor is also needed for any bathrooms in the basement because the plumbing fixtures, particularly toilets, need to be higher.
Cleanout
The sewer will get from the building down a trench that maintains the 1/4" per foot downward gradient to the septic system (or public sewer). Where the house sewer pipe joins the trench sewer pipe it is a good idea (and a building code requirement) to put in a cleanout. The best type to use is a two-way cleanout so you can clear both upstream and downstream blockages. You should put the cleanout just outside the footing within about 30" from the outer edge of the footing. A piece of sewer pipe connects upwards from the cleanout to about a foot above grade and a screw cap goes on the top.

Sewer stack
In my case, none of this is relevant at this stage because I chose to route the sewer pipe through the wall rather than through the slab.
For detailed information go to Plumbing Building Code and Plumbing DWV (Drain, Waste, Vent) .
Sewer plumbing is referred to as DWV (Drain, Waste, Vent) plumbing to stress the point that you need a vent as well as a drain so that there is "air is behind water". This ensures that water drains properly. You need to provide a pipe up to the roof near to the various plumbing fixtures. The best way to do this is to provide a DWV stack (or stacks) which is a vertical pipe that comes up through the building and then out through the roof. Plumbing fixtures then connect into the stack. The stack should be 4" ABS pipe all the way up except for the last part through the roof that is only for air and so can be 2" ABS.
At the bottom, a long turn 4" ABS connector piece is used to turn the pipe vertical from the 1/4" per foot sloped 4" ABS pipe that goes to the sewer collection tank in the yard.

Note that if you do decide to route DWV plumbing under the concrete slab then you will need to have it inspected before pouring concrete. It really is much easier to route it through the basement wall.
Install any other utilities
Take advantage of having an under-slab trench
This not relevant to my case as I route utilities round the outside of the house rather than under it.
If you are taking advantage of having a ditch under the building to get utilities such as electricity, data, and random other stuff to the other side of the building, then now is the time to install this pipe and conduit in the trench. It needs to be low enough in the trench to pass under where the Form-a-drain will be. It is best to avoid making unnecessary holes up through the slab, so the best plan with these utilities is to route them under the building and out the other side, and then route them vertically up the wall on the far side. You can feed them through the wall below grade if you want, but it will still be easier to waterproof an entry point in a wall rather than in the slab. One way of allowing for future random stuff is to install 4" non-perforated drainage pipe so you can retrofit other stuff later.
It is best not to use the same trench for both a sewer pipe and a potable water pipe so you should use a separate trench (eg round the outside of the building) for the potable water pipe. In many areas it is against building code to use the same ditch.
With lots of pipe and conduit it does take a wider trench and it can be a bit challenging getting them to all fit below the height that the Form-a-drain will be at.
Multiple pipes at far side
For the moment just leave the various utility pipe and conduit on the far side sticking up above grade with plenty of length to spare.
Get plumbing inspected
This an absolute requirement
Before it is covered in rock, if there is a sewer pipe under the slab you need to get the plumbing inspected by the official inspector from the health department. The inspector needs to sign the plumbing permit. Even if you don't have any plumbing under the slab it is still a good idea to talk (eg via email) to the health dept inspector to tell him that there is no under-slab plumbing and get his agreement that it is ok to pour the slab without having a plumbing inspection.