


Home Site Map - Techniques - Plot Infrastructure -
Well House Design
![]() Everything you need to know about building and maintaining your
wellhouse.
Everything you need to know about building and maintaining your
wellhouse.
Water Well if no public water available
No choice
This page is only applicable if you don't have a public water main to your house and instead need to use a private water well. If there is a public water utility pipe in the road past your house then you are required to use it (even if you don't want to). If there isn't public water in the road then realistically that means that your not going to be able to use a public water utility (even if you want to). There is a bunch of hassle and expense associated with implementing your own private well, but it does have the big positive in that you won't have to pay a monthly water bill. With a private well you are also free to use as much water as you want, even if there is a watering ban, but only up to as much as your particular well can produce. Private wells are very variable in how much water they can produce (usually in the 1 - 20 gallons per minute range. If you are unlucky then your well might dry up or you might have to drill lots of different wells until you get one that works. If you are really unlucky you might even find that it's just not possible to get a working well anywhere on your land. That is doubly bad, because having a correctly functioning water supply is a pre-requisite for getting a permit to build your house.
Drilling a Well
Needs specialized drilling truck
Drilling a Well is not something you can do yourself. You need to find a local Well Drilling company that has the necessary drilling truck.
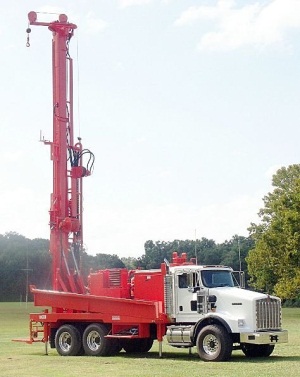
What does it cost?
Typically there will be a call out charge for them to come to your site with their truck and then there will be a charge per foot for drilling the well. A typical well may be 200 feet deep or more. If they drill a well and it does not produce water then they will go elsewhere on your property and try drilling another well. All the time the per foot drilling costs mount up, If a large rock in your land breaks their drilling bit then you will probably also get charged for that. Realistically a well will easily cost you $10K but if you are unlucky then it could be even as much as $30K or more.
Where should you drill?
It's up to you
Most people assume that when you hire a professional well drilling company they will know where on your land is the best place to drill. That is not the case. You need to decide where you want them to drill. If they don't strike water then it's your responsibility. The other reason why it needs to be you that decides is that before the drill truck arrives you will have needed to provide a drivable pathway to the well site that is suitable for a large truck. That may involve felling trees (which may involve getting a permit) and you may need to spread a decent layer of gravel to avoid the truck getting bogged down in mud. Drill truck drivers are very protective of their trucks and if they don't think your roadway is suitable then they will go home again (and you will still have to pay the callout charge).
So how do you decide?
Some people will tell you to hire a water diviner guy to walk around your property holding two sticks that will cross when water is detected in the ground underneath. I'm an engineer, so I tend to be rather skeptical about such things. But then again, I don't have a better way to suggest. Ground penetrating radar is expensive, and notoriously unreliable, so is not worth doing. The best advice I know of is to find out the flow rates that your various neighbors are getting and then position your well as close as possible to the neighbor's well that has the best flow. But by all means also hire a water diviner. There are plenty of stories of water diviners successfully picking drill locations.

Plot map is the biggest determiner
Realistically your plot and the plot map you do of your property will likely be the biggest factor in your decision where to drill.
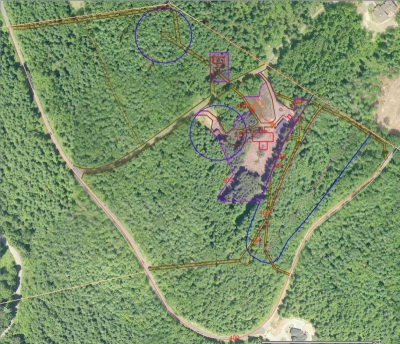
On this plot map of my property you can see two blue circles. These are Well exclusion zones (setbacks), and in most areas these need to be 100 foot radius). The one in the center is where my current working Well is, but I have also selected another site near the top of the plot. If ever my Well dries up then I will get another Well drilled at the alternate site. I selected that site at the top of the plot because neighbors to the north seemed to be getting higher flow rates than neighbors to the south. It was also a location that was not going to interfere with my future building plans (remember the exclusion zone required around wells). I also figured that I would be able to create a roadway to the site that would be a useful pathway to have for other reasons (such as walking around the edge of my heavily wooded plot).
How to select a Well drilling company
Ask your neighbors
Well drilling companies tend to cover an area with about a 50 - 75 mile radius because driving the truck long distances takes time and money. If you ask other plot owners in your area then you will be able to form a list or the 5 or so companies that serve your area. Those other plot owners will also be able to give you their thoughts as to whether a particular company is good or not. Do bare in mind though with these recommendations that hitting water is a random crap shoot. If a Well company hits water for a particular plot owner then the plot owner will probably say good things about that company. If through bad luck they don't hit water then the plot owner will probably say bad things about the company.
Up-market or low cost company
Paying for an expensive Well drilling company does not in any significant way increase the chances of hitting water (in my opinion). As long as the drilling company is competent and not run by a bunch of crooks, then I would argue that it's best to pick one with the lowest drilling cost per foot. With a low per foot cost you will be able to afford to drill a couple of Wells for the same money and pick the one that gives the best flow rate.
Try to do a deal
It may not work, but it's worth trying to negotiate a deal with the Well drilling company. Ideally you would negotiate a low per foot drilling cost but would pay them a bonus if they achieve a Well with a better than 10 gallons per minute flow rate. The reality is that you will happily pay plenty of money to get a successful Well but you will resent any money that you spend on a dry Well. Whether you can negotiate such a deal will be a function of how much competition there is in your area to get your business.
Do the Well-House yourself
Rather than getting the Well drilling company to implement a Well-House building and all the equipment inside the Well-House, I would advocate just getting the Well drilling company to drill the Well and fit the submersible pump that's down the Well. They would demonstrate to you water coming out of the pipe from the Well at whatever is the number of gallons per minute that the Well is supposed to be able to produce. Everything after that I think you are best doing yourself.
Things to get the Well drilling company to implement
Get Well drilling company to install submersible pump
You could decide to just have the Well drilling company drill the Well hole. As part of this, they will have dropped a test pump down the hole to get a rough idea of the flow rate that the Well is capable of producing. They enter this gallons per minute (GPM) figure in the Well log. Their test pump is also used to suck up all the mud from the hole to clean it out. You could now take over things yourself, but I think it's better to let the Well drilling company actually install the submersible pump down the hole. That way they are taking a bit more of the responsibility that the Well really is going to produce a reliable flow of water. With the proper pump installed you can run it for say 24 hours (with it pumping water into your yard) to check that the flow rate really is sustainable. Also it's actually quite difficult to pull a heavy pump out of a Well, or adjust its depth in the Well, if it's 200 feet down in the ground, so you ideally need the Well drilling company's winching equipment.
Submersible pumps
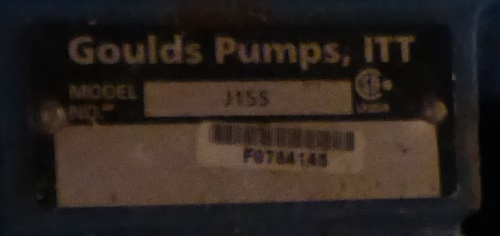
Submersible Well pumps are specialized pumps that live down the Well near the bottom of the drilled hole. Assuming that the Well is producing enough water, then the pump will be under water. The pump is supplied with electricity (typically 230VAC) from a wire down the Well and it pumps water up a small diameter pipe to the surface and on to your Well-House tank. The Well will have been lined using a steel pipe with a diameter of typically 6 inches. The submersible pump has to fit within that 6 inches so is long and thin. It is lowered down the Well on a steel cable.

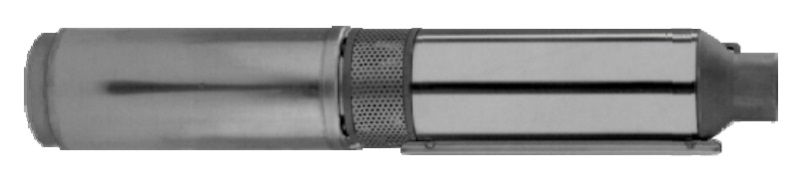
Pump GPM rating
Submersible pumps come with different gallons per minute (GPM) specs. It is NOT the case that a bigger GPM is better. You want to have the pump GPM to be about the same as the gallons per minute of the Well. If the pump has a significantly higher GPM than the Well then it will be sucking on air for much of the time, and that will cause it to wear out quicker. A typical Well is something like 10 GPM (judging by the fact that this is the most popular submersible pump rating). If you have a fairly poor flow Well then you would be better off with a 5 GPM pump. If you have a real gusher then you can get pumps up to 25 GPM and even above. You can use a lower GPM pump than the GPM of your Well if you don't plan to ever need that much water. A good manufacturer of submersible pumps is Flint & Walling and these are available from here. A 10 GPM one will be something like $500. You also need a few accessories to go with the pump such as a rubber torque arrestor.
What level to locate the pump
Your Well will have a standing water level. This is the level that the water will fill to if you left it alone and were not pumping water out. When you start pumping water then the water level in the Well will go down while waiting for more water to seep through the soil to replace the water you are pumping out. Ideally you want to locate the pump so that it is under water for most of the time. It won't however be underwater all the time if you are pumping water out at a higher rate than the Well is able to produce. For Wells with only 1 GPM flow rate then this will probably often be the case, but this is just the reality of a low flow Well and you just have to accept that. Submersible pumps are actually fairly hardy these days so they still provide a fairly long life even if they do spend a lot of their time just sucking air.
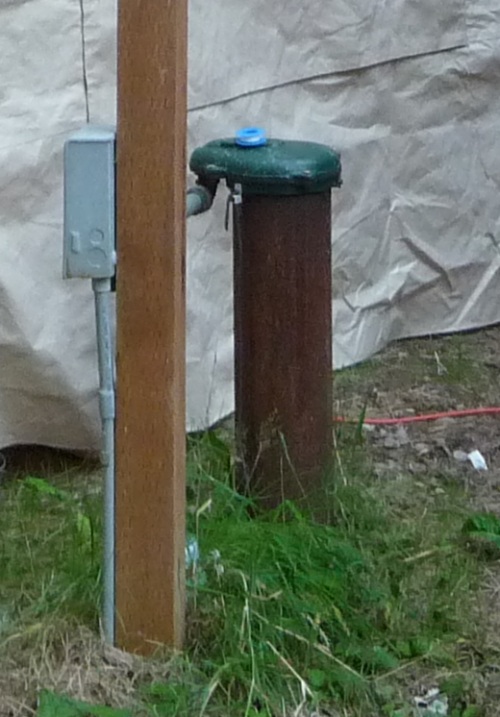
Well-Head
After the Well has been drilled and the submersible pump has been installed, this is what it looks like. You can see the steel Well pipe casing coming up above the ground. In the picture you also see the pump saver box mounted on a nearby post (read details below). The grey pipe going to the top of the Well casing pipe is the power feed. The water pipe comes out through the wall of the casing about 3 feet below ground level to avoid it freezing in the winter.
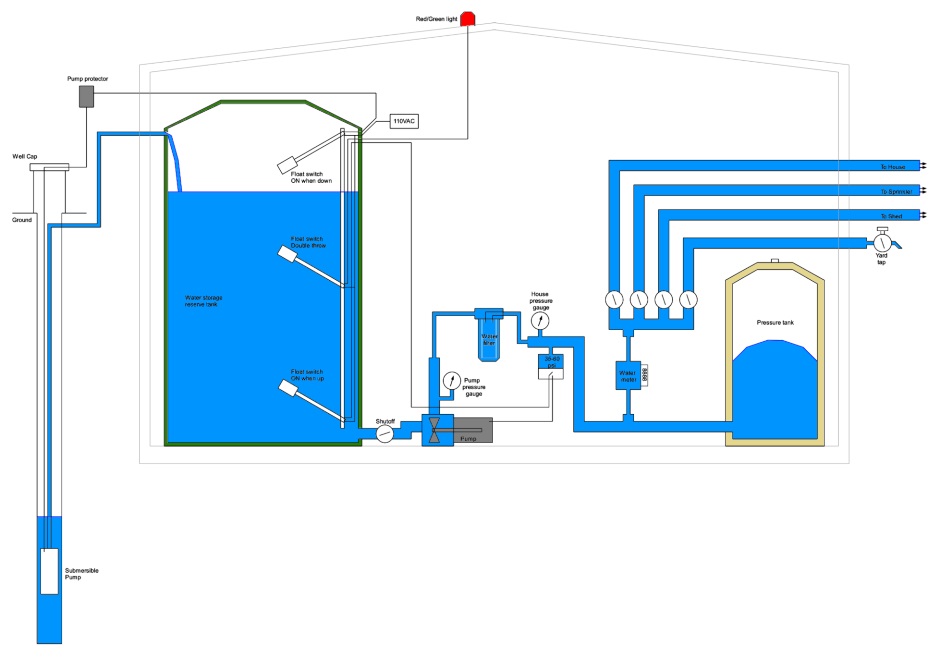
How a Well-House works
Diagram
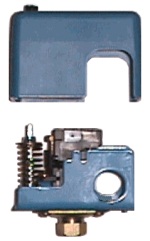
Powering the Down the Well pump
When the Well drillers have done their thing, hopefully you will have a 3 foot high 6 inch diameter steel turret like thing in your yard. Down the Well they will have installed a submersible pump. A wire will come out of the Well cap and you will need to provide 230VAC (L1 + L2 single phase) power to operate the pump. You (or the Well drilling company) should fit a pump protector box in the power line (mounted on a post near the Well head) that helps the pump motor start and generally protects it under fault conditions. It contains a microcontroller based voltage and current sensing circuit that continuously monitors power fluctuations, overcurrent, and undercurrent. When an abnormality such as lack of suction is detected, it deactivates its output relay to shutoff power to the pump. It starts a timer to keep the power off for a user selectable time before trying again. If there is water to pump and everything is normal then the submersible pump will operate continuously.
These are available from here.
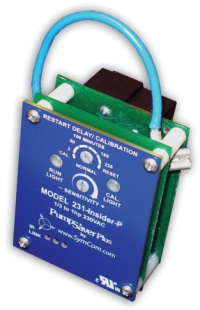
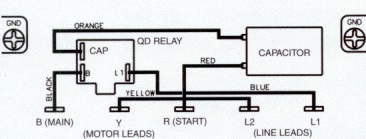
Typically this module is mounted in the same steel water resistant box as the capacitor arrangement used to help the pump motor start. The steel box with capacitor is typically made by Franklin and the protector module is made by PumpSaver.

Amount of equipment required
The amount of equipment you need above ground for your Well depends on how good your flow rate is. The poorer the Well, the more equipment you need. If you have lots of natural water pressure from the submersible pump down your Well then you could potentially connect directly to your house, but in most cases you are going to want a more complex system as shown in the diagram and as described below.
Need a Well-House building
The equipment needs to be in some sort of building to keep it dry and to avoid it freezing during the winter. You could build a shed that's just big enough to fit the equipment, but you may as well build it as large as your county planning department will allow so that you can also use it to store tools and your lawn mower etc. In my area it is ok to build a building up to 200 square feet without needing a permit. You will want something with a proper concrete slab and footings. You could buy a shed self assembly kit or build a wooden shed or build a concrete block shed or even build a poured concrete wall shed.
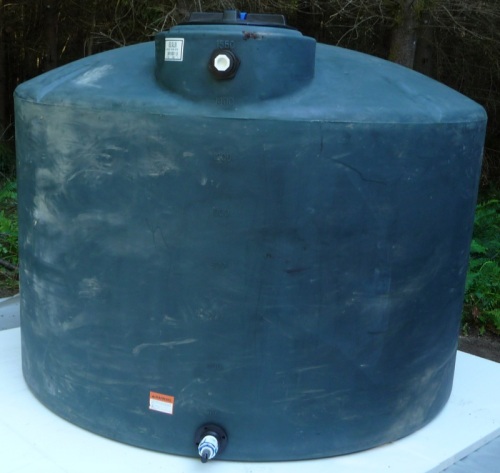
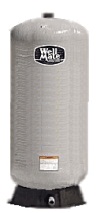
Large water storage tank
A water storage reservoir tank is needed when your peak water usage exceeds the flow rate of the Well. A Well with a flow rate of only 1 GPM will give you 1440 gallons a day, which is plenty for even a large family house, but if you run a bath and run the washing machine then your peak water usage could be up to 50 GPM. The water storage tank smoothes out these peaks and generally provides a safety buffer. The poorer your Well flow rate, the bigger the tank you will want to use. Something in the 1000 - 2000 gallon range is a good choice for a 1 GPM Well. Tanks in this range cost between $550 and $750 and tend to be something like 6 feet tall. It's best to buy them fairly locally because shipping costs are high.
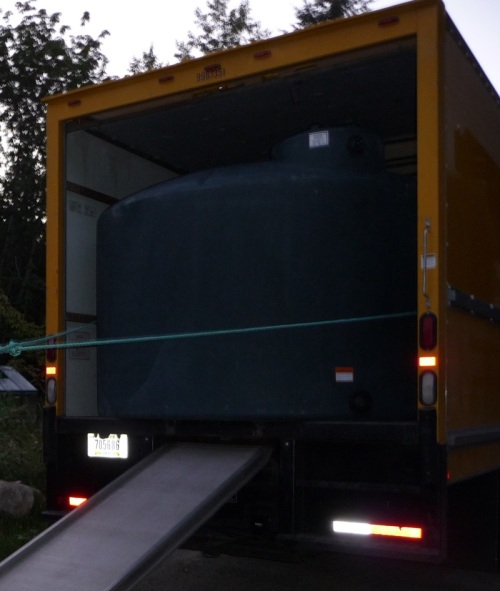
Details on the tanks I purchased can be found here.
When installing a water tank it is important not to have any stones or other sharp protrusions under it. Using 8'x4' sheets of polystyrene is a great way to give a tank a nice base.
Storage tank fittings
Out of the Well will come a water pipe of something like 3/4 inch diameter. It typically comes out through the sidewall of the steel Well casing, just below the frost line in the ground. This needs to be plumbed in through the shed wall and connected to the inlet hole that's near the top of the tank. The inlet will be above the water level in the tank so you will hear a pleasant waterfall sound as water fills the tank.
Inside the tank you will need to install two float switches. The one near the top of the tank is used to turn off the submersible pump down the Well once the reservoir storage tank is full. This stops the tank overflowing. The one near the bottom of the tank is used to shutoff the Well-House water pressure pump if the storage tank is not full enough. It ensures the water level never falls below the height of the outlet pipe (that's near the bottom of the tank). This stops the Well-House water pressure pump from sucking on air and being damaged. The float switch level should be adjusted so it allows power to go to the Well-House water pressure pump if the water level is just above the height of the pipe that goes to the Well-House water pressure pump.
Details of the float switches I purchased can be found here.

In addition to the two required float switches, it's not a bad idea to also add one half way up the tank to light a warning light when the tank becomes half empty.
Note that if you are using more than one water storage tank (to give yourself lots of reserve) you do not need to use a set of float switches per tank. As long as you connect the tanks by T-ing the output pipes at the bottom of the tanks then the water level will naturally equalize between the tanks. As long as the tanks are all the same size then you just need to have float switches in one of the tanks. Having just one set of float switches also of course makes the electrical wiring a lot easier.
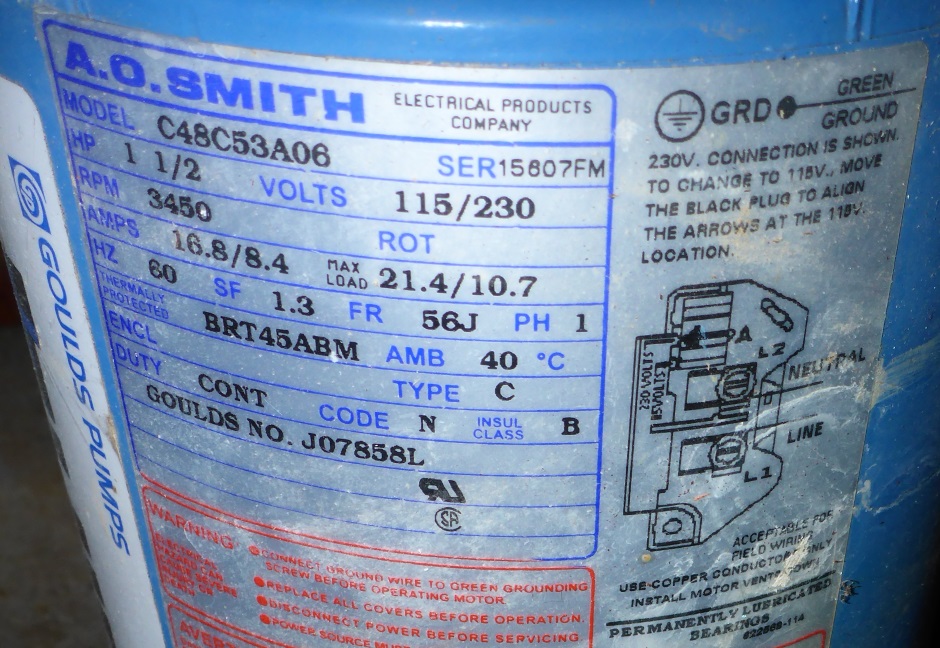
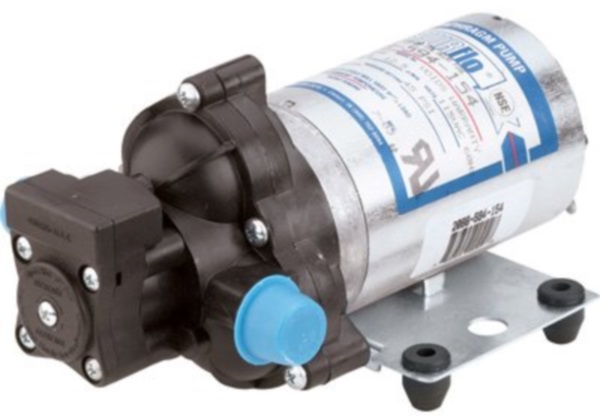
Water pressure pump
This needs to be a 230V single phase unit, ie it connects to L1 and L2 power via a dual pole breaker. It is 1.5 HP.

Pressure Tank
The pump is not used to directly pump water to the house. If that were the case then the pump would need to be on all the time to maintain the water pressure to your taps. Instead what happens is that the pump is used to build up water pressure in a pressure tank. When you turn on a tap, you are using water pressure from the pressure tank. Only if you leave the tap on for a while will the pressure gradually reduce, which will the trigger the pump to turn back on to build up a reserve of pressure again.
A pressure tank is something like 5 foot high with about a 3 foot diameter. They have strong walls that can withstand 100 pounds per square inch (psi) pressure. There is just one pipe into the tank at the bottom that is both the inlet and outlet. Inside the tank is air and the air cannot get out. As you pump water into the pressure tank, the air is compressed. When the pump isn't on and you operate a tap in your house then the compressed air pushes on the water to drive it to the house tap. There is a rubber membrane inside the tank that separates the air from the water, but the principle would work even if the membrane were not present.
Typically there is a pressure relief safety valve at the top of the pressure tank, but you really would not want to put it to the test.
The pressure tank I used can be found here.
Pressure Switch
A pressure switch is what provides the mechanism for stopping the pump once the required pressure in the pressure tank has been reached. This switch is the other thing (in addition to the bottom float switch) that determines whether power is sent to the Well-House water pressure pump to turn it on. Typically a pressure switch is set to turn on the pump when the pressure has dropped to 50 psi and turn it off once the pressure has reached 70 psi. The pressure switch allows you to adjust the figures. If you set only a small range between the min and the max then the pump will come on more frequently (so will wear out sooner). If you set the range too wide then you will have a noticeably variable water pressure in your house. A 20 psi difference is a good compromise. In my case I set an average pressure of 60 psi, ie between 50 and 70 psi.. If you set it lower then your shower won't be as good. If you set it higher then the risk of a pipe leak becomes greater.
The pressure switch I used can be found here.
Location of pressure switch is important
An important question is where to site the pressure switch. For some unknown reason, a lot of implementers of Well-Houses put the pressure switch close to the pump. Most pumps even provide a small bore water outlet pipe to make this easy. Putting the pressure switch near the pump is however a bad idea. It should instead be close to the pressure tank. The reason is that typically you will want a water filter between the pump and the pressure tank. A water filter has both resistance (to water flow) and also inductance (due to the mass of water inside the filter). The net result is that the instantaneous dynamic pressure at the output of the pump will be a lot higher (say 30 psi higher) than the more steady state pressure at the pressure tank. A pressure switch near the pump would form an unstable control system. The pump would turn on at 40 psi and the pressure would instantaneously jump to 70 psi which would cause the pressure switch to turn the pump off again. That in turn would cause the pressure to jump back to the real static value of 40 psi, which would cause the pressure switch to turn the pump back on again. The pump will be going on off on off on off every second which will very soon wreck the electrical contacts in the pressure switch and may also damage the expensive pump. Put the pressure switch on the pressure tank side of the resistance and inductance of the water filter.
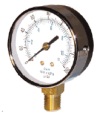
Pressure Gauges
There is no fundamental need to have pressure gauges, but I would highly recommend having at least one. Pressure gauges allow you to see what going on and they allow you to properly adjust your system. The most important one to have is close to your pressure switch. It lets you adjust the spring mechanism on your pressure switch to the right on and off pressures. Out of geeky interest, I also put one on the output from the pump because I wanted to see the dynamic pressure (that's how I know the dynamic pressure is 30 psi more than the real static pressure). I also put a pressure gauge there because I needed something to block up the small outlet port that was provided (incorrectly) on the pump for attaching a pressure switch.
The pressure gauges I used can be found here.
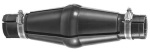
Water Filter
A water filter is worthwhile, but I'm not convinced it's worth spending the money on a mega expensive one. I used a $50 water filter and it handles all the water from the Well House.
The one I used can be found here.

Depending on how the cold water plumbing is done in your house, it is better to put the filter inside the house rather than in the wellhouse. Ideally you want to just filter the water to the drinking water faucets rather than to the baths, showers, and washing machine. For baths, showers, and washing machines it is better to use unfiltered water so you get better flow and don't unnecessarily wear out the filter. Also if the filter is in the house it is more convenient to change the filter cartridge.
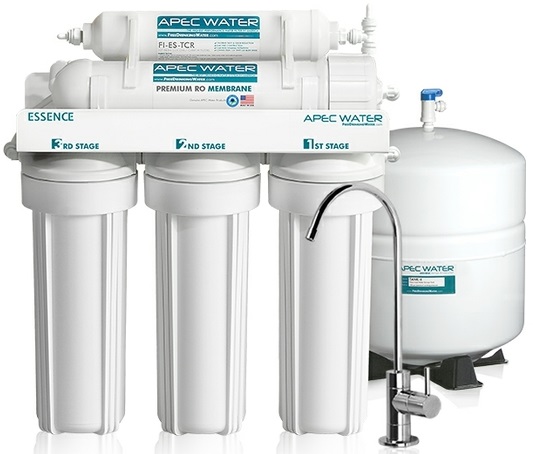
For really clean water it is good to put a Reverse Osmosis Water Filter under the kitchen sink.
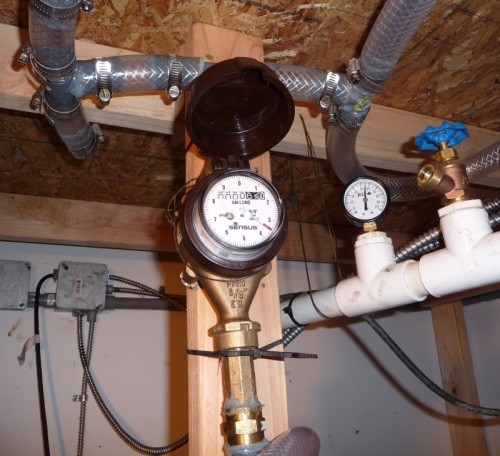
Water Meter
An obvious question is why would you want a water meter given that all the water you get from the Well is free. The reason is that you want to be able to find if there are any leaks in the underground water pipes to your house. Water from the Well may be free (once you have incurred the capital cost of implementing a Well) but it is still a finite resource. If your Well has a fairly low flow rate then you won't be able to tolerate it leaking from the pipes. If you have a water meter then every few months you can turn off all your taps in the house for a day or so (while you go on vacation) and then check that the water reading at the start of the test is the same as at the end of your test. That will reassure you that you don't have any leaks.
The water meter I used can be found here.

Flood detection
If a pipe breaks on the high pressure side then you will likely loose all the water in your reservoir tank. Ideally what you want is a water detector on the floor of the wellhouse that causes power to be turned off to the pressure pump if a flood occurs.
Pipe to house
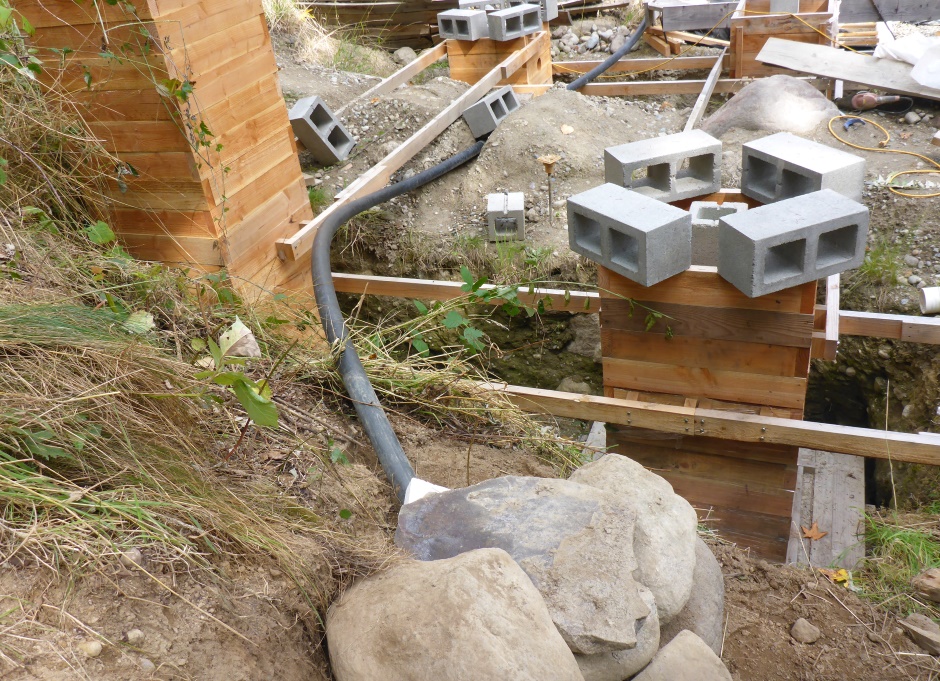
Separate drinking water system
Many people will consider this to be unnecessary, but I am very fussy about my drinking water. The main water feed to the house from the WellHouse is perfectly drinkable, but there are big holding tanks and big pumps involved. I like the water best when it is fresh out of the ground, ie has had no opportunity to get stale in a big reservoir tank. I have chosen to implement a separate small volume water system that feeds the drinking water via a half inch PEX pipe to the house. It feeds a dedicated faucet in the kitchen and three on the bedroom floor (in bathrooms) using a simple daisy chain.
A small (5 gallon) collection vessel is placed between the pipe from the Well and the big reservoir tank. The inlet is at the top of the small tank and the exit is also at the top so that water overflows into the big reservoir tank when the small collection tank is full. The collection vessel is actually a 5 gallon carboy with PVC pipe and T piece fitted to the top. There is also a slightly lower exit in the PVC pipe with a PEX pipe that goes to 3/4 of the way down into the carboy and this goes to the small pump. A nice thing about it being glass is that you can see if any sediment has collected in the bottom.
A suitable pump is detailed here .
For the ultimate in clean water it is good to use a Reverse Osmosis Water Filter.