


Home Site Map - Techniques - Structure -
Railings
![]() Required for balconies, decks, stairs, and landings.
Required for balconies, decks, stairs, and landings.
Requirement
Building code
Building code requires that any human accessible platform that is more than 2'6" off the surface beneath must have a railing. Typically railings are required both on the exterior (balconies and decks) and interior (stairs and landings) of the house.
The railings must not allow a 4" diameter sphere to pass through. This apparently equates to a baby's head. It is good to go for a 3.5" gap between rails to allow for any bending. If you have vertical bars that are half inch diameter then put them 4" on center.
The railings need to be strong enough to resist the force of someone running into them or leaning heavily on them. The building inspector typically will push on your railings to judge their strength.
Railings on the landing around the stair floor opening (and on decks and balconies) must be 42" above finished floor height.
My design
The exterior and interior design can be different, but I have tried to keep as much commonality as possible.
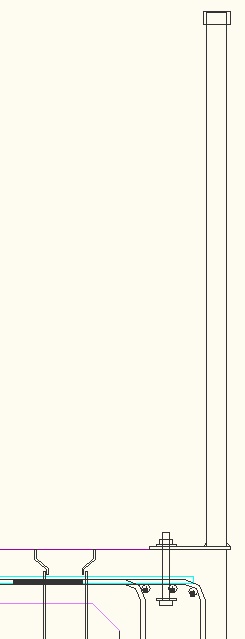
In my case most of the "platforms" that need to have railings are made from poured concrete (decks, balconies, and internal floors). The railings need to be right at the edge of the concrete but the anchor point needs to be somewhat inboard in order to be strong. I use a 6" long, 2" wide, 1/4" thick steel plate to do the offset.
The deck posts are 1.5" square tube steel. They are each welded vertically onto an offset plate. A wooden jig is used to hold the alignment while welding.
Info on steel supplier is here.
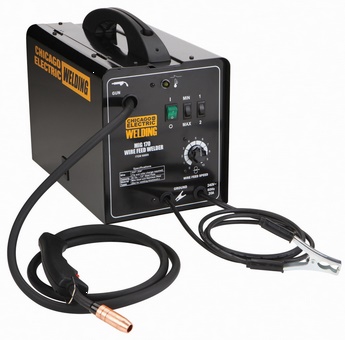
The weld at the bottom needs to be strong. I weld using the following welder...
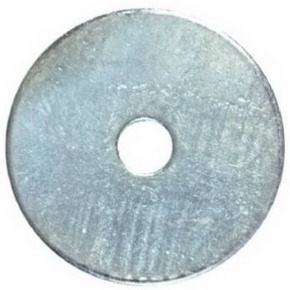
The steel deck post assembly is attached with a nut and washer to a stainless steel bolt set into the concrete. The stainless steel bolt is 5.5" long and has a 2" fender washer. Even though the bolt is not fully threaded, the washer will sit against the bolt head due to gravity and the pouring of the wet concrete.

The distance between posts on horizontal railings varies depending on the situation between about 3'6" and 8'. Between the posts go two 2"x1" rectangular box section pieces, one at the top and one that is about 3.5" from the bottom. The length is from the center of one post to the center of the next post. The ends of the 2"x1"s are cut with a U that is 1.5" wide and 3/4" deep. The U for the top piece is only on one side.
The horizontal pieces are attached to the steel posts using quarter inch 2.5" bolts that go all the way through. Making the horizontal pieces detachable means the vertical bars can be fitted and also sections of railing can be removed for maintenance or repainting.

The vertical bars are done with half inch round steel tube. The center to center distance of the vertical bars is 4". This makes the gap between the bars 3.5". They go into half inch holes drilled into the top and bottom bar on just one side each. They don't need to be welded or glued or anything.
The 4" hole sequence needs to be carefully figured out to achieve a good look. A discontinuity in the 4" sequence needs to be placed in the least obvious place. The 4" sequence is on the center of the vertical even when the vertical is a post instead of a vertical rail. The spacing between posts should where possible from center to center be a number of inches that is divisible by 4. If not divisible by 4 then you will have a discontinuity. Typically for the last post spacing you will find that the 4" sequence cannot be maintained. In the center of the building you may decide the 4" sequence will start at the center and both far ends will have discontinuities.
Stainless steel 5" long full thread bolts are embedded in the deck concrete. They protrude 1" above the surface of the concrete. During the pour they are held in place by a strip of 2x4 that is countersunk at the bolt positions.
Steel quantity and costs
In calculating overall railing cost the length between posts, ie a railing section, is assumed to be 6 foot.
Need low carbon steel for better welding. Examples of low carbon steel suitable for welding include C1008, C1018, A36, A1011, and A500.
Plates are 6" long. The steel for each plate costs about $0.77. Per foot of railing the cost is $0.13 and the length is 1". Overall length for 300' of railing is 300" and overall cost is $39.
The post length is about 3' 6". The steel for a post costs about $4.60. Per foot of railing the cost is $0.74 and the length is 6.6". Overall length for 300' of railing is 1,981" and overall cost is $222.
The steel for a horizontal rail that is 6' long costs $8.10. Therefore the two horizontal bars on a 6' length of railing costs $16.20. Per foot of railing the cost is $2.70 and the length is 2' (24"). Overall length for 300' of railing is 7,200" and overall cost is $810.
The length of a vertical bar is 3'2" (38"). The steel for a single vertical bar costs about $2.10. A 6' length of railing needs 17 vertical bars so the cost of vertical bars for a 6' length of railing is about $37. Per foot of railing the cost is $5.77 and the length is 102". Overall length for 300' of railing is 30,600" and overall cost is $1,731.
Overall the cost of the steel to make a 6 foot length of railing is $56 (not counting galvanizing and painting). With the bolt, call it $10 per foot. The railing length for the first phase main floor deck is 286 feet so the steel cost is $2,860.
Rust protection
Galvanize first
Galvanizing is likely the best bet. The best process is "Hot Dip Galvanized".
Hot-Dip Galvanizing involves dipping the base metal into a molten pool of zinc. First, the base metal must be cleaned either mechanically, chemically, or both to assure a quality bond can be made between the base metal and the zinc coating. Once cleaned, the base metal is then fluxed to rid it of any residual oxides that might remain after the cleaning process. The base metal is then dipped into a liquid bath of heated zinc and a metallurgical bond is formed.
Get the welded parts galvanized after welding. If necessary can paint after galvanizing to get the required black color.
Best bet: Emerald Galvanizing
neil@egalv.com
http://www.egalv.com/ Randy Breiwick or Neil Mertz 621
NW 41st Street Seattle, WA 98107 (northern side of ship canal in
Seattle).
Standard rates are 40 cents per pound
(finished weight) of parts, but price is negotiable depending upon the
size of the job. Their kettle size is 10' long, 3.5' deep and 2.5'
wide. Give them a ballpark figure on the total weight to
be galvanized and they can give an exact quotation. Send Neil mail
referencing the 15 cent cost for DOTs in 2005. Ask for 25 cents.
Then paint
Painting over galvanization is called a "duplex system". When used together, the corrosion protection of the two systems combined is far superior to either protection system used independently. When hot-dip galvanized steel is painted or powder coated, the duplex system provides a more sophisticated manner of corrosion protection known as the synergistic effect. Steel is afforded corrosion protection for 1.5 to 2.3 times the sum of the expected life of each system alone. For example, if a galvanized coating alone on black steel would provide 50 years of maintenance-free protection and a paint coating would not require any maintenance for 10 years, the combination duplex system would provide maintenance-free protection for 90 to 138 years in the same environment.
Most people paint or powder coat galvanized steel during the most difficult time period to do so - between 48 hours and one year after galvanizing. During this time frame, zinc is very reactive with the atmosphere and proper surface preparation is critical. Successful surface preparation, including the removal of loose zinc oxide or zinc hydroxide particles, will prevent adhesion problems from occurring. After a piece of steel has been galvanized, it is sometimes quenched or treated by the galvanizer in order to halt the reaction between the iron and zinc (and to facilitate immediate shipment of the galvanized steel). The most common post-treatments are water-quenching, chromate-quenching, and phosphating. Both quenching methods (water and chromate) can adversely affect the bond between the galvanized steel and the paint. Communicating with the galvanizer prior to galvanizing helps avoid post-treatments that can be detrimental to paint or powder coating adhesion. The paint manufacturer can provide more thorough information about the compatibility of specific systems with galvanized steel.
The key to painting or powder-coating over hot dip galvanizing is proper surface preparation accomplished through etching the material or by other abrasion means. The margin for error is very small when dealing with newly galvanized steel surface preparation. The adhesion of paint onto galvanized steel becomes a very small problem when the galvanized coating has weathered for at least a one-year period. The zinc corrosion products form a very dense, insoluble protective layer that accepts a paint coat readily. A brand new galvanized coating also experiences few adhesion problems within the first 24 to 48 hours after coating. The zinc metal on the surface forms a zinc oxide layer which then converts to zinc hydroxide and then zinc carbonate. The zinc carbonate layer is a very dense and slightly rough layer. Paint adhesion to this layer is extremely good with little or no surface preparation. The beneficial overall process takes about a year of exposure to rain and air.
It is best to talk with the galvanizing company to get their recommendation as to the best paint to use. Ideally they will be able to arrange for a sister company to do the painting. The galvanizing company will also be able to facilitate proper surface preparation, such as making sure the steel is not quenched after galvanizing and ensuring any coating imperfections are remedied.
Because paint sticks better after the galvanizing has aged for a year, the best strategy may be to install the railings in a raw grey galvanized state and then paint them after a year. Make it easy to unbolt the railings so they can be painted (even brush painting will cause lots of unsightly drips onto the concrete).
Stair railings
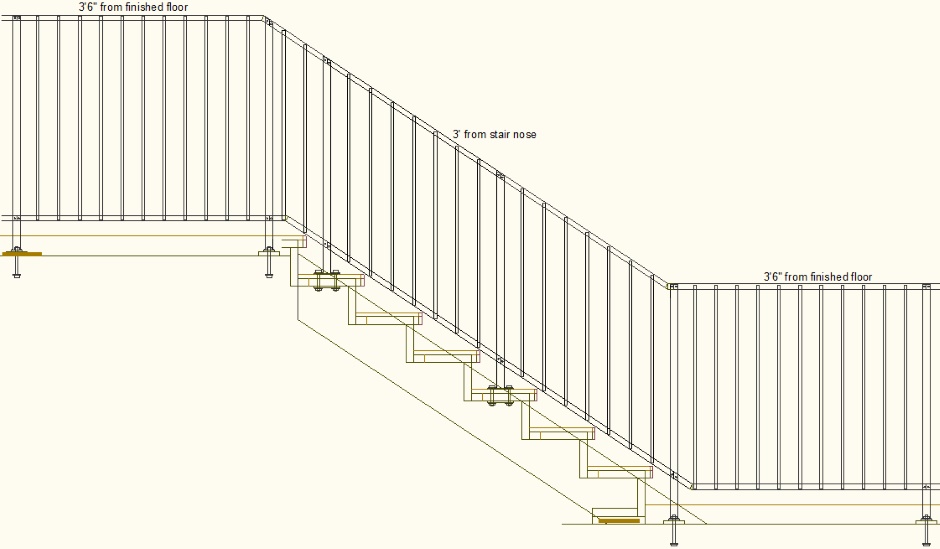
In the case of stairs, the railings are of course angled to follow the angle of the stairs.
A post is on every third step. Because of the stair cadence used, it works out that the pitch of the vertical rails needs to be 4-1/8" (rather than 4" for horizontal railings). This means the opening between vertical rails is 3-5/8" (rather than 3-1/2" for horizontal railings).
There will typically be a discontinuity in the railing pitch. It is best to put the discontinuity at the top of the stairs (as it is less visible than having it at the bottom).
An angle jig is necessary to drill the holes in the top and bottom horizontal bars.
Welding is required to make the top and bottom horizontal bars at the top and bottom of the stairs to make the transition from the stair angle to the horizontal.
Outside railings above condition space
Try to avoid adding railings to concrete above conditioned spaces. Where they are needed, try to get away with just fixing them to the thermally isolated columns.
Stair rail and landing rail lights
In the metal railings on the underside of the top bar put LED lights. Could be individual lights or a stick on strip. Best to make them 12 volt as the railings are metal.