


Home Site Map - Techniques - Plot Infrastructure -
Exterior Lighting
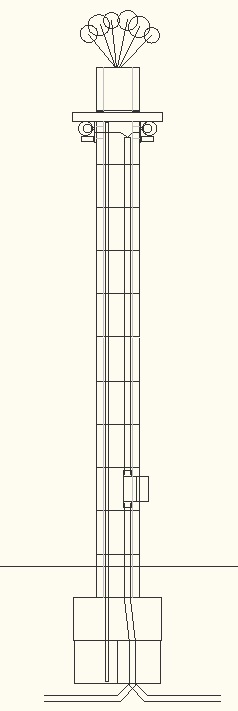
![]() This low cost motion activated lamppost design makes your yard usable
and safe.
This low cost motion activated lamppost design makes your yard usable
and safe.
Scenarios
1) Walking around the yard.
This will trigger any of the motion sensors in that sector, and when any of them has activated, all the lights in that sector will come on for 10 minutes. Any continued movement will cause the lights in that sector to stay on.
2) Turning on the lights from inside the house to see the yard.
There is a manual master override to ON switch inside the house for each sector. (These switches cannot be used to disable the motion sensors.)
3) Leaving the lights on in the yard for a party.
There is a manual master override to ON switch inside the house for each sector. (These switches cannot be used to disable the motion sensors.) In practice this is unlikely to be necessary because motion from people at the party will keep the lights on all the time thanks to the motion sensors.
4) Leaving the lights on in the yard for security when leaving the house.
There is a manual master override to ON switch inside the house for each sector. (These switches cannot be used to disable the motion sensors.)
5) You want to know if an intruder person or animal is in the yard.
Inside the house there is an indicator lamp for each sector to show if any of the motion sensors in that area have been activated. Motion will have caused the lights in the yard for that sector to have come on so you can also look out of the window to see what's there.
6) In "The End Of The World As You Know It (TEOTWAYKI)" scenario you may want to be notified of an intruder without any external lights being visible.
Inside the house there is an indicator lamp for each sector to show if any of the motion sensors in that area have been activated. To stop the yard lights coming on you need to slightly unscrew each bulb on each lamppost.
7) It's a windy night and the lights are staying on all night.
There can be (future enhancement) an automation controlled master OFF switch near or in the breaker panel (eg in the wellhouse) that allows the sector to be disabled. If you leave this switch in off state then nothing will work, ie no motion sensors and no turn on with the switches in the house. Without the automation future enhancement you can turn off the lights using the breaker in the breaker panel or you can slightly unscrew the light bulbs.
8) You want to walk round the yard in the dark to look at the stars.
There can be (future enhancement) an automation controlled switch near or in the breaker panel (eg in the wellhouse) that allows the sector to be disabled. Without the automation future enhancement you can turn off the lights using the breaker in the breaker panel or you can slightly unscrew the light bulbs.
9) You are in some random part of the house and you want to turn on the lights in a particular sector without having to go to the place where the manual switches are.
Inside the house there can be (future enhancement) an automation controlled switch on each sector to turn on a sector from your smartphone. Without the automation future enhancement you need to go to the manual switch in the house. Toggling the power to the sector using the automated switch near the breaker panel will cause the lights in that section to come on and stay on for several hours (it is a feature of the particular motion lights electronics).
10) You are in the yard and you want to permanently turn on lights in a particular sector without relying on the motion sensors.
Inside the house there can be (future enhancement) an automation controlled switch on each sector to turn on a sector from your smartphone. Without the automation future enhancement you need to go to the manual switch in the house.
Lamppost implementation
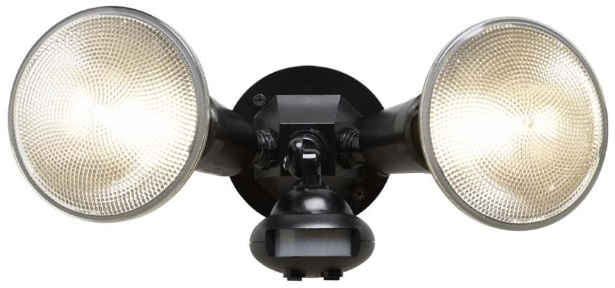
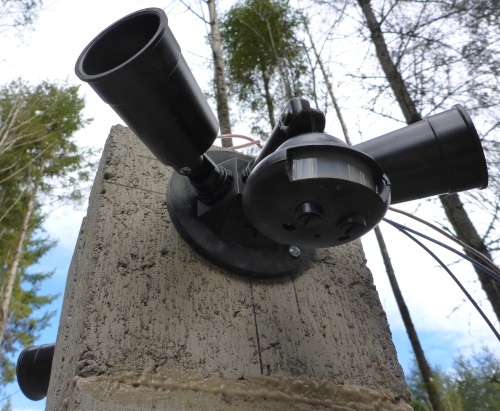
Motion light unit
The starting point is to find a good low cost motion activated dual lamp socket.
 Details
here .
Details
here .
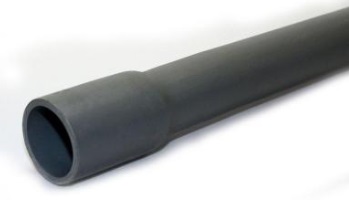
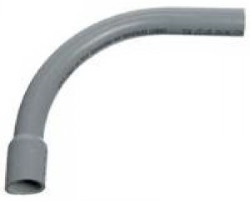
Foundation and conduit
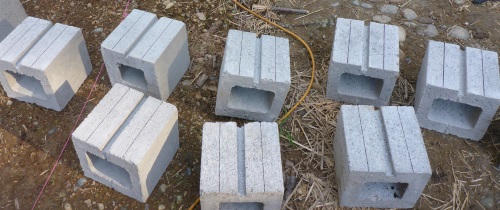
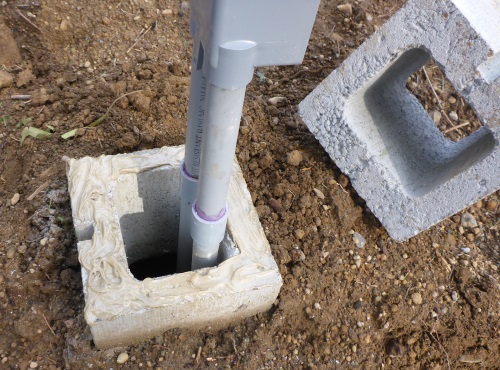
The lampposts are made from concrete blocks that are glued together with PL-Premium construction adhesive . The foundation for the lamppost is formed using two double concrete blocks glued together. The 3/4" electrical conduit comes through a hole made in the bottom.
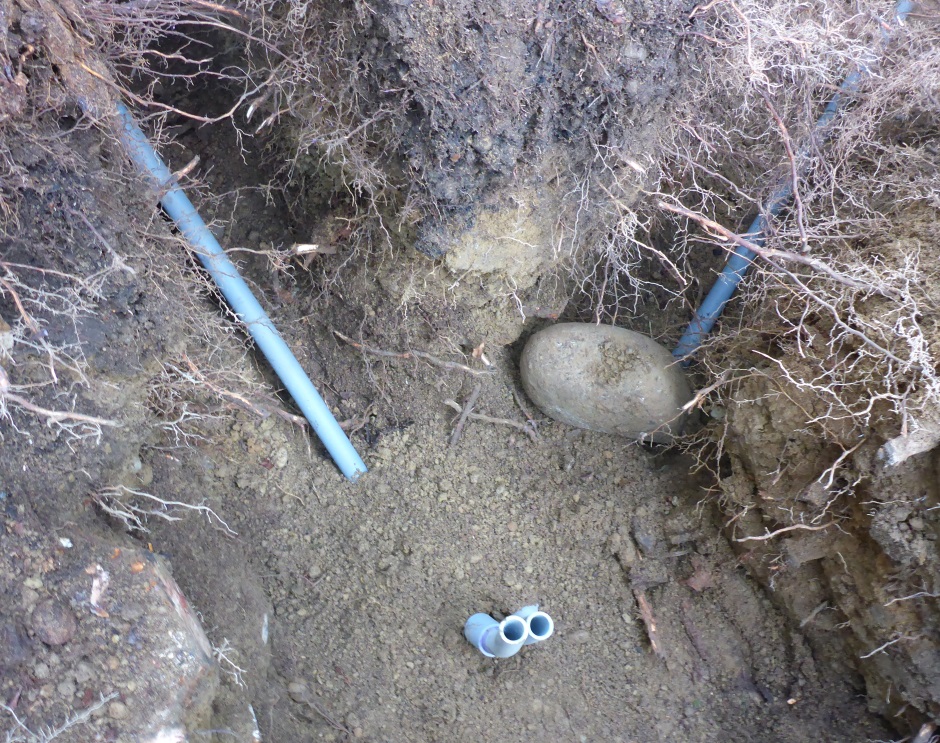
Start by digging a hole about 2 feet below grade. Make the hole big enough for the the two double blocks. Get the bottom of the hole level.

 Concrete
block 8x8x16
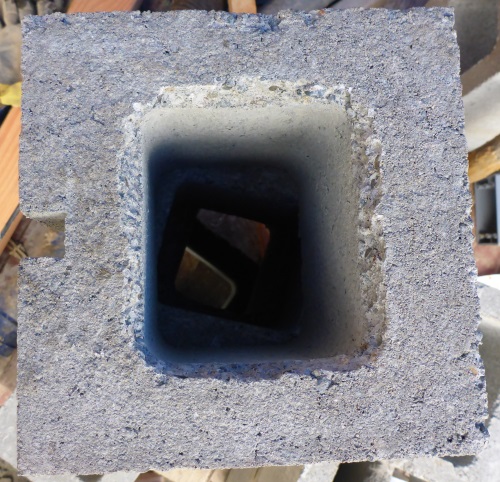
Concrete
block 8x8x16A stone chisel can be used to make the hole for the conduit.

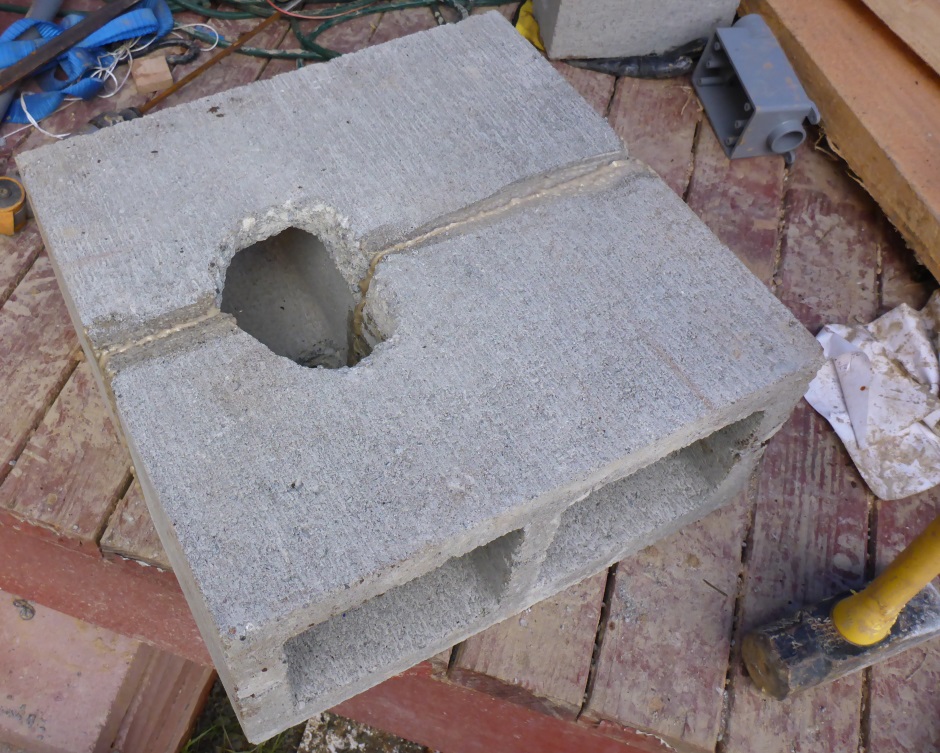
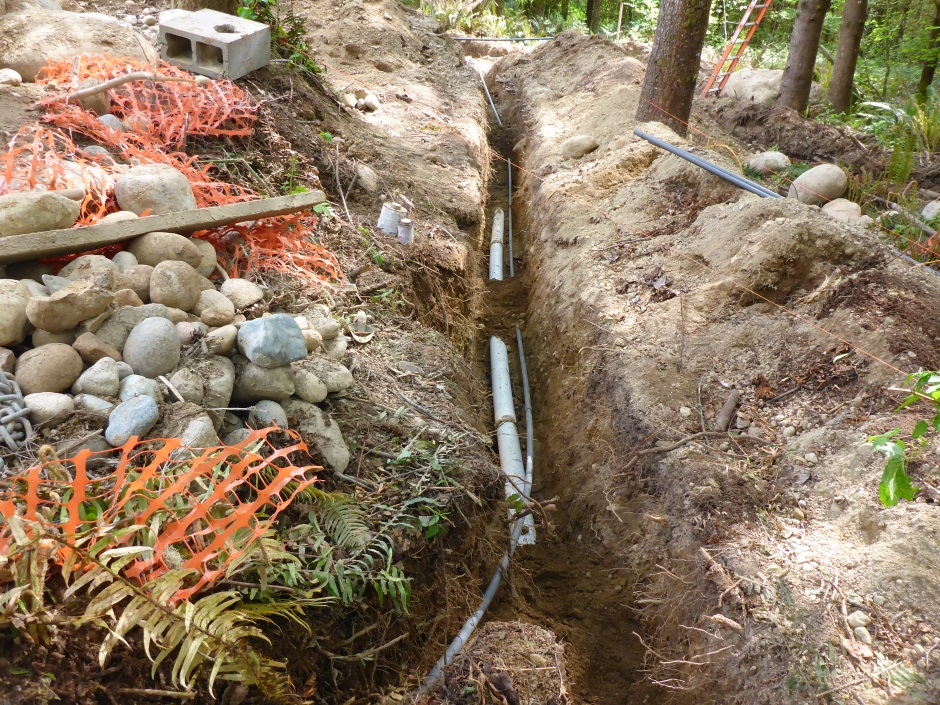
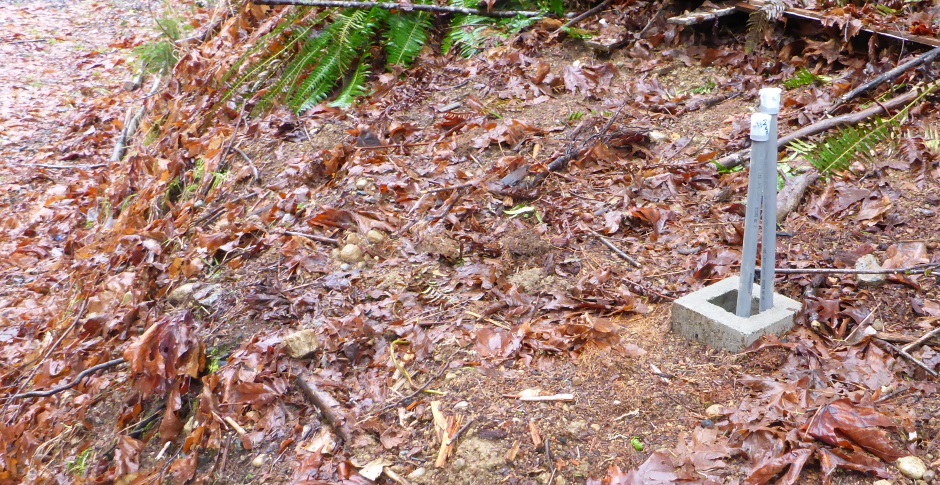
After installing the conduit (both power-in and the feed off to the next lamppost in the sector), add some non-organic soil over the conduit, tamp it down, and make the surface level.
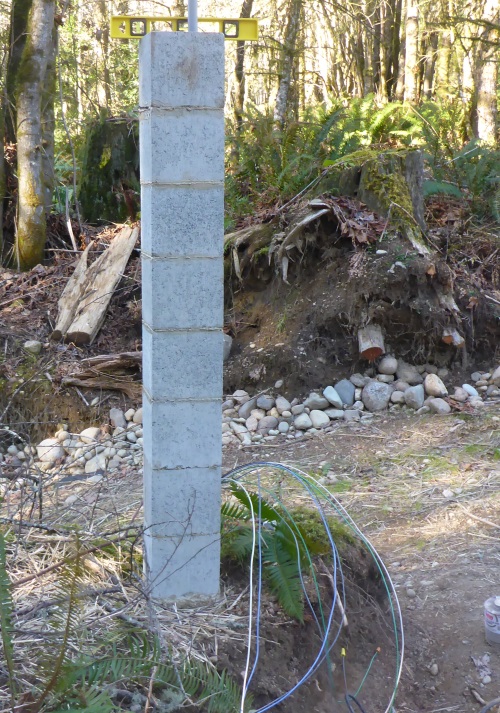
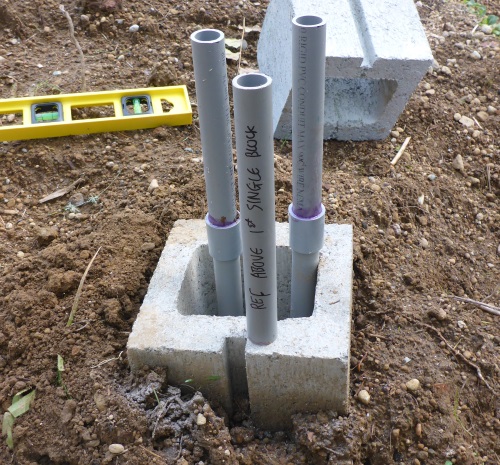
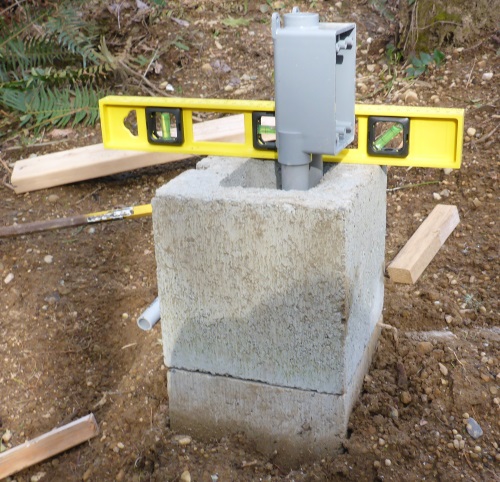
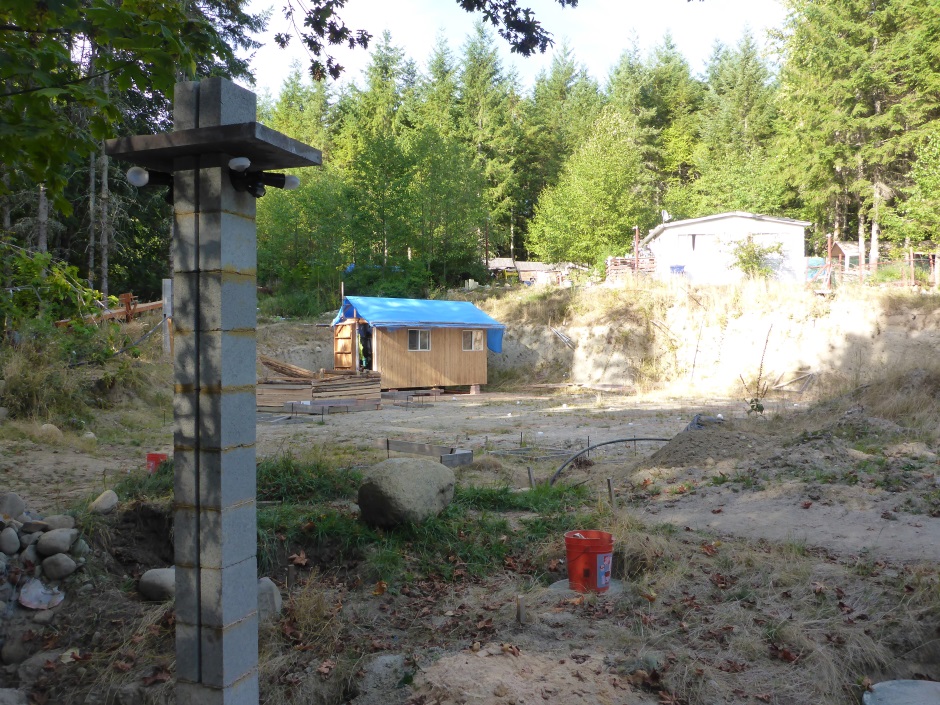
Lamppost stem
In the center of the foundation, start building up the lamppost stem that is formed from single size concrete blocks.
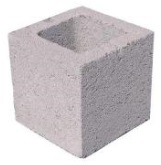
Note the edges of the block on the thicker side have been rounded off with a hammer. This is to stop the lip from pushing the conduit away from the wall. On the thinner side, you should always de-burr the face with a hammer because that will have roughness and bumps from the molding process.
The first of the single size blocks will be below grade level.
Only add one block above grade level because the block after that will need to have a cut away side to allow for a power outlet socket (see later).
Use a level on the top and a longer one on the sides to ensure the lamppost is properly vertical as you build up the blocks.
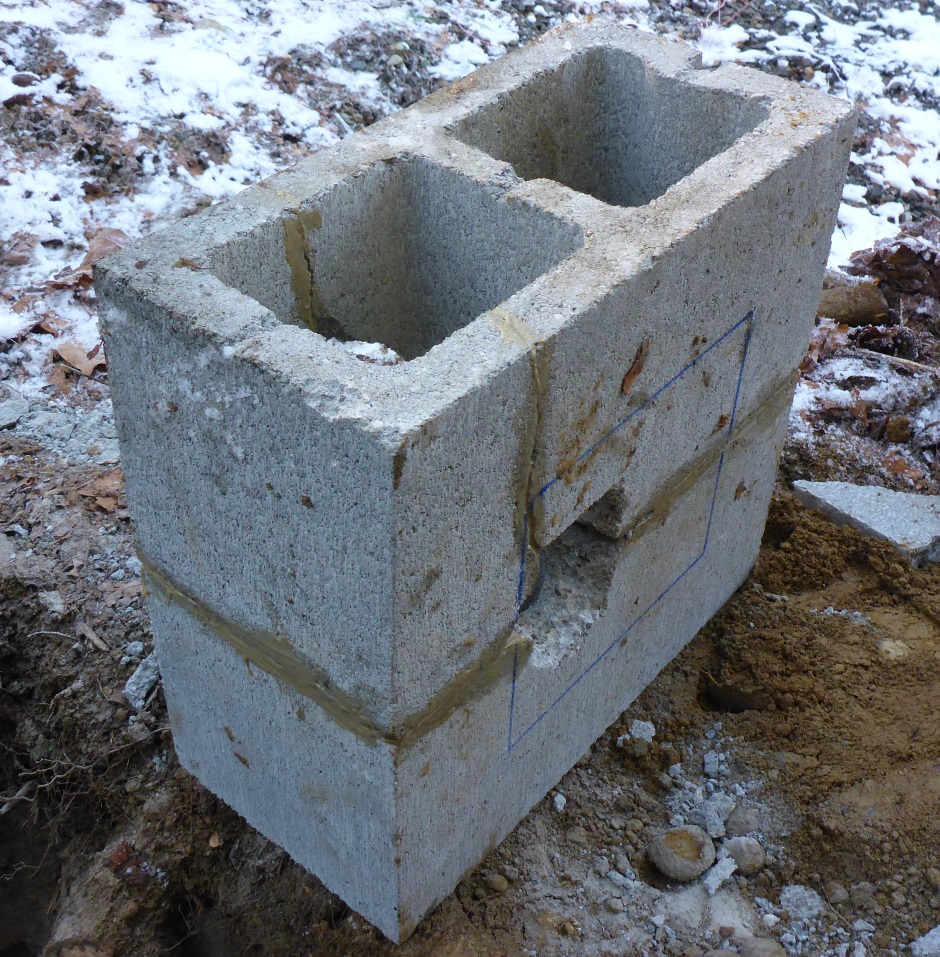
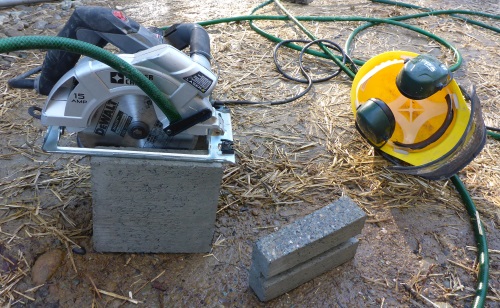
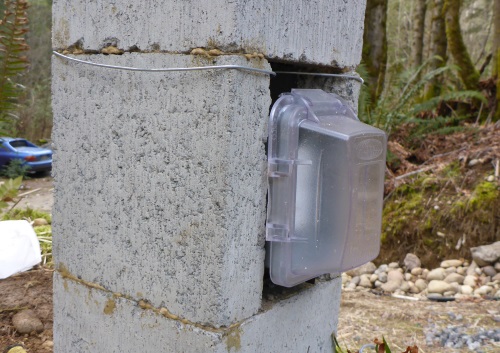
Power sockets
Near the bottom of the lamppost (but away from the wet soil and ground plants) you will want to install a power outlet.
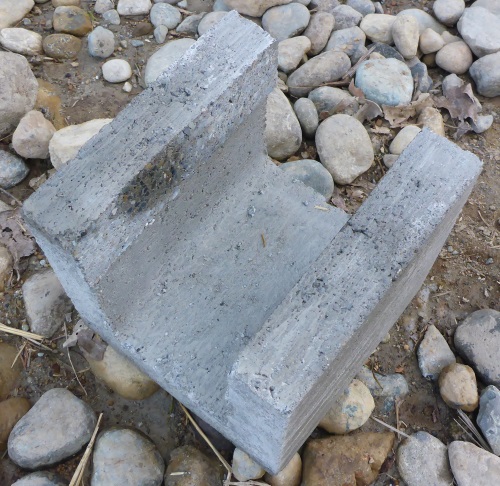
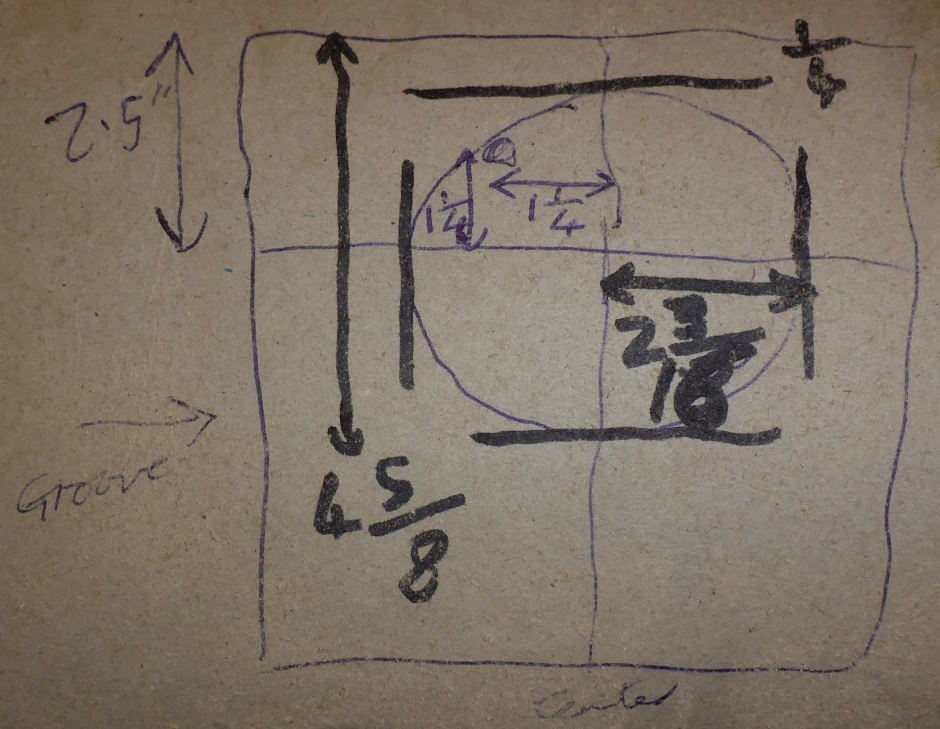
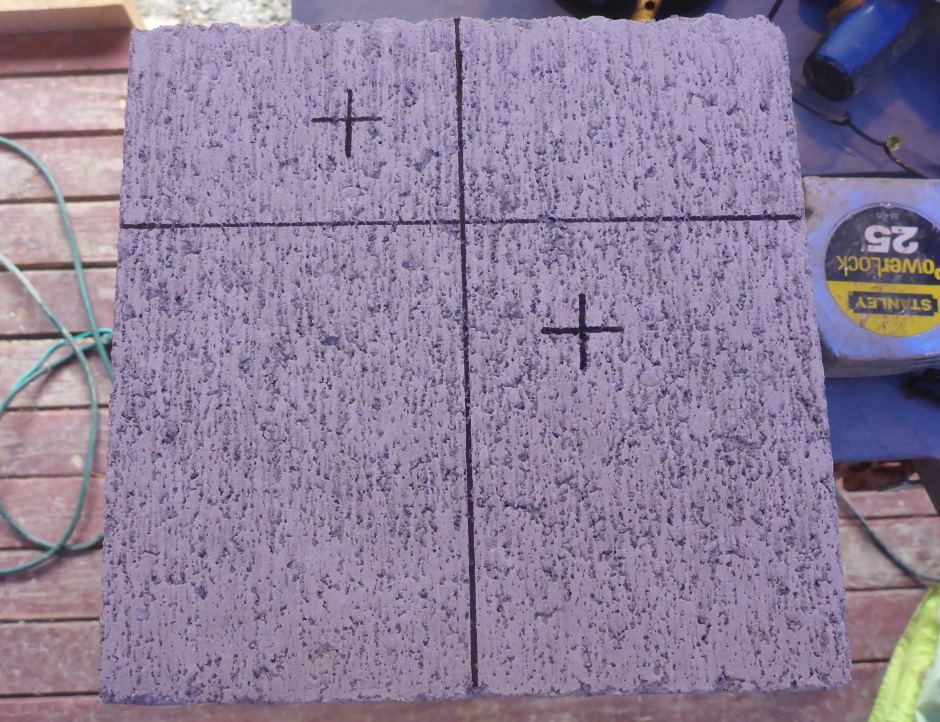
Where the power socket goes you need to cut the side out of a single block. Use a 7" diamond blade in a circular saw. Power the saw from a GFCI power outlet. Point a garden hose at the cut to keep it wet to cool it and to avoid dust. Use safety glasses, ear protectors, and a dust mask.

Start by marking the position of the cuts.
Use a water resistant tamper resistant socket.
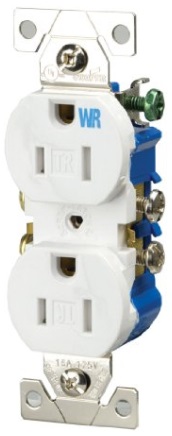 Details
are here
.
Details
are here
.
Fit it in an electrical box that has two 3/4" connections on the bottom and one on the top.
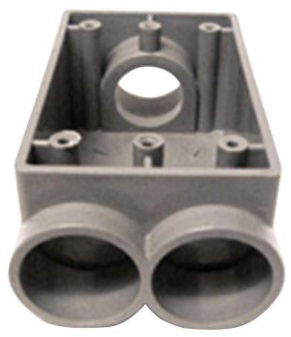 Electrical
Box External 3/4in Single Gang
Electrical
Box External 3/4in Single Gang
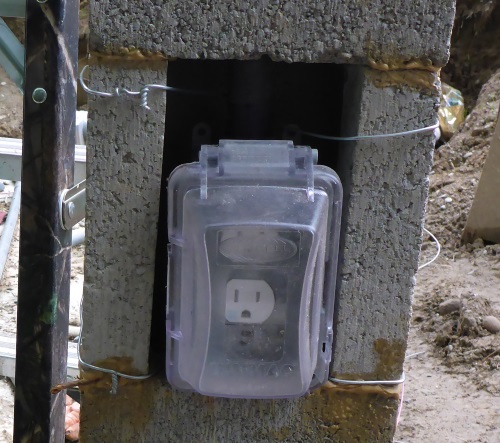
Fit a water cover as the faceplate for the socket.
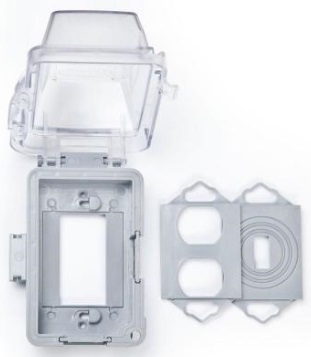 Electrical
Weatherproof Cover
Electrical
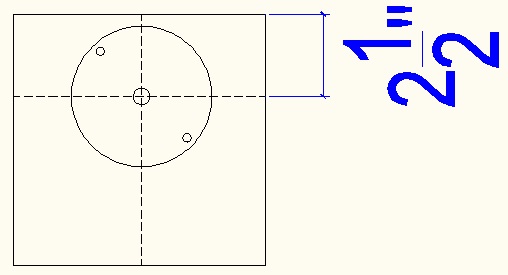
Weatherproof CoverUse a height template to get the conduit cut off at the right level for the electrical box that holds the power socket. The height template assumes there will be a plain block before the cut block.
Socket for light strings
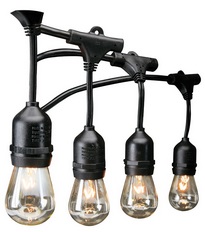
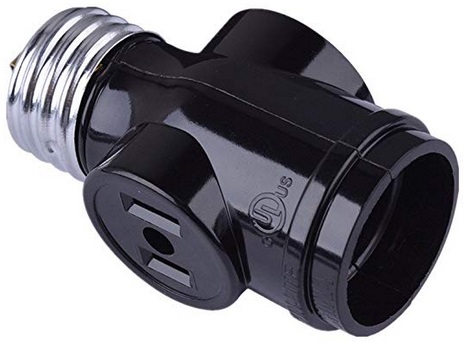
If you want to attach a light string between lampposts such that it is motion activated, then use an adapter screwed into one of the bulb sockets. It is best to support the light string using garden wire between the top blocks of the lampposts.
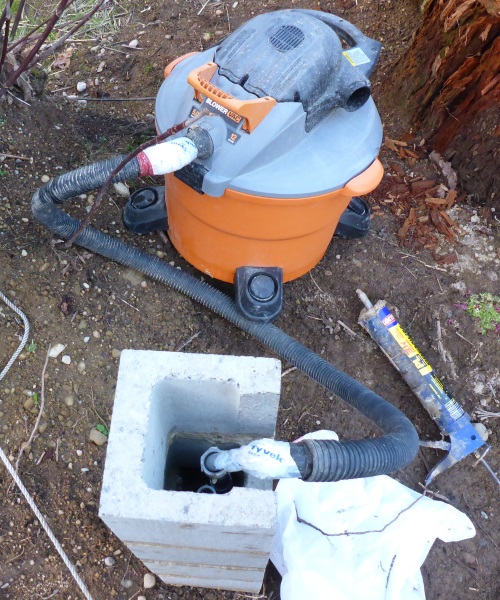
Pulling wires
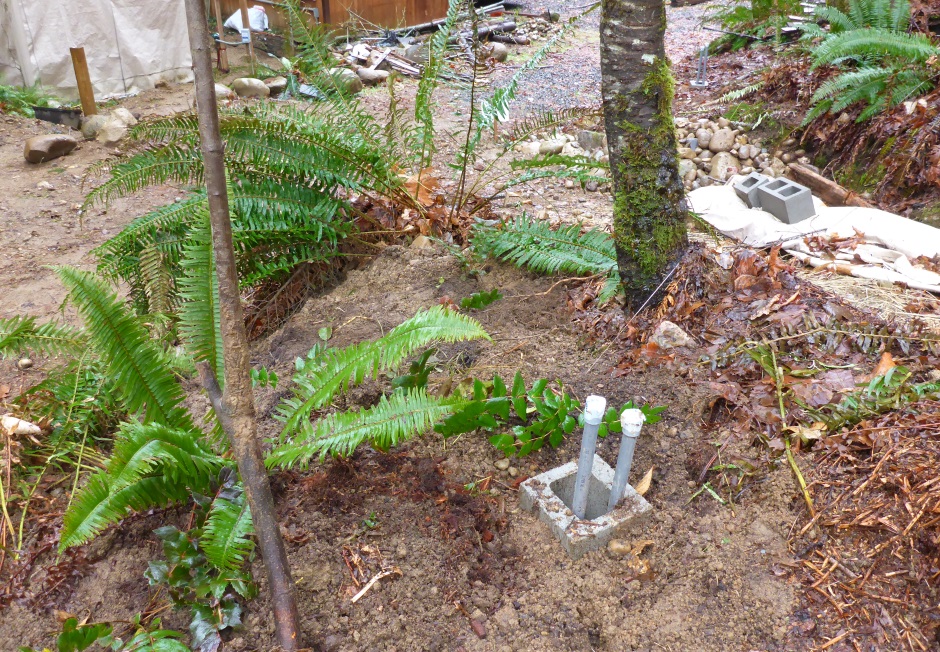
To get rain water out of the conduit and to then pull string though it you need to use an industrial vacuum cleaner. Tie a small piece of sponge to the end of a string to suck it through the pipe. Once you have the string all the way through then attach a rope to the string to pull the rope through the conduit. Then attach the 4 electrical wires to the rope and pull them through.

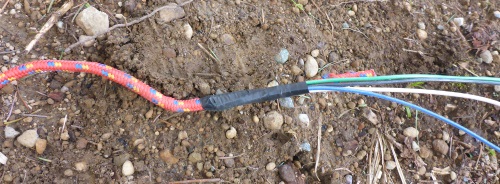


Through each 3/4" conduit needs to be pulled 4 wires, each 12 gauge. If it is an L1 circuit then the colors are Green, White, Black, and Yellow (or Blue). If it is an L2 circuit then the colors are Green, White, Red, and Grey (or Orange).
The Yellow (or Blue) wire is the switched L1 live, ie the live that goes to the actual bulbs. For L2, a Grey (or Orange) wire is used for the switched L2. The Yellow (or Blue) or Grey (or Orange) wire from each string of lampposts needs to route to the house. In the house is an indicator bulb so you can see if a motion sensor has operated and it also allows a switch in the house to be used to manually turn on that string of lights. The Yellow (or Blue) or Grey (or Orange) wire is made live either by one of the motion switches in the chain closing or by a switch in the house being operated.
If motion sensors use the same return wire then by definition all the lights will all come on together. That's not a bad thing.
There is no need for a manual switch on lampposts because if you are near a lamppost then the light will turn on automatically and if you want them permanently on then you can use the switch in the house.
It is necessary to route not just the Yellow (or blue) or Grey (or Orange) wire to the house but also the live and neutral wires so that the switch and light inside the house can operate with the right variant of live and neutral.
The first lamppost in a sector has a weatherproof tamperproof GFCI socket and all the other lampposts attach to the load output from the GFCI.
It is necessary to have a different sector for each GFCI protected circuit. For example the lights in the wellhouse are on a different circuit from the W1 lights in the yard. This all needs more wires to the house.

My wire labeling
Sector 1 Triangle round
gardens
Sector 2 South
roundabout drive
Sector 3
North roundabout drive
Sector 4
In Wellhouse
Sector 5
Lower drive
Sector 6
Pump tank greenhouses
Sector 7
Septic tank west lawn
Sector 8
East lawn hobbit
Sector 9
Upper drive
Fixing motion light to concrete block
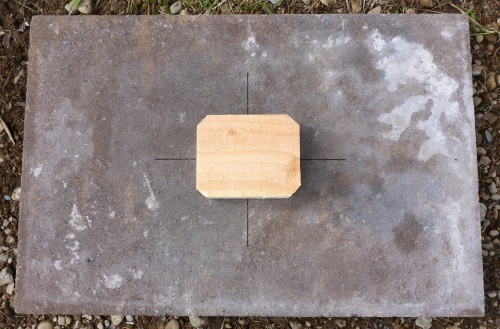
Concrete paver rain cover
Even though the motion light units are supposedly waterproof you still need to keep the worst of the rain off them. This is done using a concrete paving slab that fits on top of the single size concrete block that has the motion light units. Glue on a piece of 2-by lumber that is cut to the size of the hole in the top of the single size concrete block. Make it a tight fit. This is used to accurately locate the paving slab and to stop it falling off.
Glue one more single concrete block in the center of the top of the paving slab. This can be used as a flower pot. Planting a small sword fern in the top will look good.


Sometimes lampposts can be added to other structures such as a rain water storage tank or a septic tank.
