


Home Site Map - Techniques - Plot Infrastructure -
Concrete Block Sheds
![]() Simple low cost shed for the yard with a grass roof .
Simple low cost shed for the yard with a grass roof .
Size
In most counties you are allowed to build a shed up to a certain size without needing a building permit. In my area (King County, WA) it is allowed to build a shed up to 200 square feet (measured on the outside dimensions of the walls). This is a huge concession although there are a few rules. You are not allowed to live in the building or park a car in it and you need to under your own recognizance build it to building code. http://www.kingcounty.gov/property/permits/FAQ/PermitReq.aspx#shed
Implementation method
The name of the game is to build a shed for as little money as possible in the shortest amount of time. I chose to use low cost concrete blocks (CMUs) from the local HomeDepot store as they are only $1.32 each (98 cents when on sale).
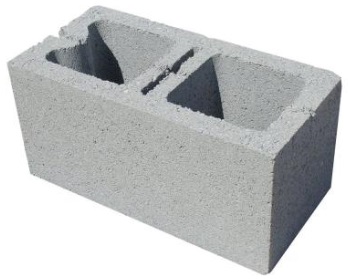 Concrete
block 8x8x16
Concrete
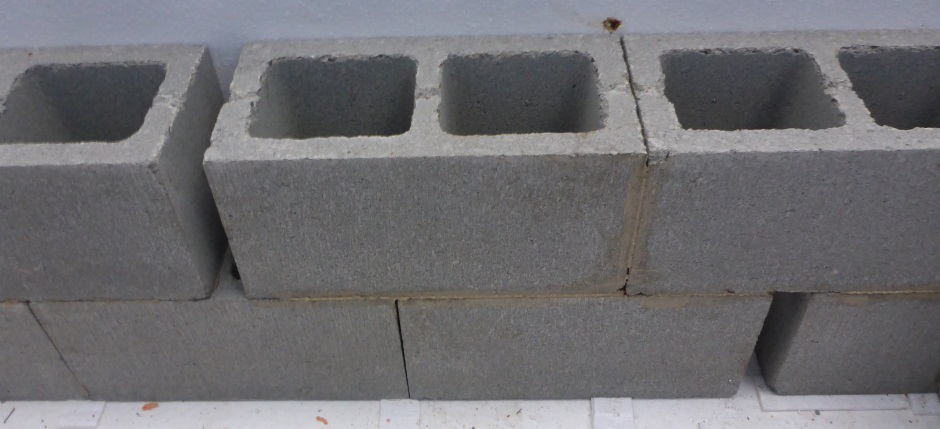
block 8x8x16Glue together the concrete blocks using PL-Premium construction adhesive . You only need to put a bead of adhesive on the top edges with a few of blobs between adjacent blocks. Arrange them in a staggered overlap brick configuration. A nice thing about using adhesive is that it comes in a convenient tube rather than you having to mix mortar all the way through the build process.
Now here's the clever bit... Adhesive works in tension and compression compared with mortar that only works well in compression. This means the entire wall acts as a beam. This means you do not really need a footing. Even though you could possibly use an earth floor it is much better, because you want the building warm and dry, to implement a concrete floor using concrete blocks and to have a water proof lining and insulation under the floor. The floor also prevents the walls from being pushed in by the backfilling forces.
You need dry weather for gluing blocks. They don't need to be super dry but they need to be their normal light gray color rather than wet.
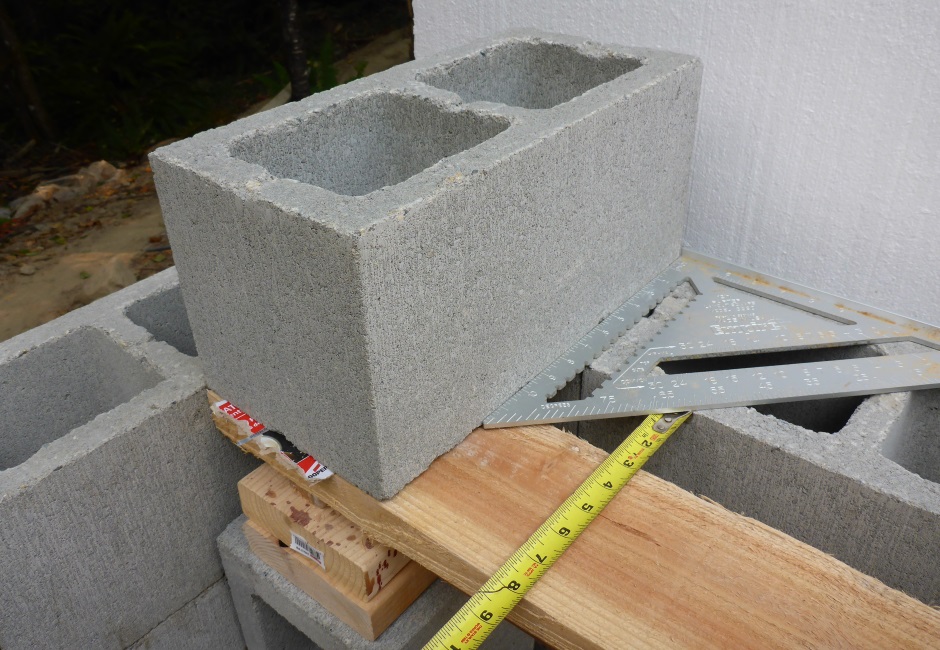
A negative with using adhesive is that the blocks are somewhat irregular in manufacture and there isn't 3/8" of mortar to take up the variation. They are also slightly tapered so they can be got out of the mold.
Another negative is that 8" wide single blocks are about 7-5/8" wide and 16" double blocks are 15-5/8" wide. This means that two single blocks are not the same width as a double block. This error is annoying, but is just one more source of inaccuracy that has to be accepted. I hate error in any building work I do but the name of the game here is building quickly at low cost.
Even with all the errors you want to avoid ever having to cut a block because cutting is difficult and takes a while to do. It is better to accept the block inaccuracy and allow for it.
The best way to allow for the block inaccuracy and inflexibility on length is to intentionally leave a gap in the row of blocks somewhere near the center of the wall. The gap will be in different places in different rows so in practice the strength of the wall is not significantly reduced. The holes on the inside and the block irregularities will get covered by concrete render.
Because you want a gap somewhere near the center of the wall on each row to take out the inaccuracy of the blocks, make sure that you slightly overestimate the size of the blocks when deciding on your building dimensions. You can assume a block length is actually 15-3/4" rather than the more likely average of 15-5/8".
How good do you want it? - two choices
You need to decide how waterproof and insulated you want the building. If you just want a small shelter to keep the rain off and you don't mind the building being damp inside with lots of spiders then you can do without insulation and do without a proper floor. This is ok for something like a rain water pumping station or a rain shelter for parking your lawn mower. I would however urge you to in most cases to design even sheds to be dry and insulated.
Presented here are two designs - The preferred one I call "Insulated Concrete Block Building" and the small super simple lesser one I call "Concrete Block Rain Shelter". I only used the "Rain Block Shelter" for the small pumping station for the rain water system. My first "Insulated Block Building" was for a greenhouse for growing vegetables. Growing vegetables requires a controlled environment and that means you want a sealed environment and insulation on the north wall to avoid heat loss.
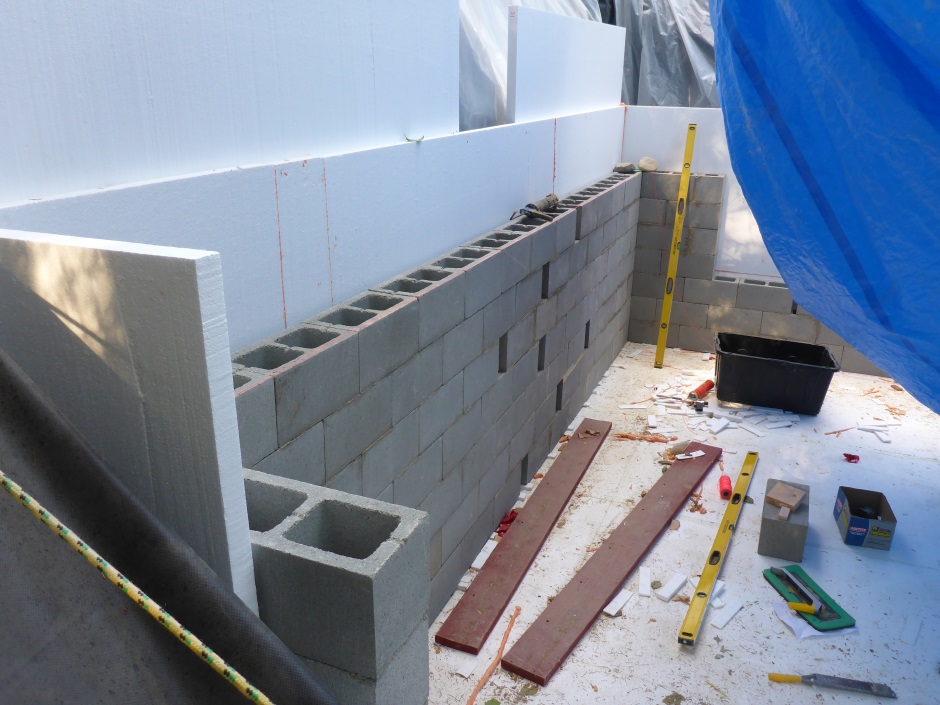
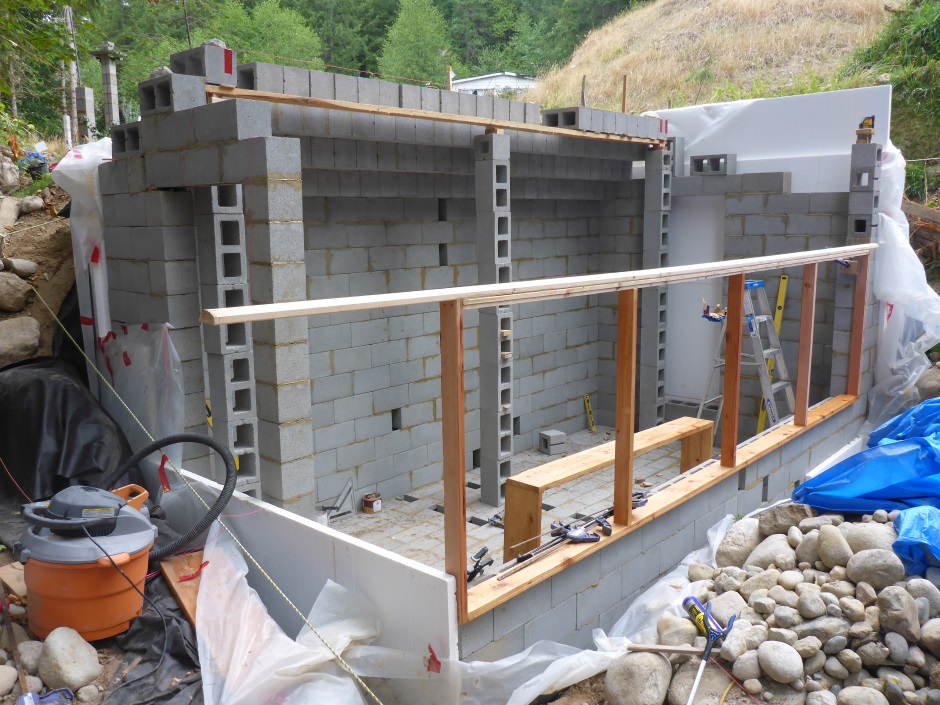
Insulated Concrete Block Building
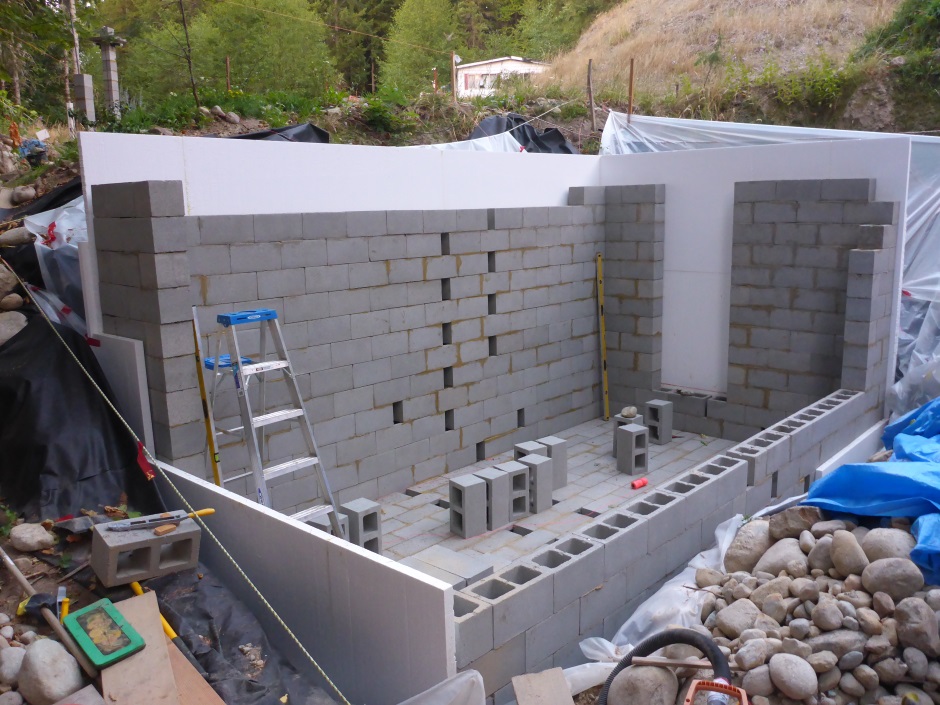
This is a bit like an ICF building except that instead of 8" thick of poured concrete the wall is 8" thick of concrete blocks. There are two layers of EPS (Expanded Polystyrene) sheets on the outside that provide both heat insulation and a waterproof skin. The EPS sheets are instrumental in setting the building's dimensions and squareness. The position of the irregular concrete blocks is set by the EPS and using a long spirit level. Blocks are added from the corners working towards the center and finally the irregular hole in the center is taken out using a small amount of hand mixed concrete.
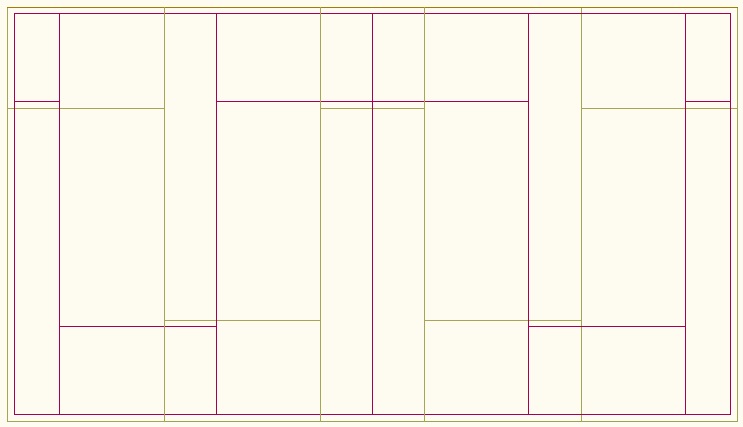
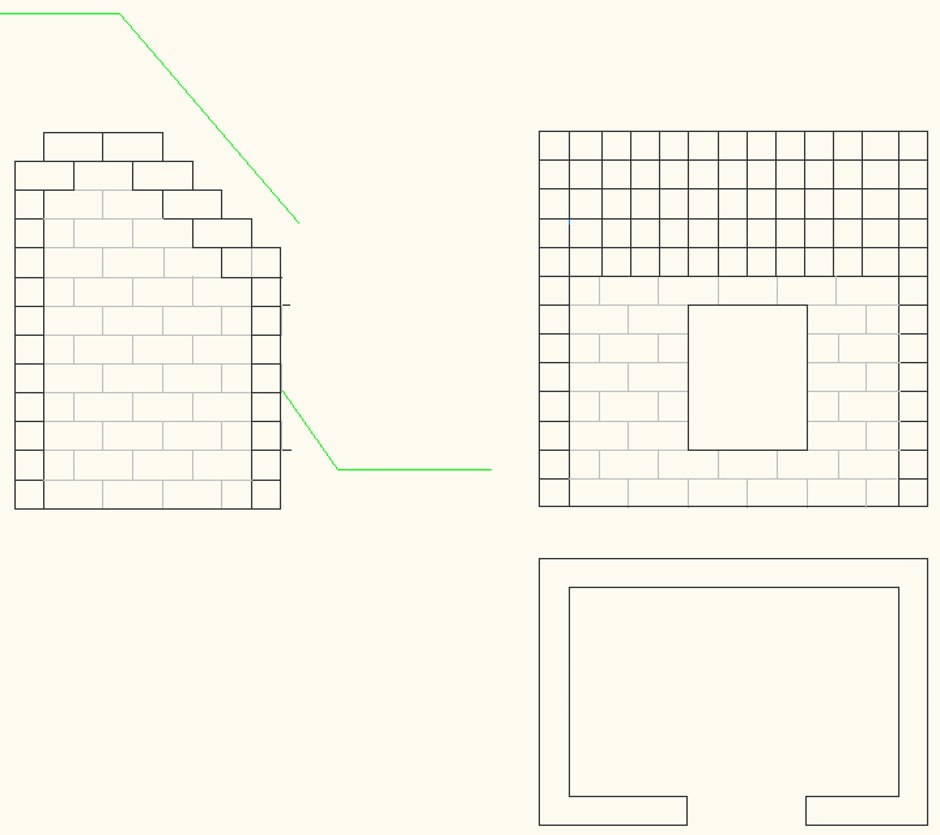
The following drawing shows a greenhouse done using the "Insulated Block Building" technique...
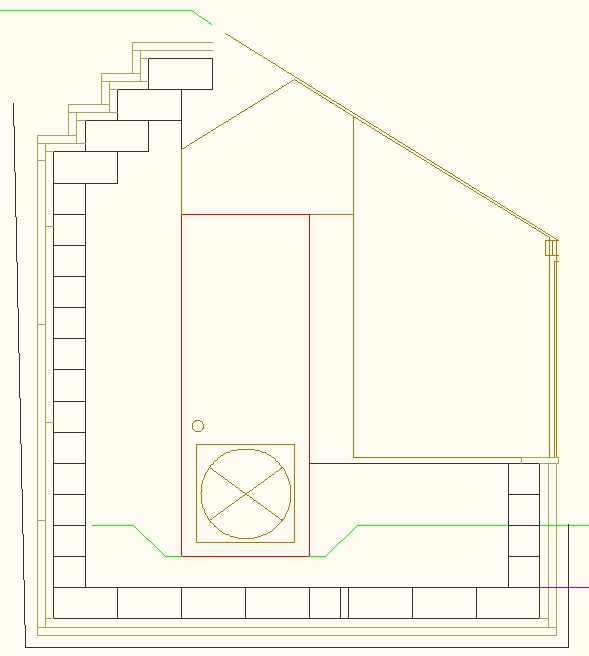
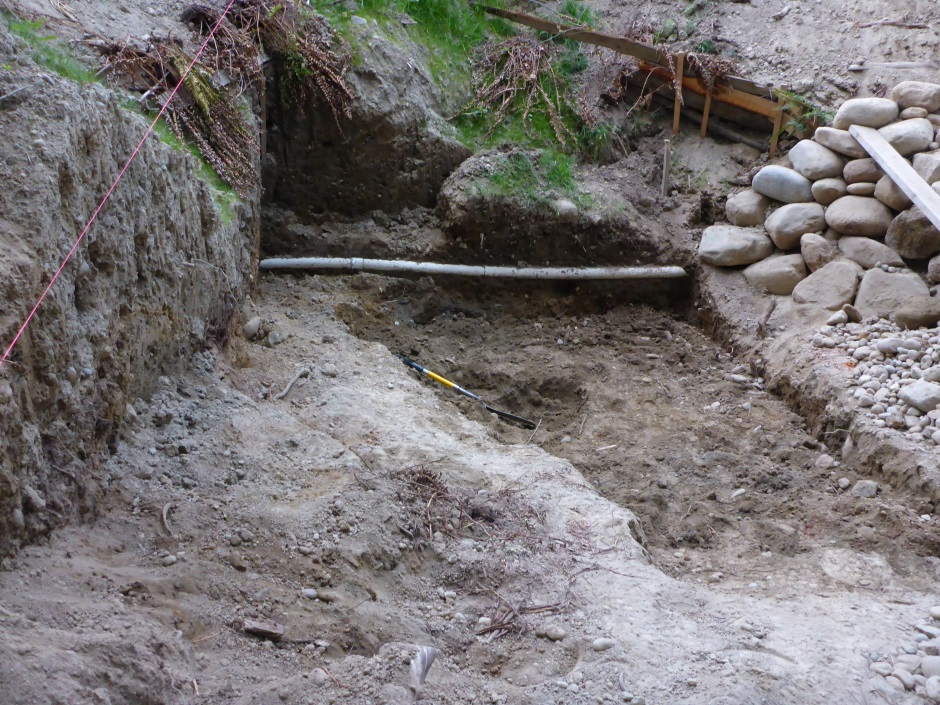
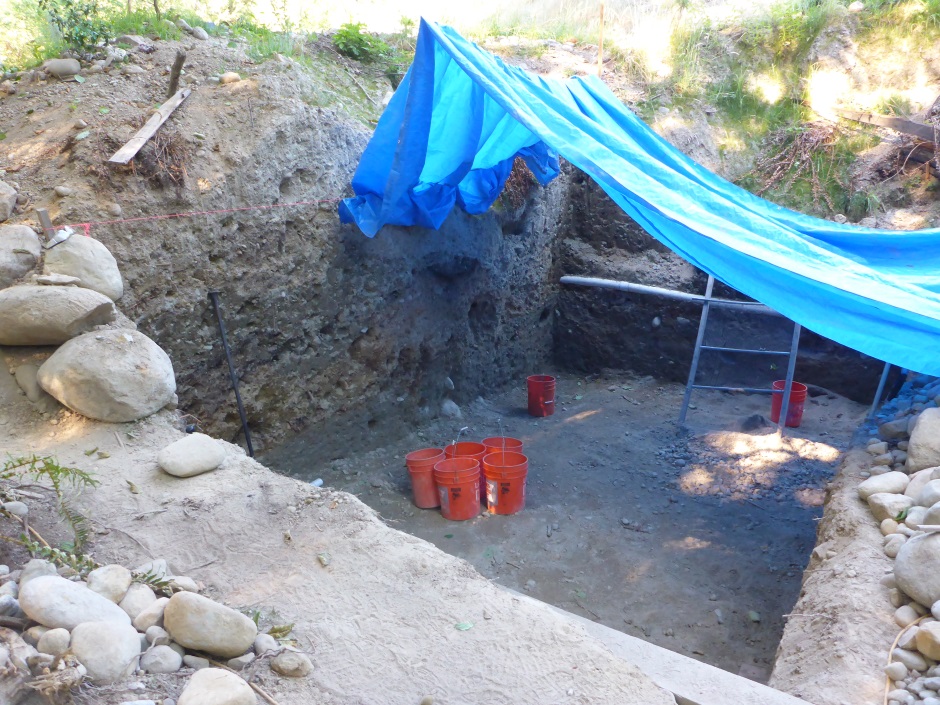
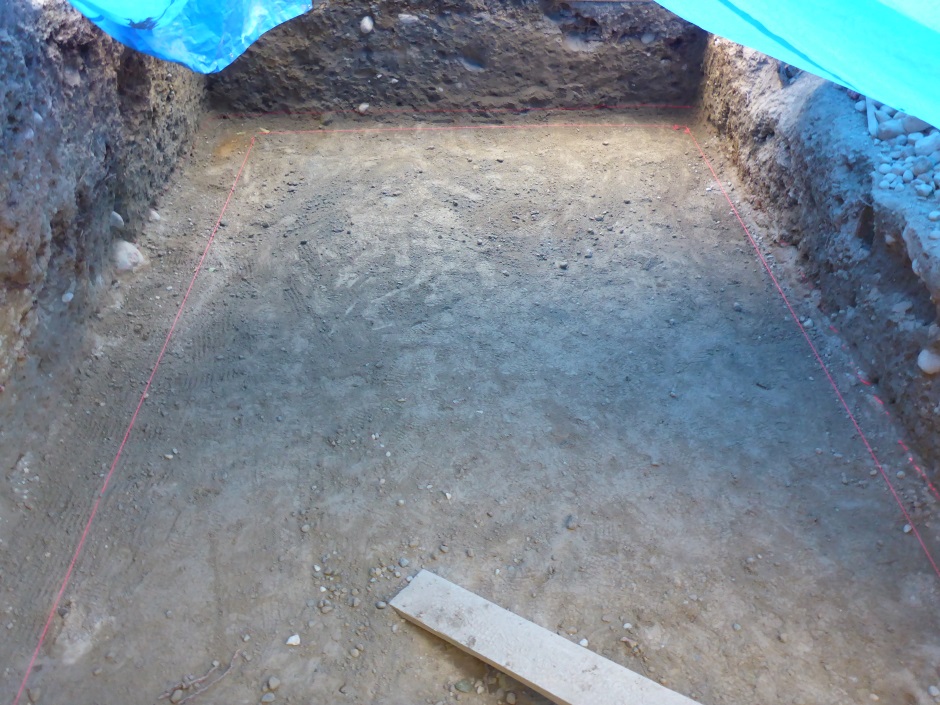
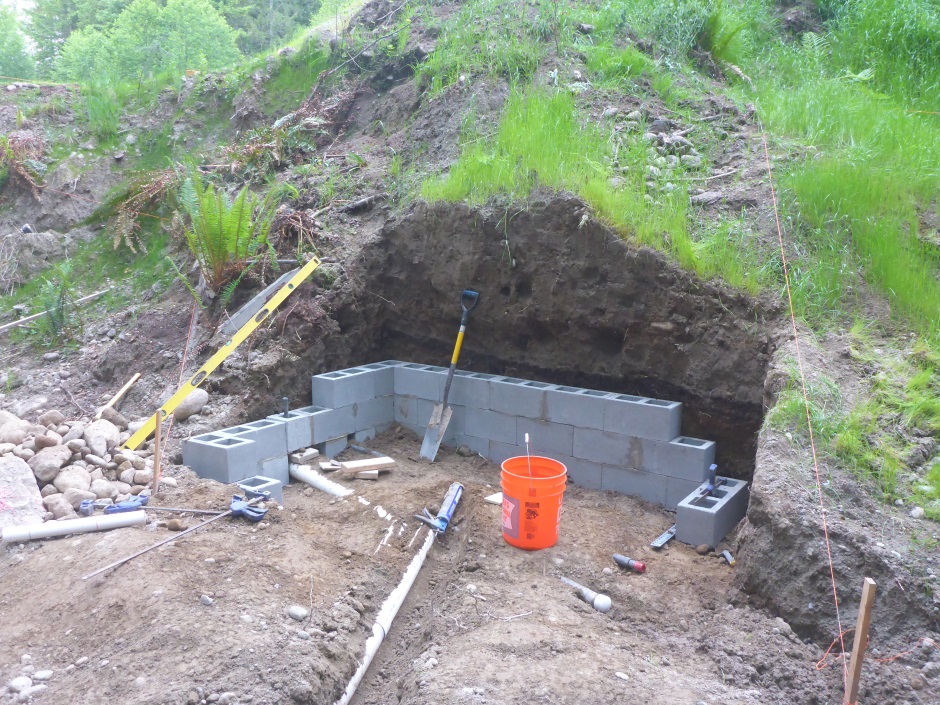
Excavate
The first step is the excavation. The bottom of the hole needs to be 1'3" below what will be floor level. That's 3" of drainage stones, two 2" sheets of EPS, and 8" of concrete block. I have chosen to make the floor level 1'3" below grade so that means the bottom of the excavation is 2'6" below grade. The rear wall will be set into the hillside so of course that involves a lot of excavation. I did the digging by hand and that's a lot of good exercise.
The white pipe in the picture is an existing drainage pipe and in this particular case sets the limit for where the wall of the building can be.
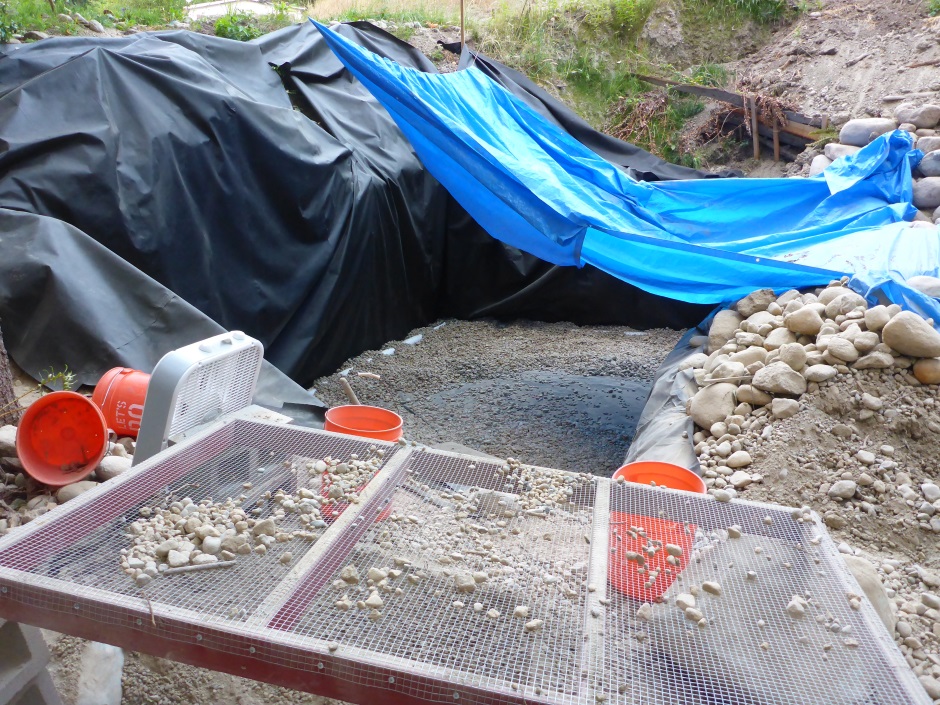
When excavating it is good to filter out the rock pebbles from the soil as these can be used to form the drainage base under the slab and against a backfilled wall. To be able to do this quickly and efficiently it is best to build a Trommel .

Ensure bottom of excavation is properly level
Use a self leveling laser to ensure the excavation is to the same level right across the whole excavation. It's also worth accurately marking out the building rectangle to determine the excavated area is correct. Make sure walls of the excavation are cut back enough to accommodate the building walls.
Line the outside with geo-fabric
The geo-fabric starts at the top of what will be the south wall, all the way under the building south to north, up the full height of the north wall, and then over the roof area that will be covered in soil. Add an extra 1 foot on the north and south ends to allow it to be folded over. It goes under the perforated drain pipe that will go round the outside of the building.

The north south cut strips of geo-fabric need to be 33 feet long for the case of the my greenhouse dimensions. It comes in 100' rolls so that means 3 strips of 33.3 feet per roll. Provided you keep the overlap to about an inch you need 19.3'/3.9' = 5 of these strips.
The strips for backfilled side walls need to be 15' long. A backfilled side wall needs 11.2'/3.9' = 3 of these strips. Shorter strips (typically 4'6") are used on sections of non-backfilled side walls.
It is useful to use 2" nails with large plastic washers to keep it in place.
You will be forming a complete enclosure of filter fabric.
Install the drainage pipe
The drainage pipe goes round the outside of the building. Tight right angle pieces are used at the building corners to keep it close in. You only really need the drainage pipe on walls that are backfilled. Make the pipe exit on the lowest corner of the slope (in my case that's the south west corner). There's no need for a cleanout as the overall pipe length is short.
It is ok for the pipe to be level but there is a slight advantage for the furthest end to be slightly elevated with some stones under it to promote water flow towards the exit.
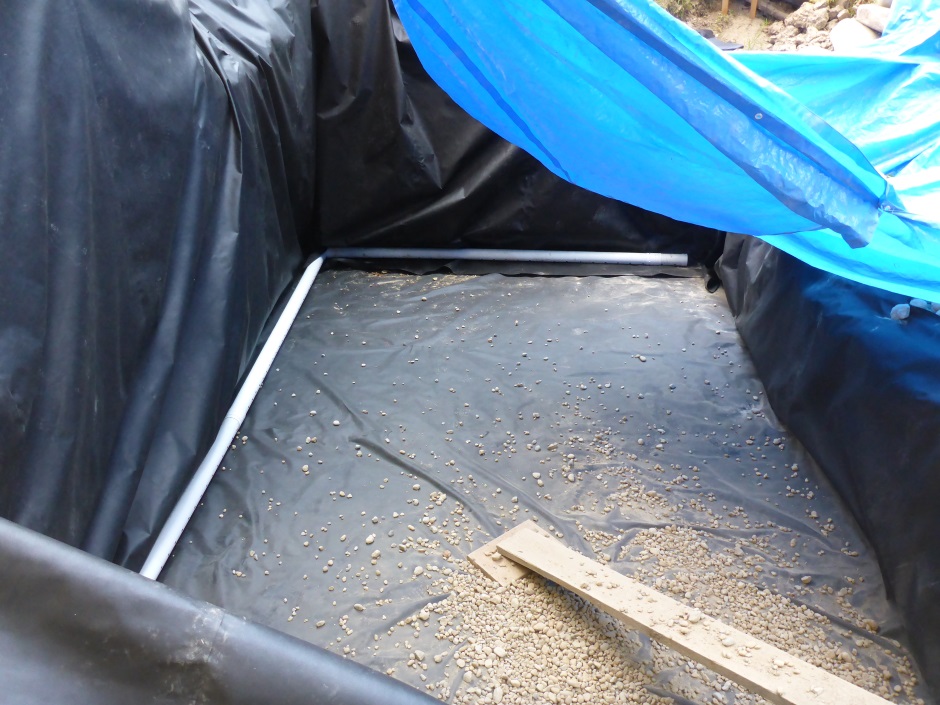
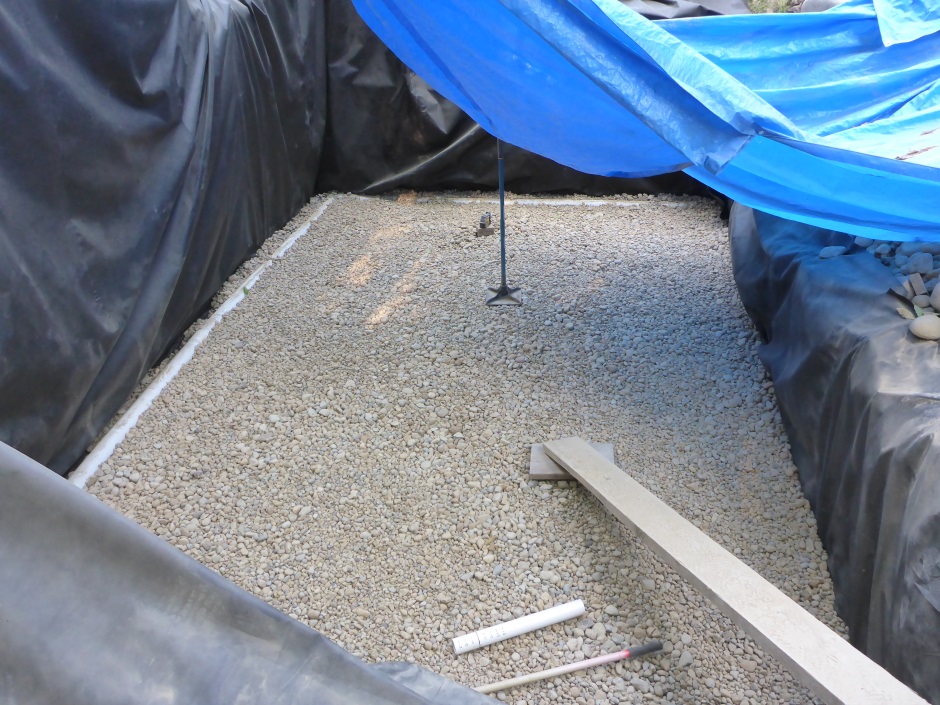
Fill underslab area with drain rock
I use round rocks filtered from my soil, but if you don't have this then use round pebble drain rock. It is best NOT to use crushed rock as it will dig into the under-slab waterproof membrane. You want a depth of 3".
Accurately level the surface of the drain rock layer. If you see any sharp rocks then remove them.
Put layer of geofabric over slab area (optional)
The geo-fabric is to provide a bit of a cushion between the under-slab rocks and the waterproof membrane. If there are no sharp rocks then you can omit this cushioning layer.
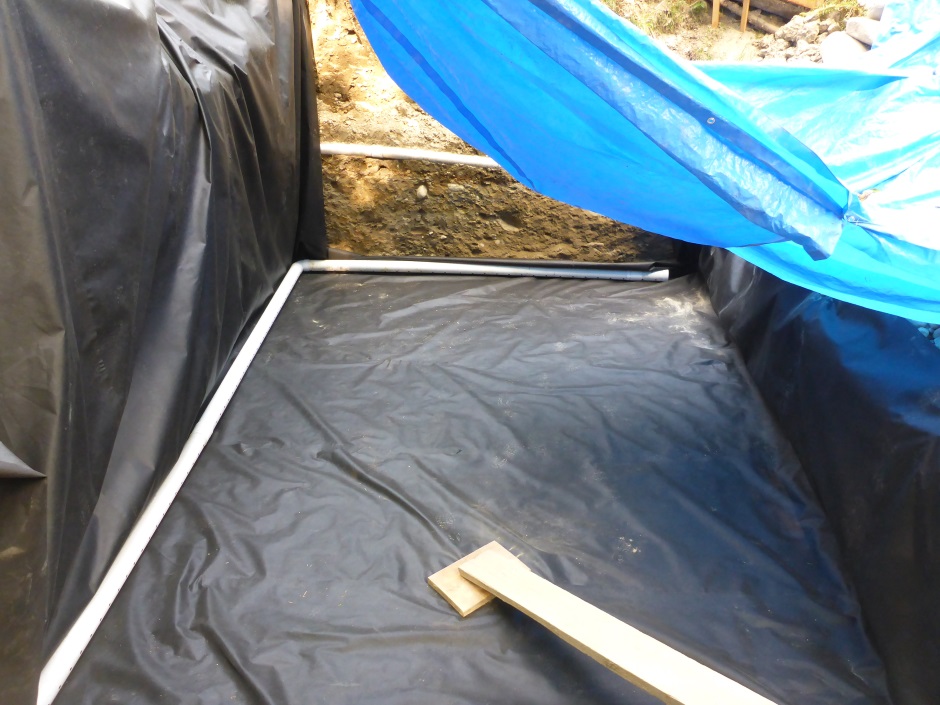
Install 6 mil polyethylene sheet
The primary job of this 6 mil polyethylene sheet is to add extra waterproofing in addition the waterproofing that the EPS will provide. It goes on top of the geo-fabric that is over the under-slab crushed rock, but there is no guarantee that it won't get punctured.
Start with a piece that is 33' long going south to north. Then add another piece (40' long) going east to west. This means there are actually two layers under the slab area. Use 2" wide single sided tape in the corners between the two sheets. The join probably won't be fully waterproof but everything helps.

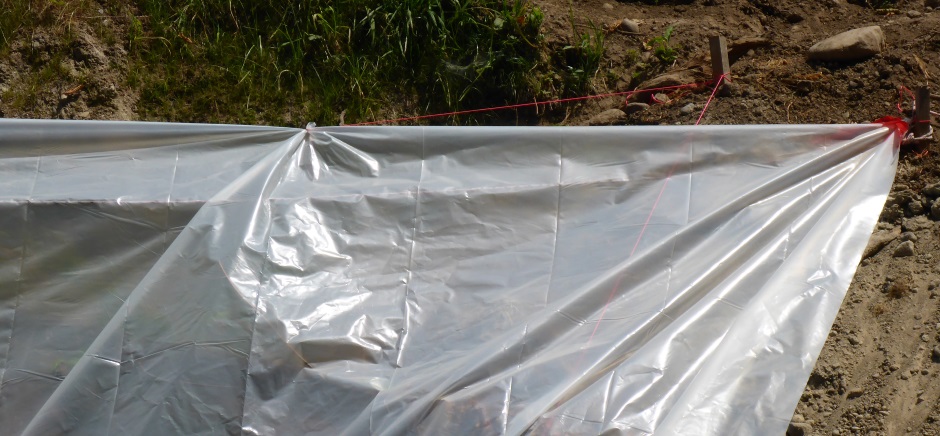
You will probably have to tie strings to keep the polyethylene up the excavation.
Note that on the backfilled walls, drainage rock will later be added between the geo-fabric and the polyethylene sheet.
Add first slab layer of slab 2" EPS
This is goes the full area under the building (ie the wall EPS will rest on it). For the greenhouse dimensions this is for the bottom layer 10'7" north south and 18'8" east west. The second layer is 2" less all the way round, ie 10'3" x 18'4". Plan the placement of the EPS sheets to stagger the joins. Glue along all the edges with Foam Adhesive.
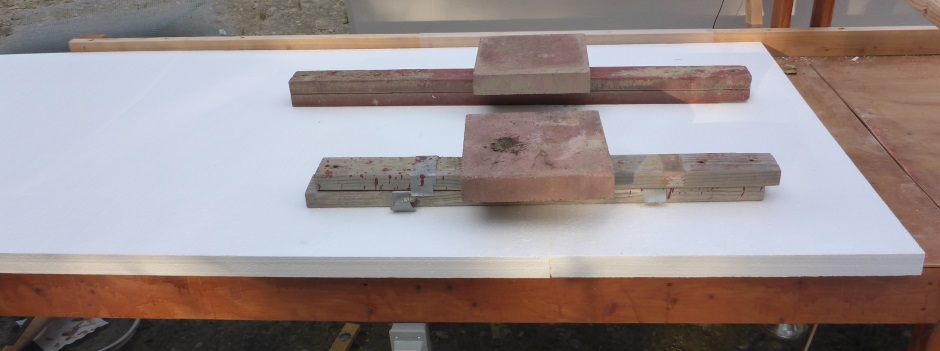
You can make longer pieces of 4' wide EPS by gluing them on the bench. Because the 8'x4' EPS sheets are typically supplied as 7'11-7/8" x 3'11-7/8" there is already an allowance for the width of the foam adhesive.
Glue the longer pieces together in the excavation to form the first layer of EPS.
You can walk on the EPS as long as you walk flat footed with soft shoes. Avoid walking close to the joins because the foam adhesive cannot take much shear force.
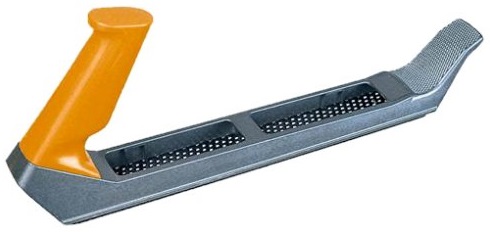
After the glued first layer is dry, use a SurfForm to remove any high spots on the joins and then sweep the whole surface with a stiff broom.
Add second layer of slab 2" EPS
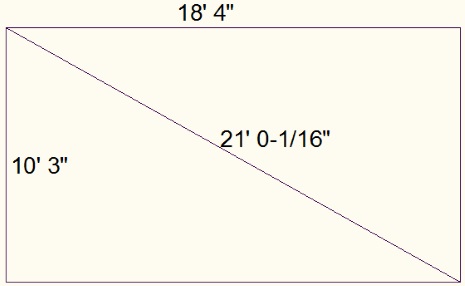
Start by drawing a line from east to west along the back wall, 2" from the edge of the first layer of EPS. I use a self leveling laser with a vertical beam and then make felt pen marks along the beam path that I then join up with a straight edge ruler. Measure the required length per the rectangle shown below (18'4") and put in a short small nail in the EPS to hold the end of the tape measure.

Mark a rectangle on the first EPS layer to show where the second layer goes. It needs to be exactly square so make sure the diagonals are the correct length. Draw an arc that you can then measure the short 10'3" sides to meet.
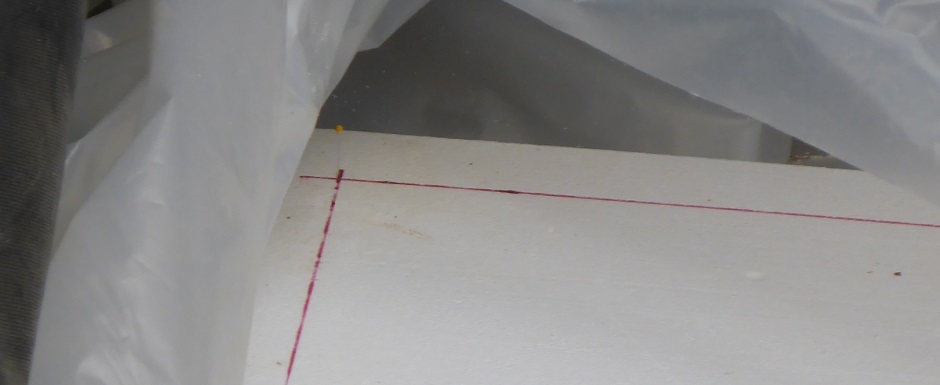
Also mark the east west center point so you know where to fix the first of the EPS for the second layer.
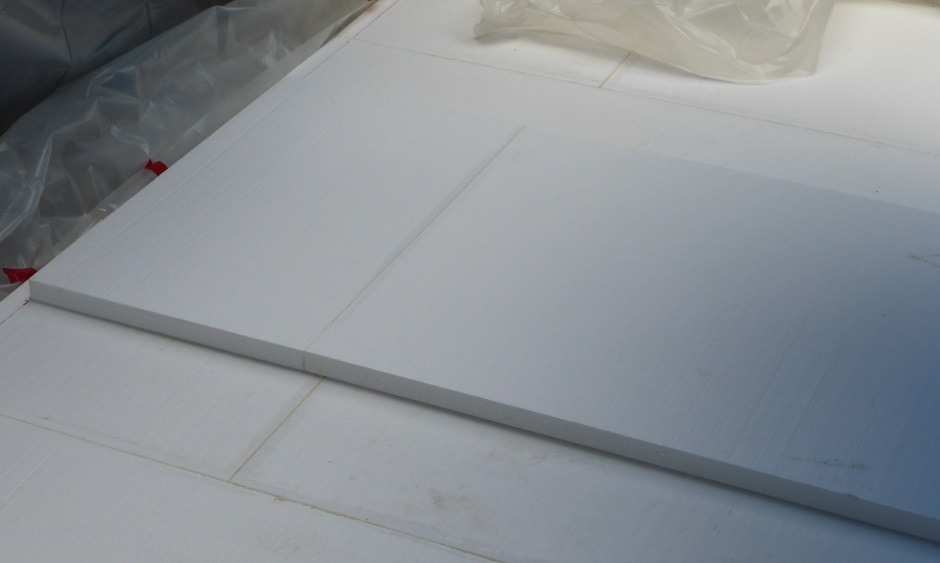
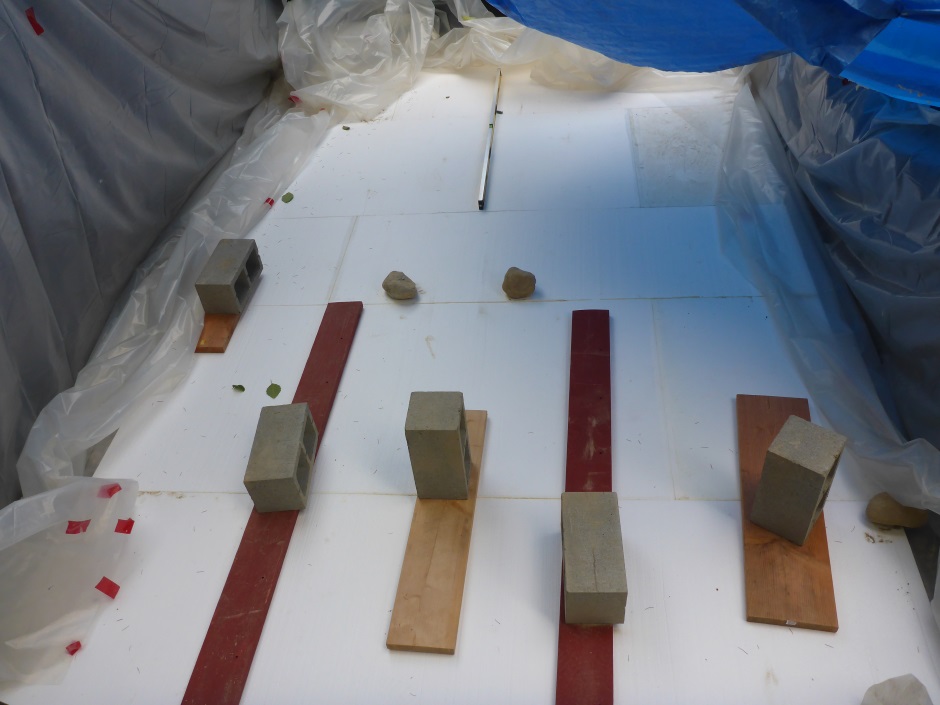
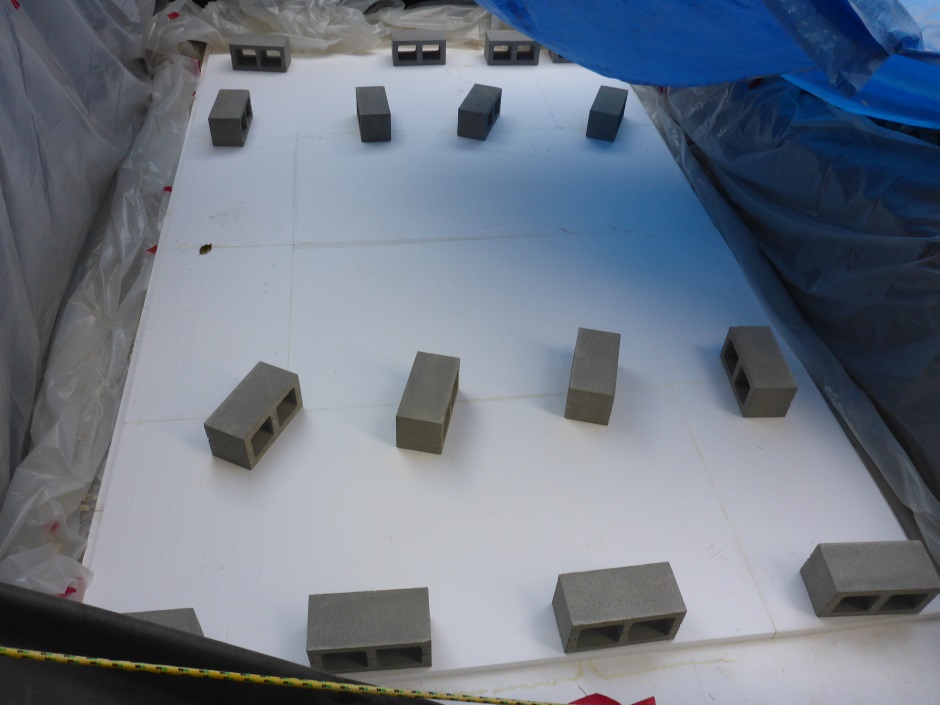
Make 4' wide strips of 2" EPS that are 10'3" long. Make sure that they are exactly 10'3" long (or at least no longer). You also need to ensure the overall width of the second layer is exactly 18'4". The strips run north south and the joins are staggered relative to the first layer of EPS. Use foam adhesive between the two layers. Use concrete blocks to weight it down while the glue is drying.
Check EPS floor is truly level
Use a long spirit level to check that the floor is accurately level. If it is not then the wall EPS will not fit properly and there will also be other cumulative errors. You may need to add some extra drain rock stones or remove some in places to get the floor level.
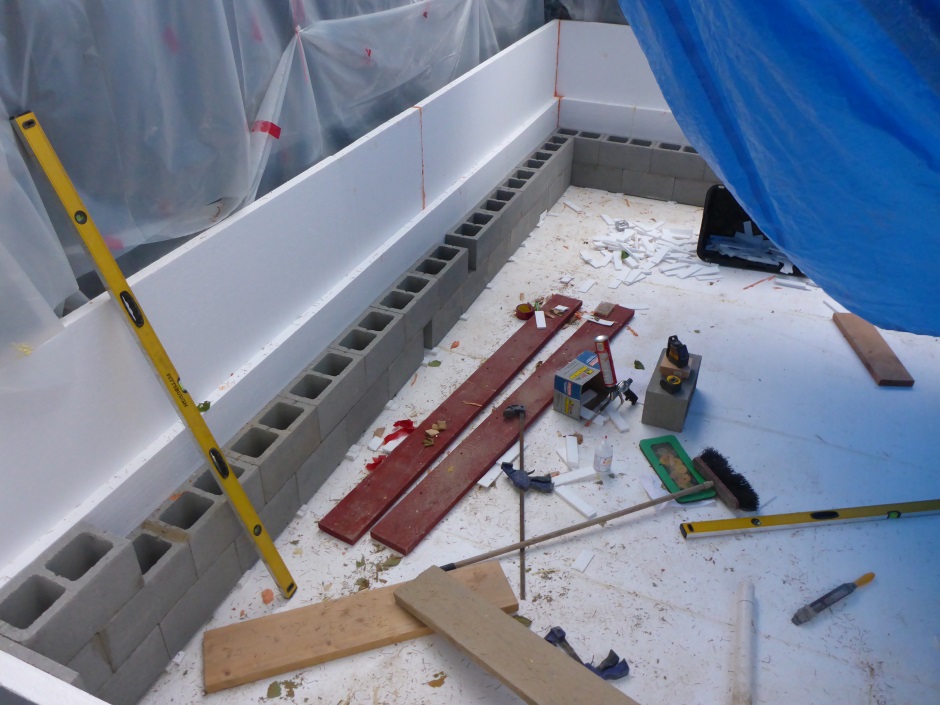
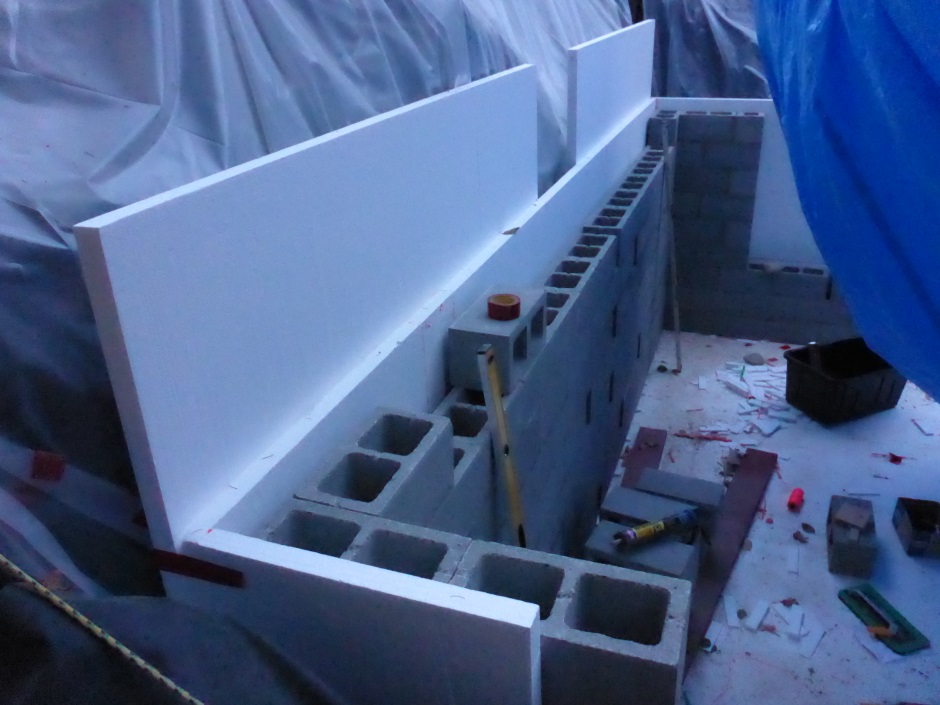
Add first pieces of outer wall EPS
These are horizontally laid and form a 4' high perimeter wall. Use foam adhesive to glue to the lower layer of floor EPS, up against the upper layer of floor EPS. You can use 3" long nails pushed in at the corners while the foam adhesive is drying. You may need to push a few suitable items behind the EPS to ensure it is tight against the upper layer of floor EPS.
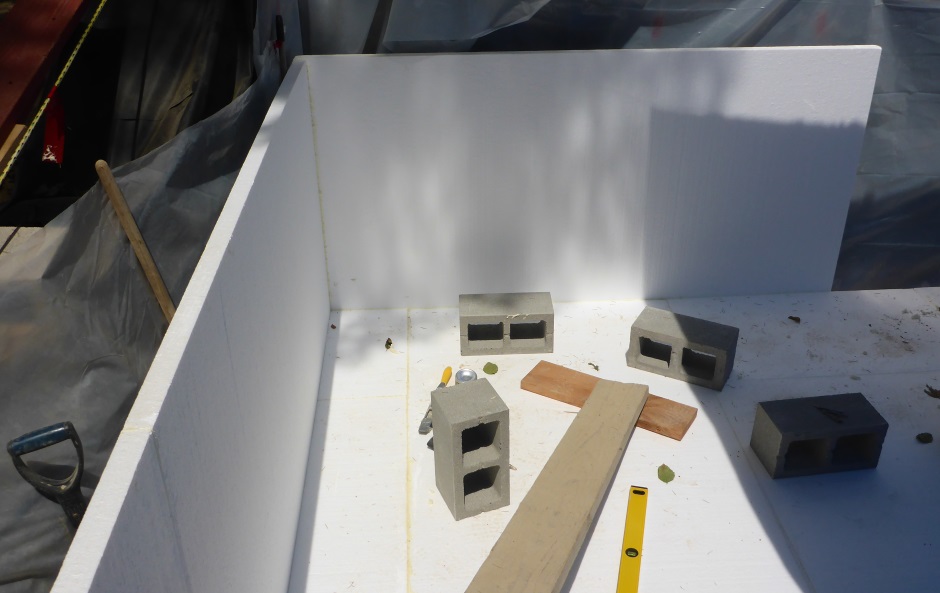
Mark rectangle for inner wall EPS
This is the join between the inner face of the inner wall EPS and the concrete blocks. Draw this rectangle on the second layer of floor EPS accurately with a sharpie felt pen.
The inner wall EPS starts with a 2' tall 4' wide piece. Subsequent pieces are also 2' tall for the pieces on the floor. This is all to ensure the joins are staggered. The north south pieces are 9'11" x 2' and can be made ahead of time on the bench.
Use foam adhesive between the EPS sheets (you just need a small amount in a snaked small bead).
As you build up the wall height you will add more EPS, but it does not have to be ahead of the concrete blocks as long as you are sure you still have access to fit it.
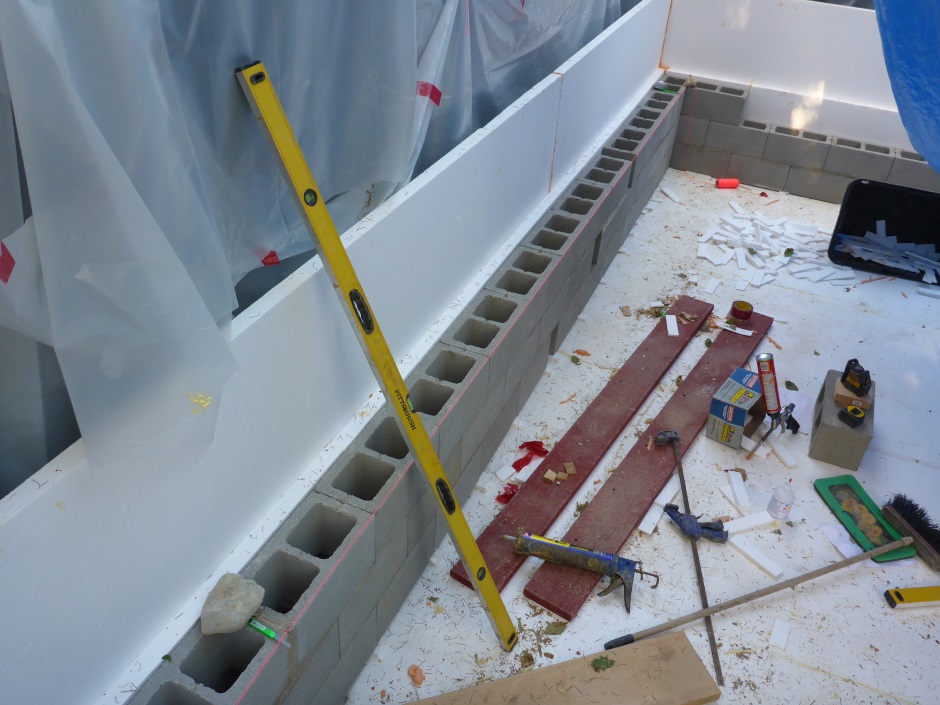
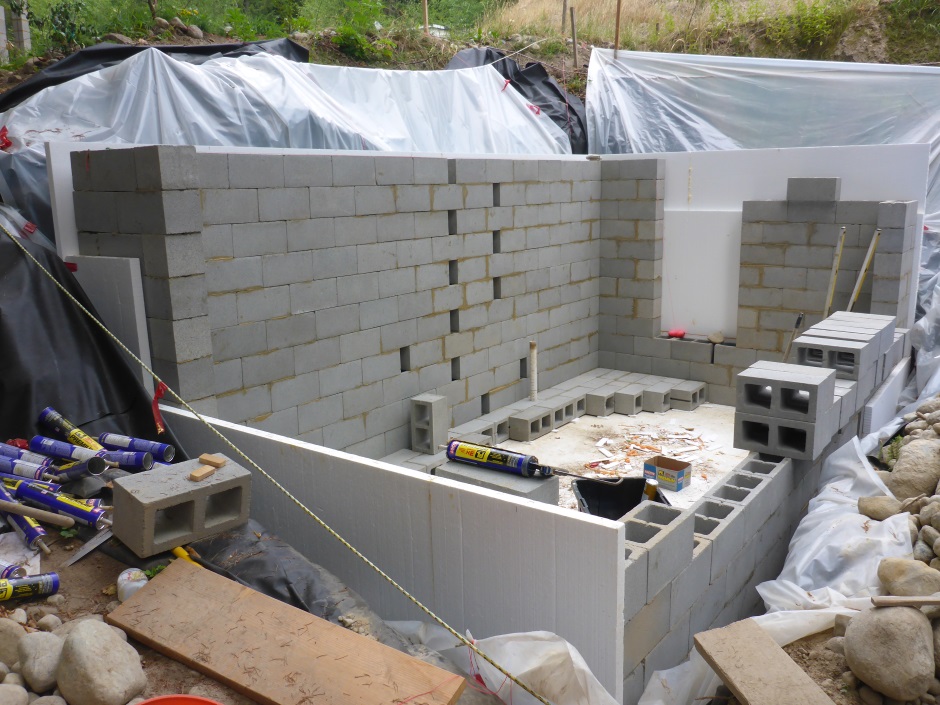
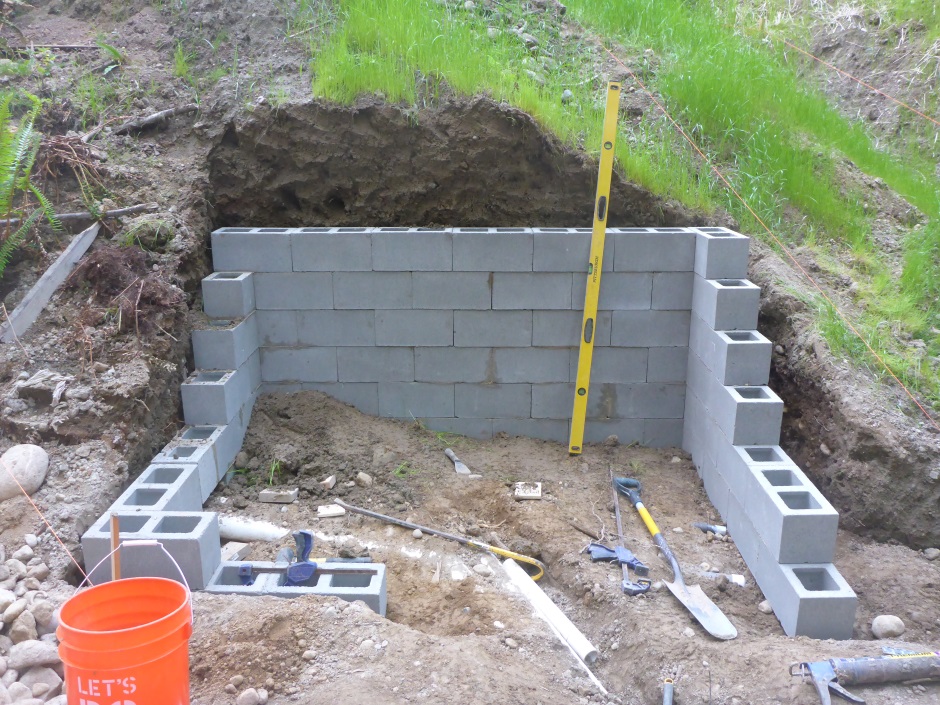
Install first concrete blocks
Even with your best efforts to get the floor level it is likely that the polystyrene EPS floor is not actually exactly level. You need to use EPS shims to get all the blocks to the same level.

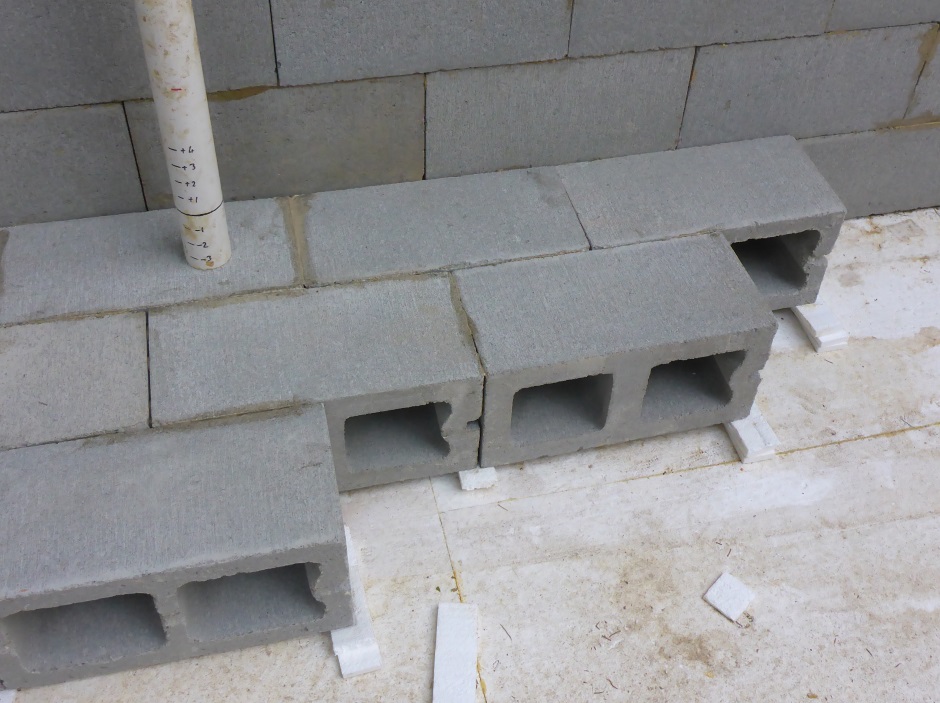
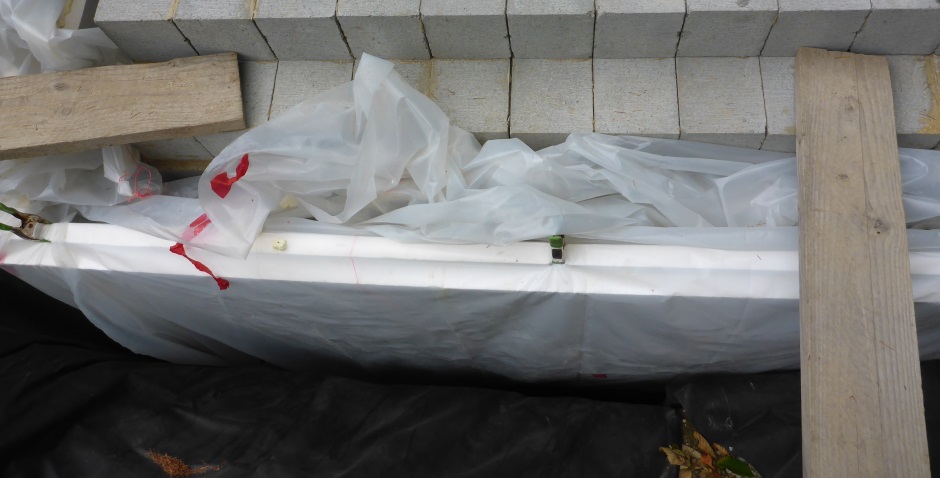
Start by setting up a level platform for a self leveling laser in the center of the floor area. A length of 2" white PVC pipe with sharpie felt pen markings is used to determine the level to the top of the blocks. Set the required reference level such that a concrete block on the highest part of the floor EPS is at the correct level without any shims.
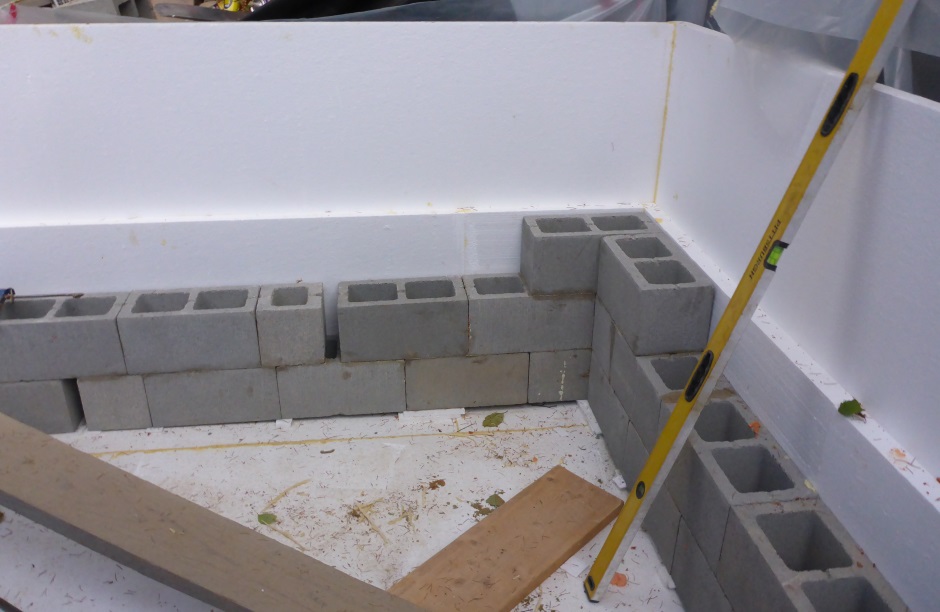
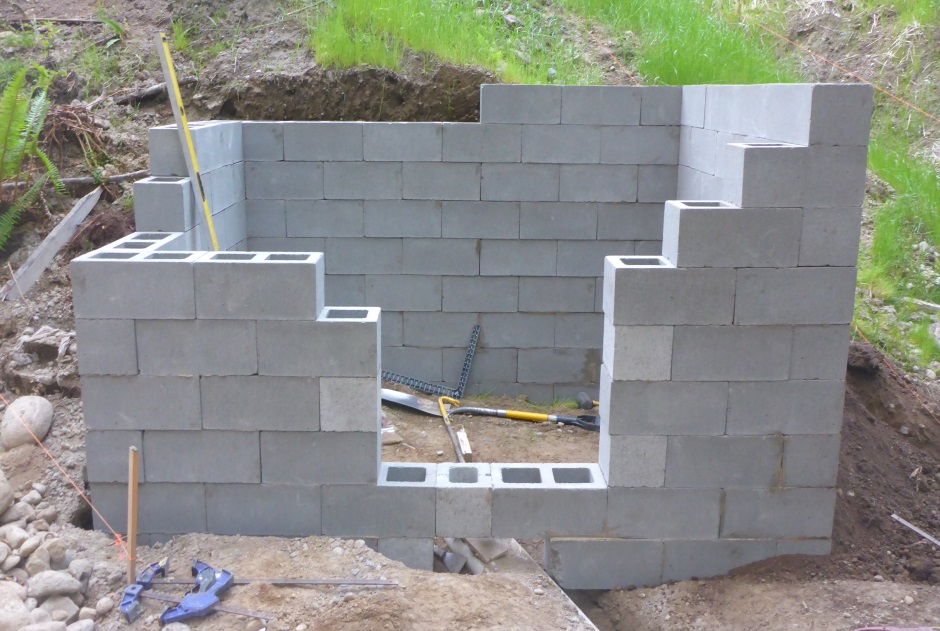
Add concrete blocks at the corners first and work towards the center of the wall. Somewhere in the center of the wall there will be a gap that is too small to be filled by a concrete block, even a single width concrete block.
On the second row of blocks, the gap will be offset such that the integrity and strength of the wall is not overly compromised. The gaps can be useful for getting services (eg electricity and water) into the building.
The blocks are glued together using PL-Premium adhesive. Use say 15 small blobs of adhesive at the block end and a small bead along the top edges of the block underneath.
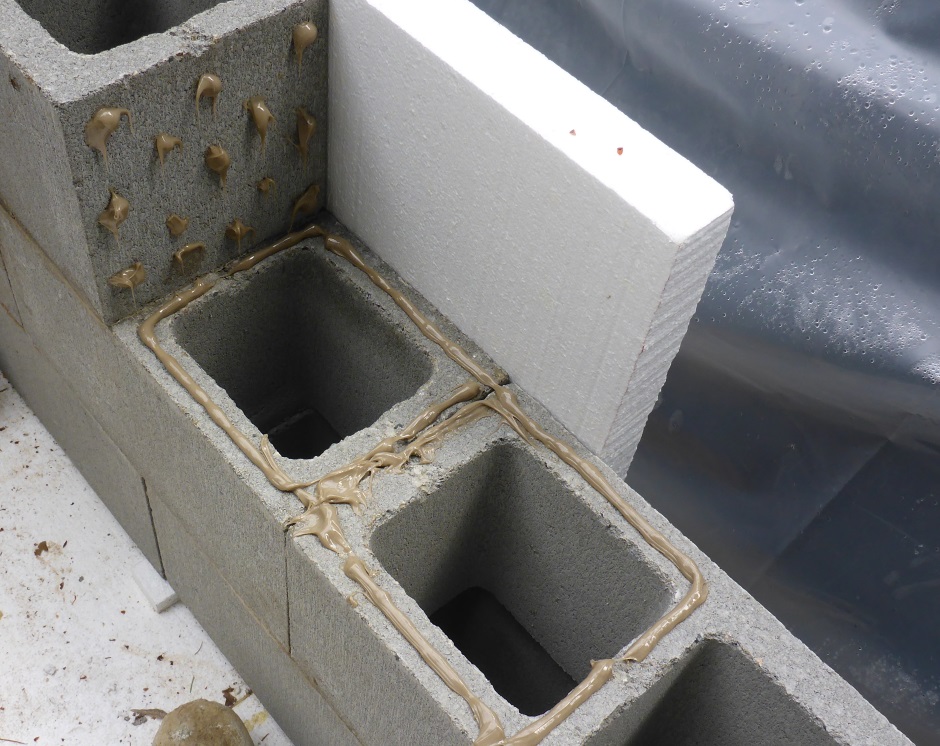
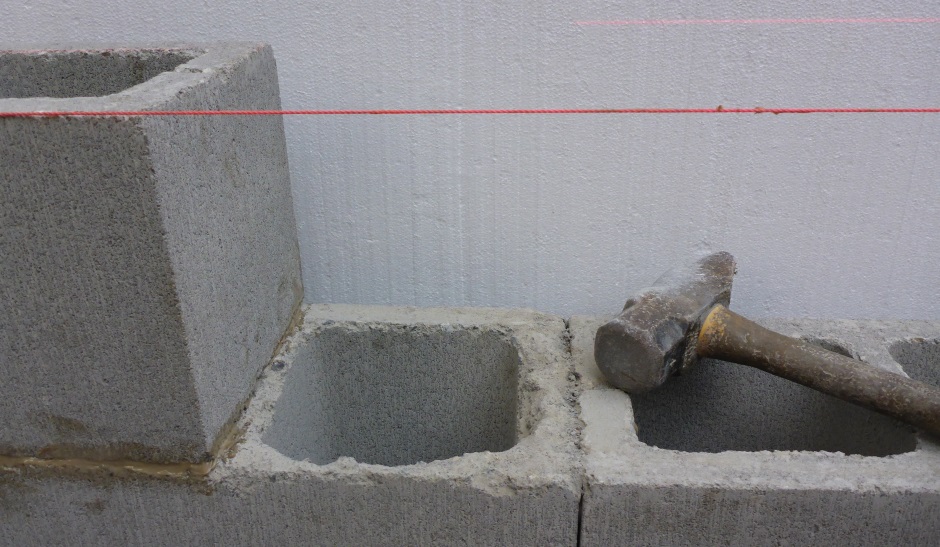
I use the convention of always having the widest face of the block downwards. You need to de-burr the top (thinnest) face of the block with a hammer because sometimes there is excess concrete high spots after the block comes out of the mold during manufacture.
Typically the wall EPS will have been implemented before the concrete blocks, but you can add the first couple of rows of blocks ahead of the EPS as long as you accurately align then with the drawn line of the wall rectangle.
On the first row of wall blocks the focus is on getting the blocks all the same level (using a self leveling laser) and making sure they are against the polystyrene or on the line if the EPS has not yet been fitted.
For the second and subsequent rows the focus is on making sure the wall is exactly vertical (using a long vertical spirit level) and that the wall is straight.

There is no point in trying to get each row level as the blocks just sit on each other and do what they want. Only when the wall is full height will you correct for levelness with a layer of mixed concrete. Occasionally as you build up the layers you may get a high spot such that the blocks above do not sit right and it is not a bad idea to try to chip off the high spot with a pointed ended club hammer.
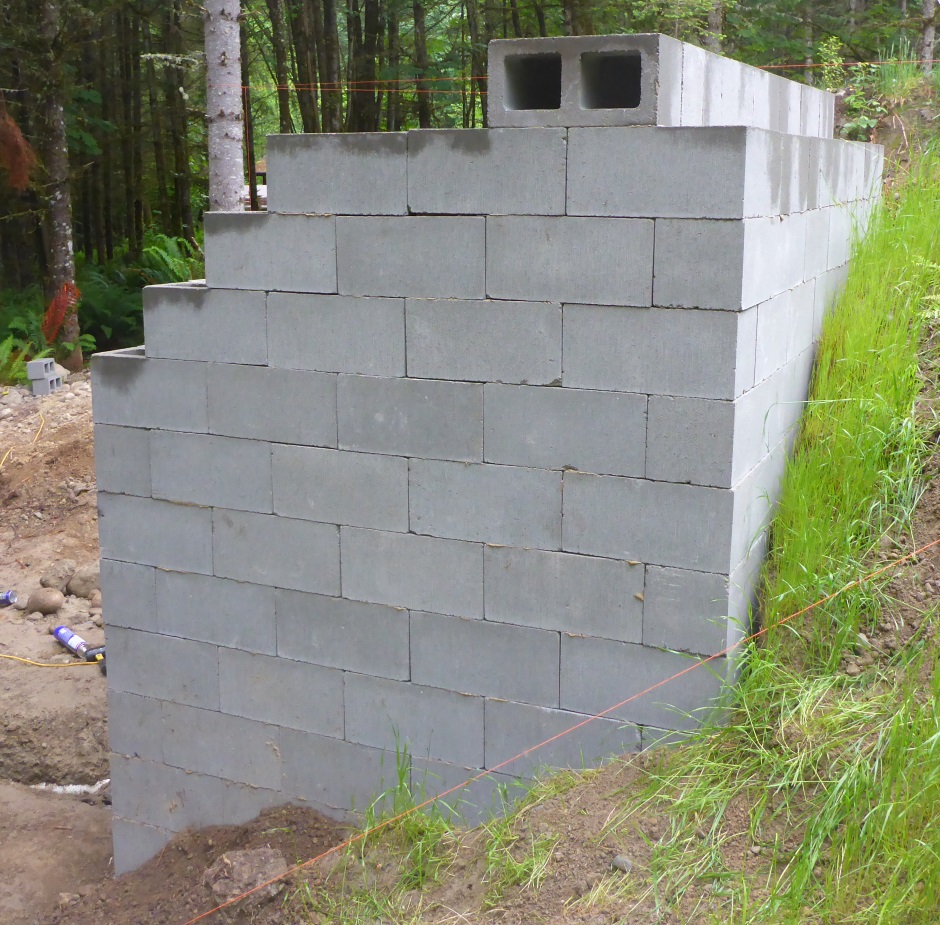
To get the wall straight you need to for each row implement the corner blocks first and then stretch a taught string along the wall about an 1/8" above where the blocks will be. I use a couple of small long bladed knives to raise the string up the 1/8". As you add each block check that the string has not been knocked out of alignment and then position the block edge to be at the string.
Keep building up the wall with both concrete blocks and the EPS sheets on the outside.


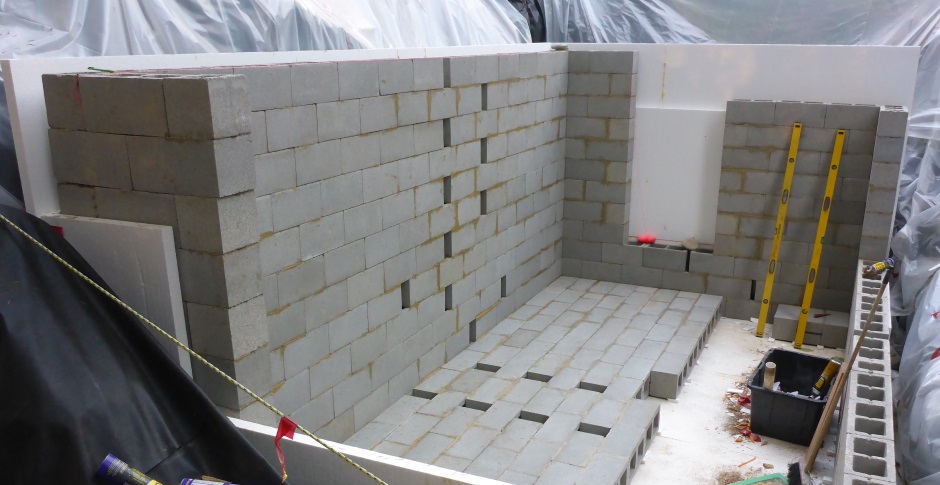
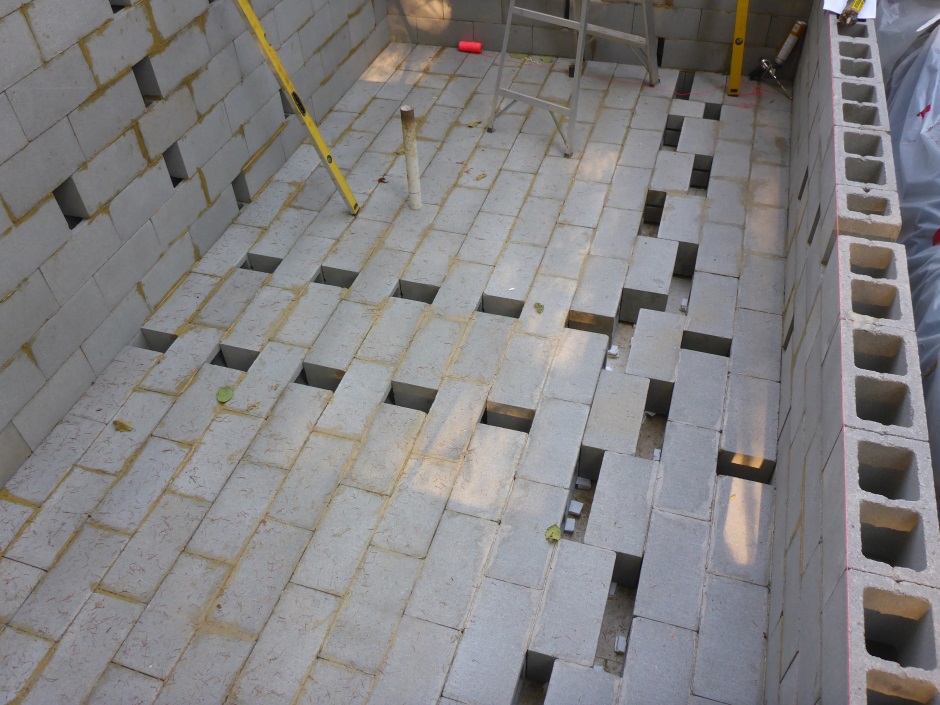
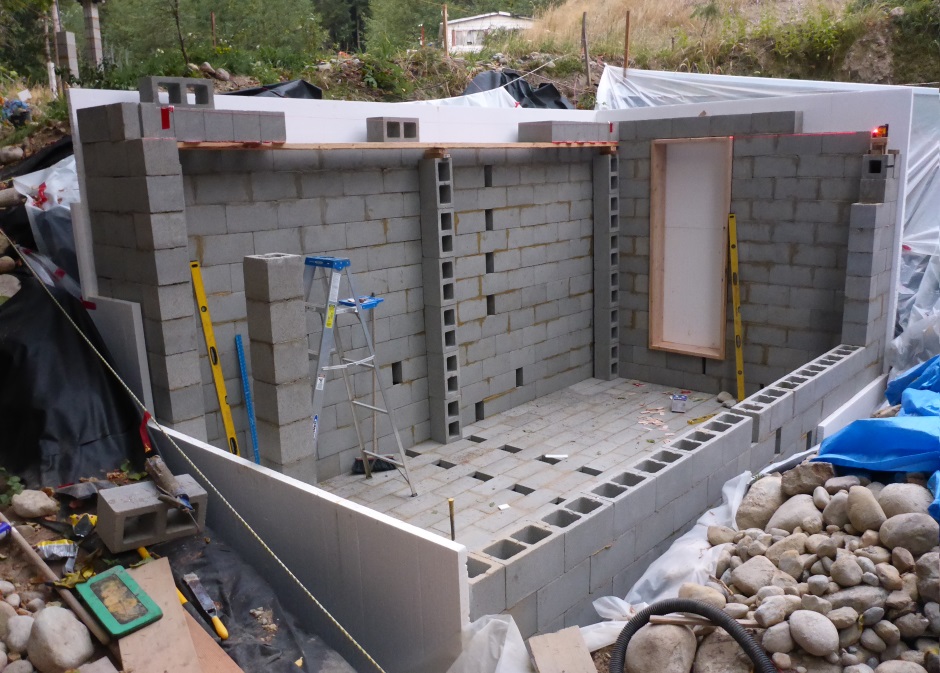
Concrete floor
The floor is also done with concrete blocks. EPS shims are used to get each block the same height (using a self leveling laser and a white pipe with markings). The floor is started in the corners and you work towards the center adding blocks. Using a brick pattern is important to span the gaps in the floor that will be left in the centers. Use some half sized blocks to produce the overlap brick pattern.
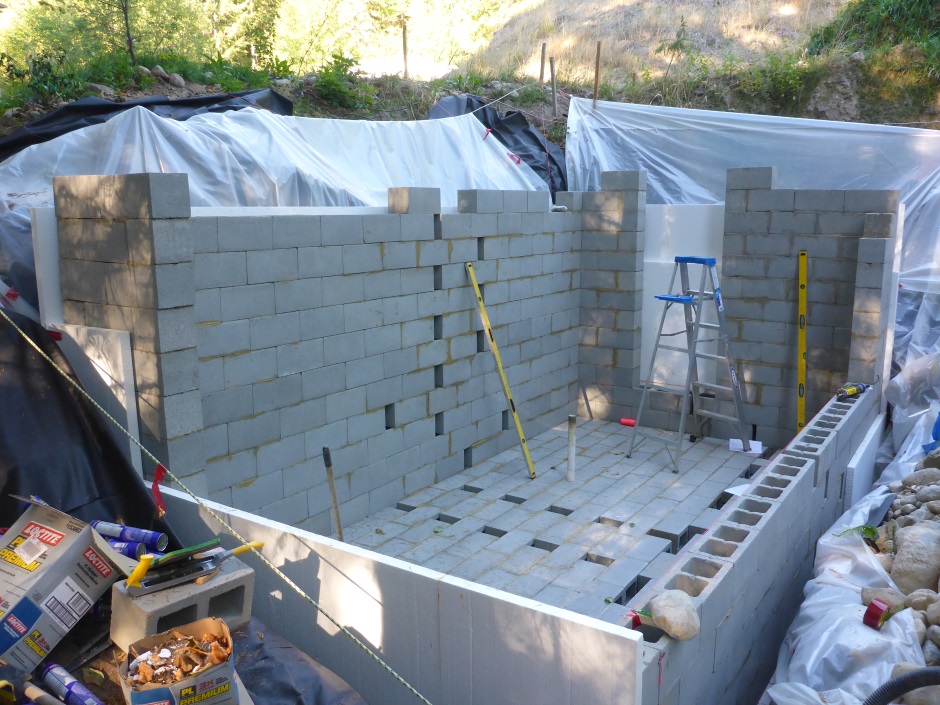
When adding the last row of blocks on the back wall you need to get the top of the wall accurately level. Start by dry fitting the blocks along the top row. Setup a self leveling laser level at a point corresponding to where the top of the lowest block in the last row of blocks will be. Other blocks will be slightly higher so you need to use a hammer to chip away at the top of the block below to reduce the height of where the block above will end up. You also need to set a string as with other rows to get the blocks straight along the wall.
Roof

Backfilling
Doors
When building up the concrete blocks don't forget about the doors. These should be shown on your CAD drawings. At the opening, check with a long spirit level that the blocks for the opening are exactly vertical. You will need to use some half sized concrete blocks to break the brick pattern. There will likely be a gap between the half sized block and the regular double sized block because the half sized block is an extra 3/8" smaller. Make sure you never position the blocks such that they protrude into the door opening area, so that means you need to add the blocks at the opening ahead of other blocks, even ahead of the corner blocks.
Concrete Block Rain Shelter
My particular design
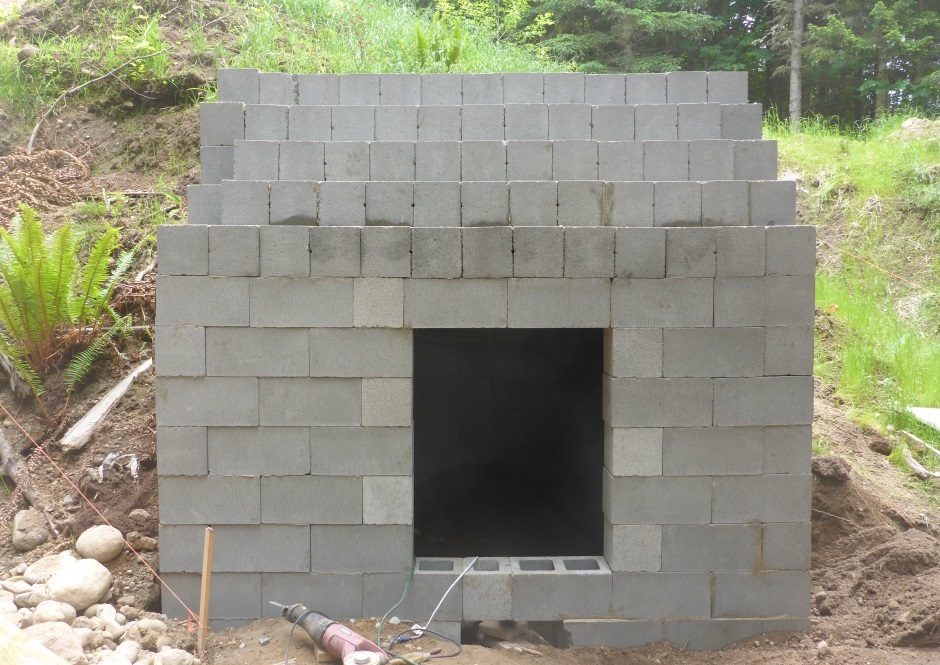
You can do the design however you want, but here are the drawings for my particular rain shelter shed for the rain pumping gear. I made the door small because I wanted the shed to be well hidden and cave-like. It is completely covered in soil with a rock wall on the visible side. You crawl through the rock wall to get inside. It has a concrete block roof that is covered in soil.
Get the soil level
With a spade and some manual labor, get the soil level. Use a self leveling laser to accomplish this. I typically use a section of white PVC pipe with a line drawn with a felt pen at the height that the laser beam is at. The bottom of the pipe is the required standardized soil level under where the wall will go.
Mark the rectangle on the soil
This is the outside edge of the concrete blocks and should correspond to your drawing. Mark this accurately on the level soil floor. This is can be done using nails at the corners with tight string between them.
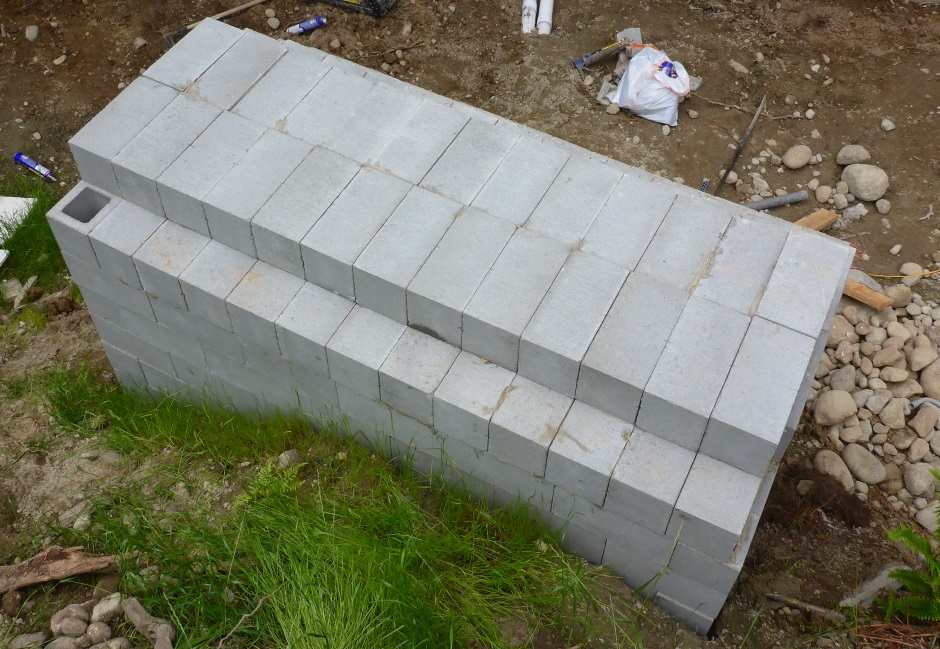
Building up the blocks
The first row is done by gluing the ends of blocks together. Use a self leveling laser to get them all the same height. Use shims or stones (or whatever) to get the blocks all the same level. Start in the corners and work towards the center of the wall (where the gap will be).
As you add each block on the subsequent rows, use a long spirit level to check that the wall is vertical and adjust the block position as needed. Use a taught string at each row to get the wall straight.
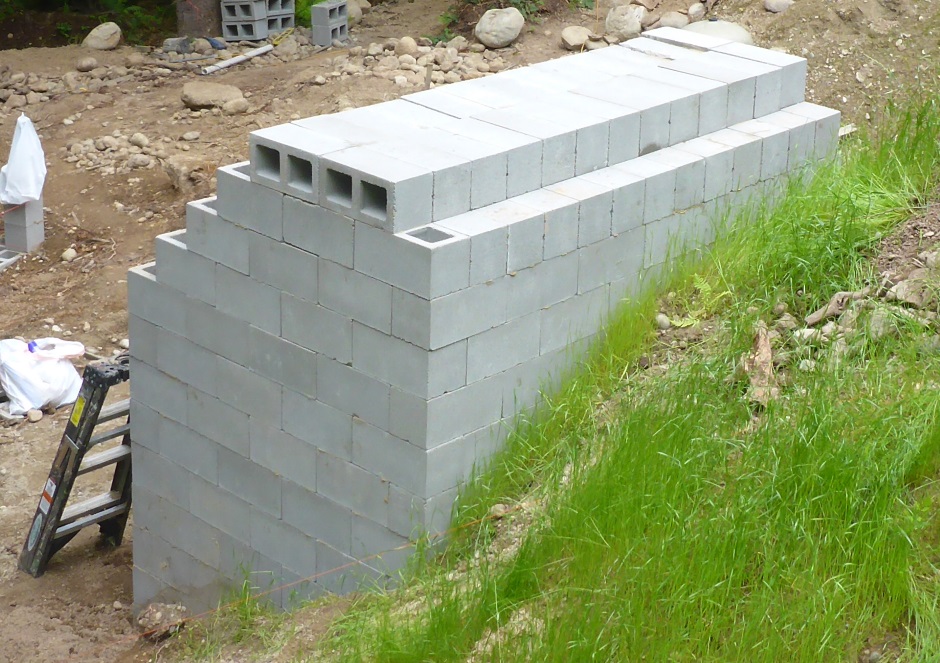
When adding the concrete blocks for the roof, these are cantilevered. Use extra blocks as a weight on the overlapping end while the glue dries.
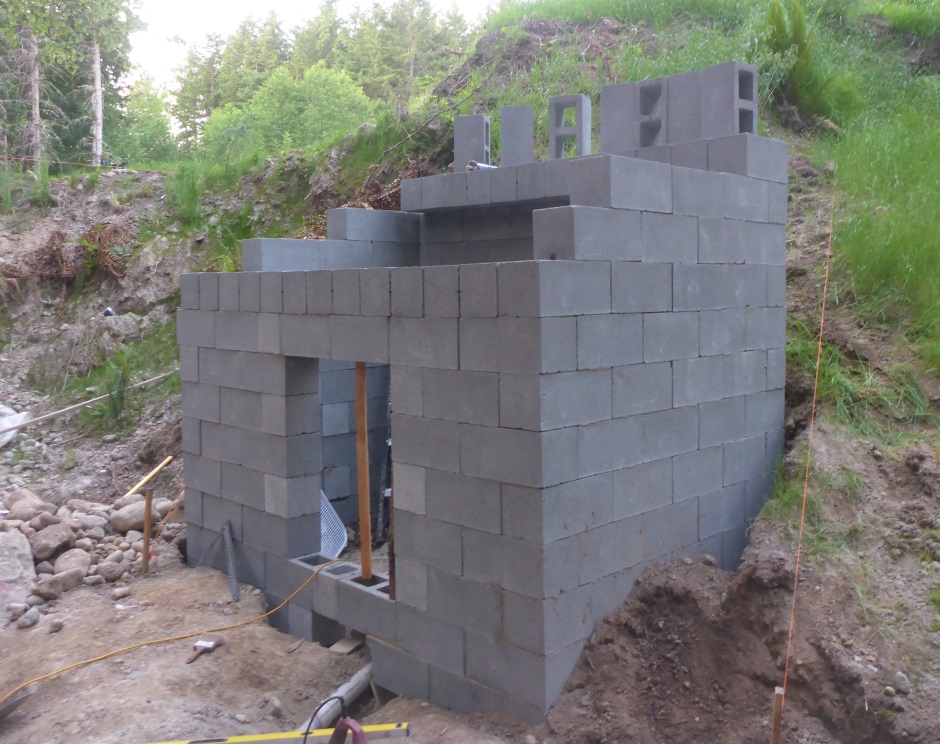
The roof blocks are turned sideways so you have continuous concrete over the roof area.
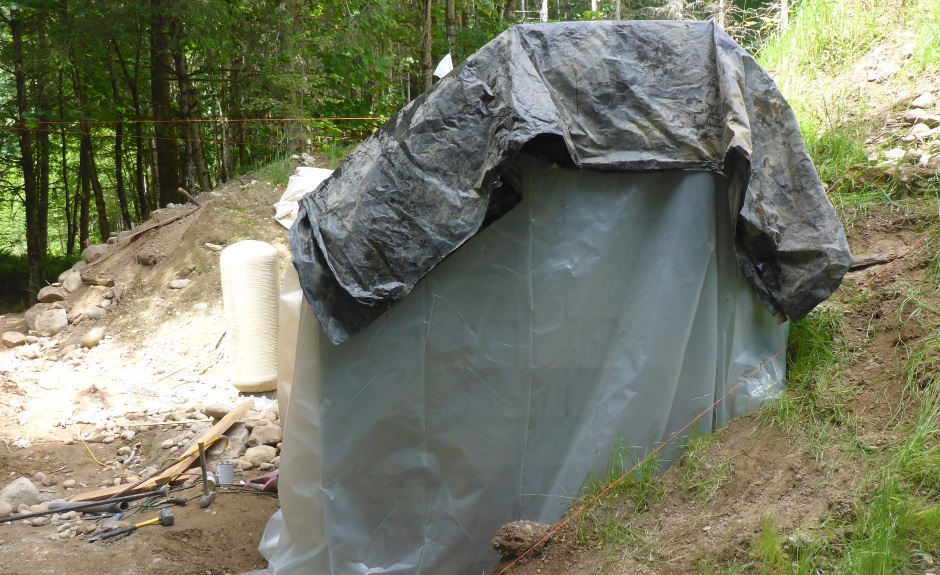
Covering roof with waterproof sheeting
For the first layer, just use anything (that will not rot) that you happen to have lying around to provide a bit of padding over the rough sharp edges of the concrete blocks.
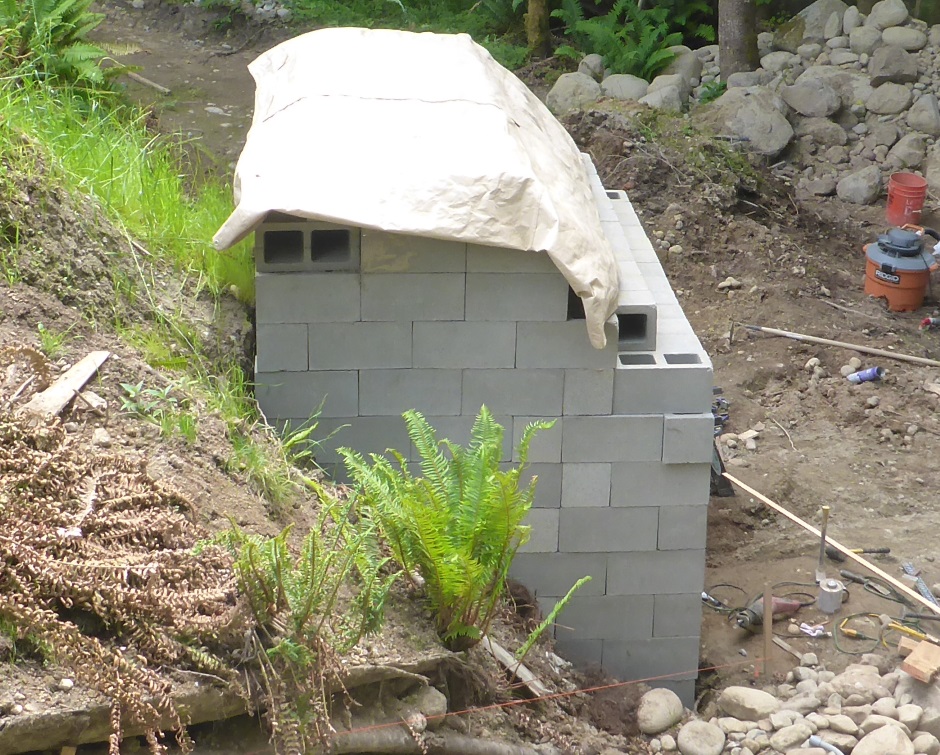
Then add some 6 mil polyethylene sheet.
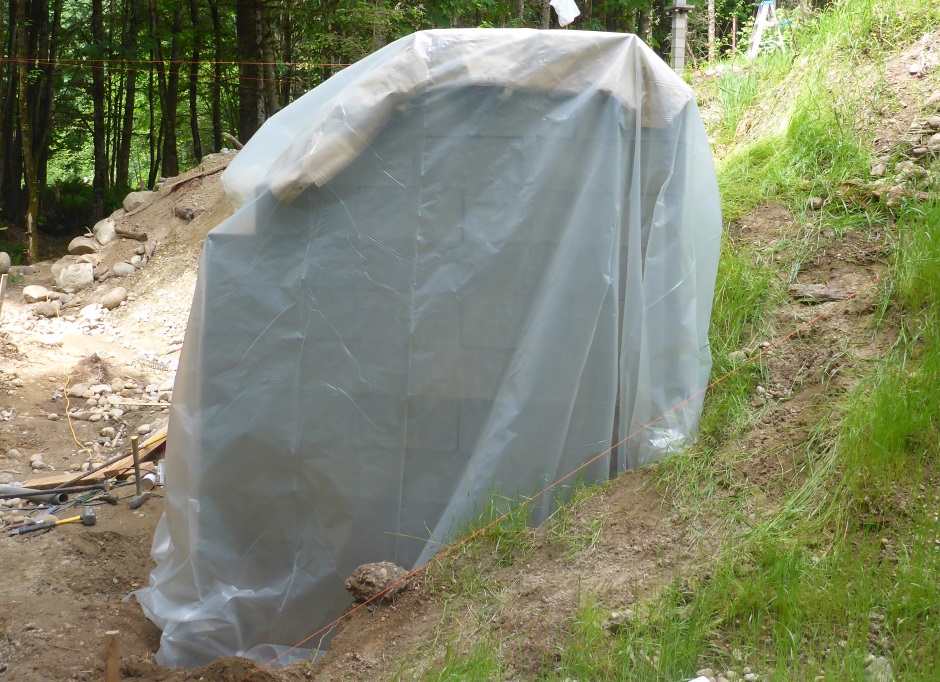
Over that put anything (that will not rot) to help prevent the polyethylene sheet from being punctured by sharp rocks.
Covering with soil
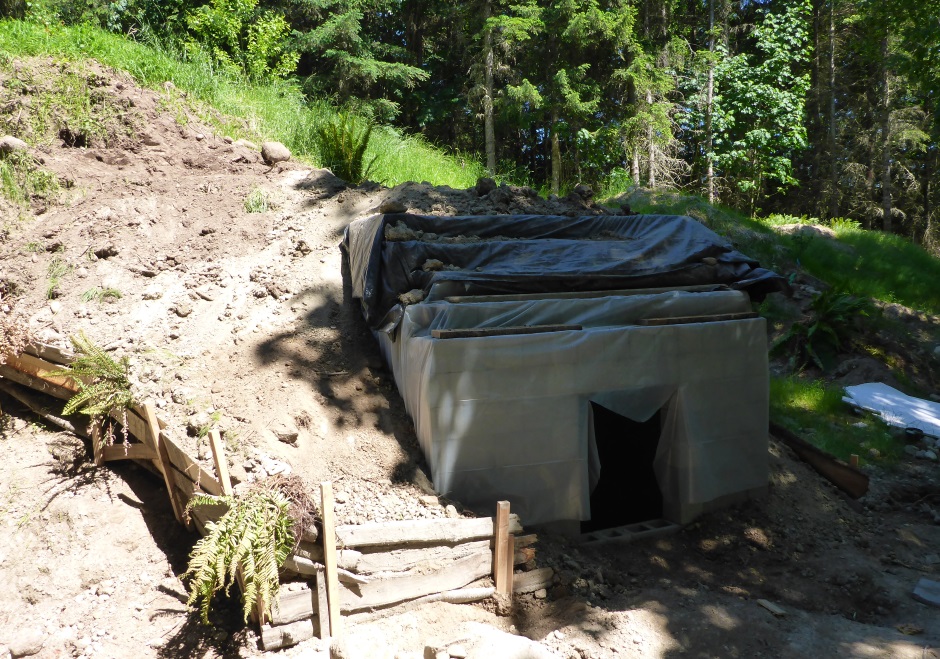
Adding a rock wall
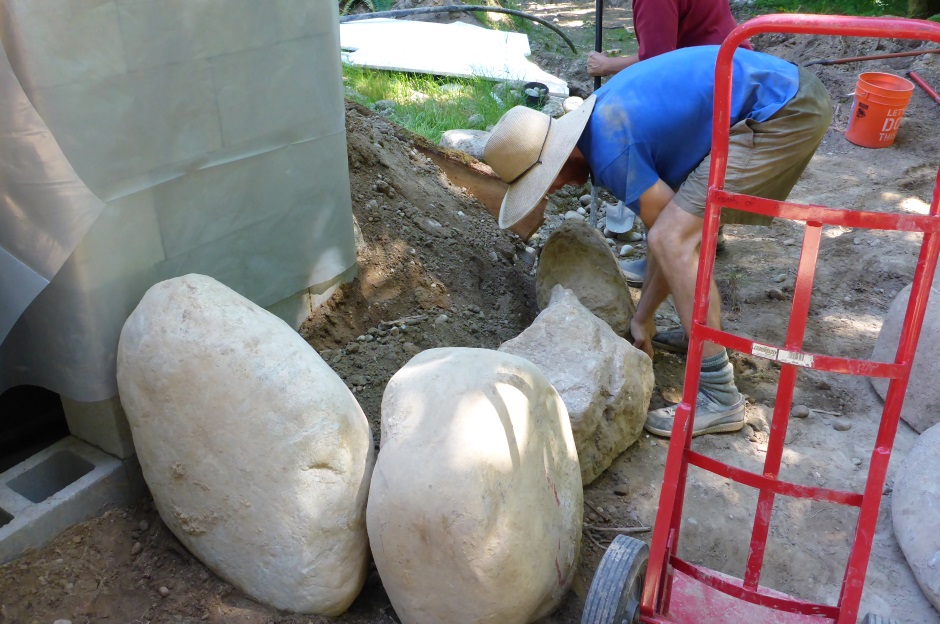
As you build up the rocks you can add additional soil.
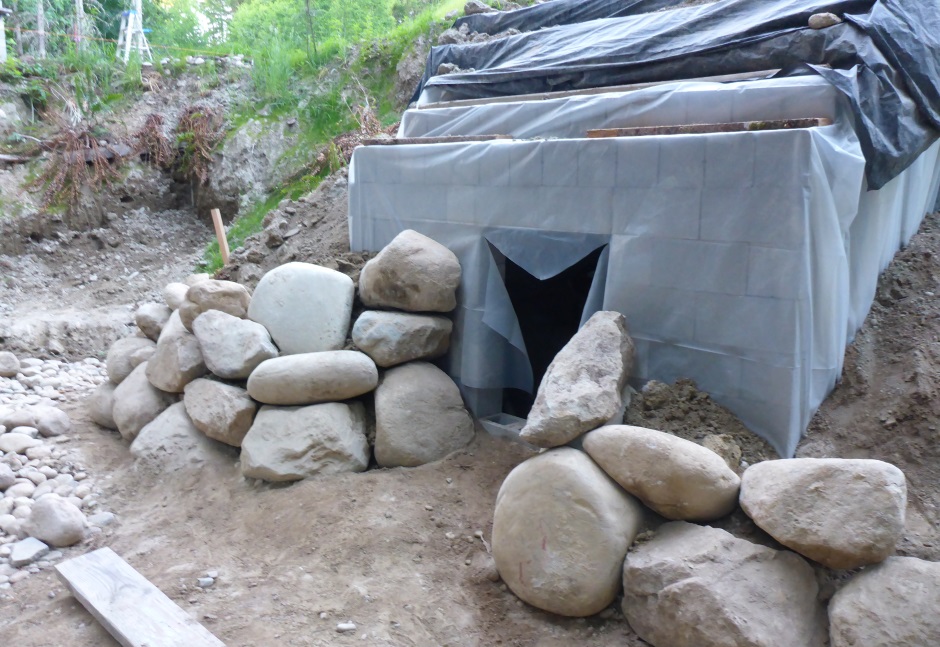
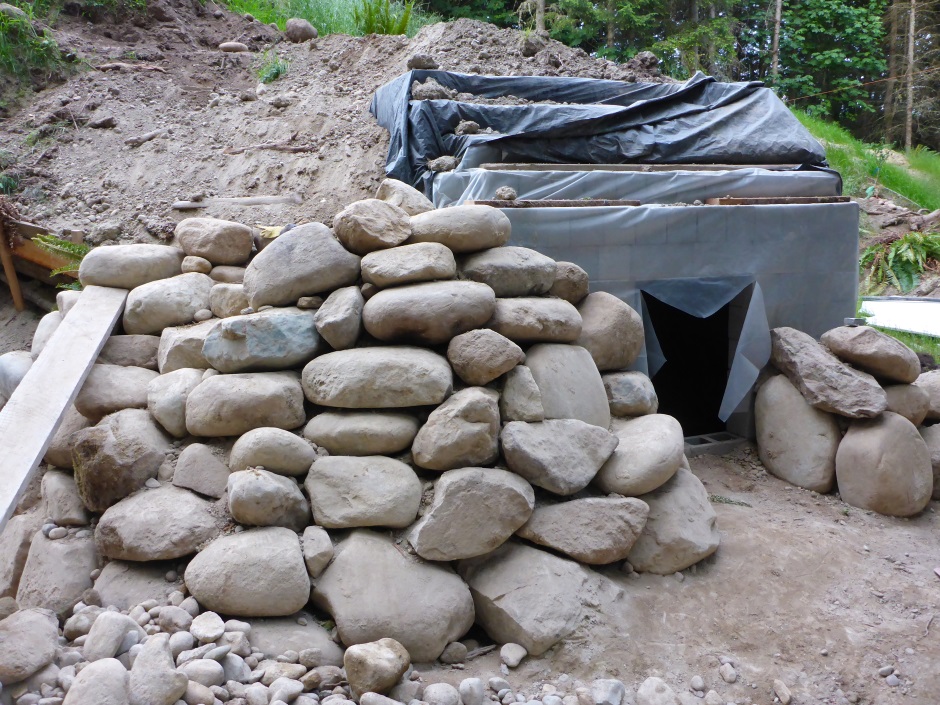
Adding a door
Making the inside look nice
Optionally if you care use stucco mortar (or potentially even regular bagged concrete) on the walls inside to hide the irregularities of the concrete blocks.