


Home Site Map - Techniques - Structure -
Carnation Walling - Vertical Batons
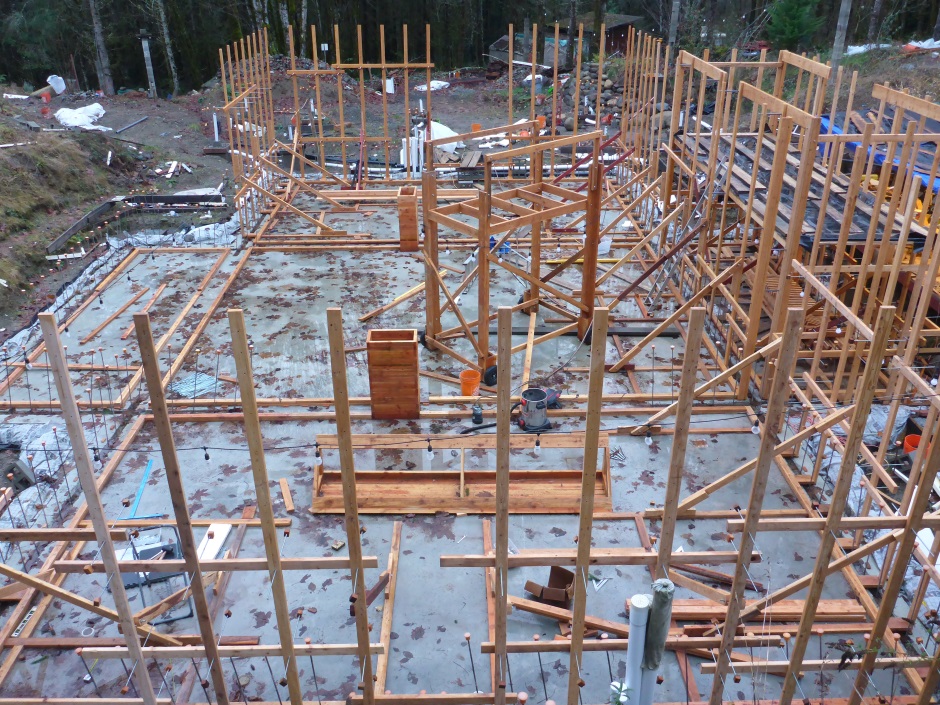
![]() Make and install the internal bracing for the walls.
Make and install the internal bracing for the walls.
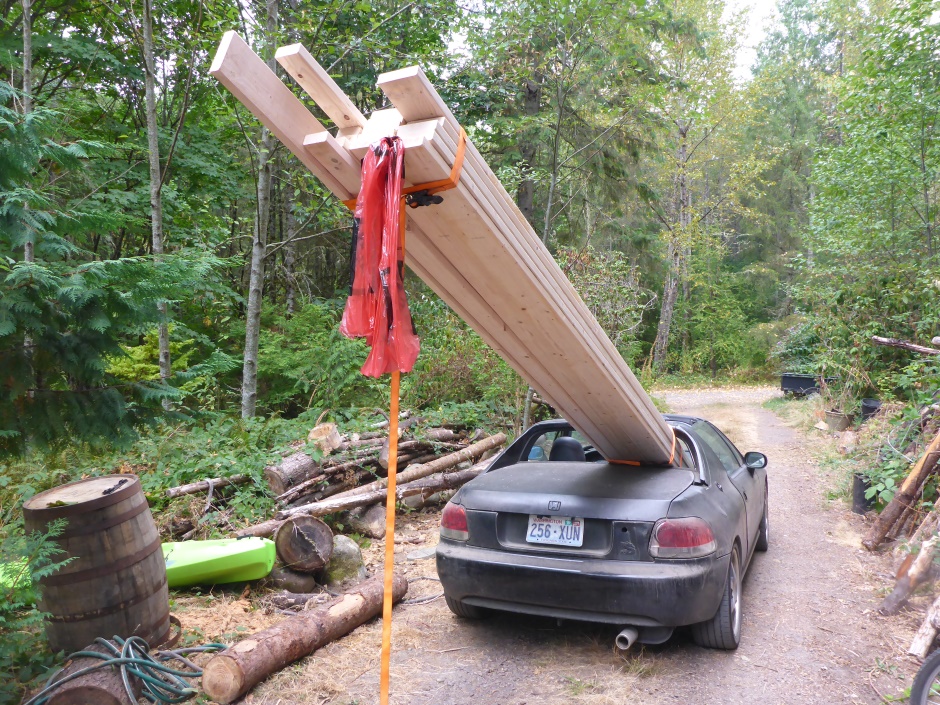
Make Vertical 2x4 batons
The length of inner batons batons should be...
House story height - 1' 11-1/2"
For the inside, you need them to be the right length to support the Carnation Flooring so it works out best if you start building with the highest ceiling areas (ie the basement) and then cut the batons shorter when you re-use them on other house levels.
For external batons, the length is the House Story Height, eg 16' for my basement.
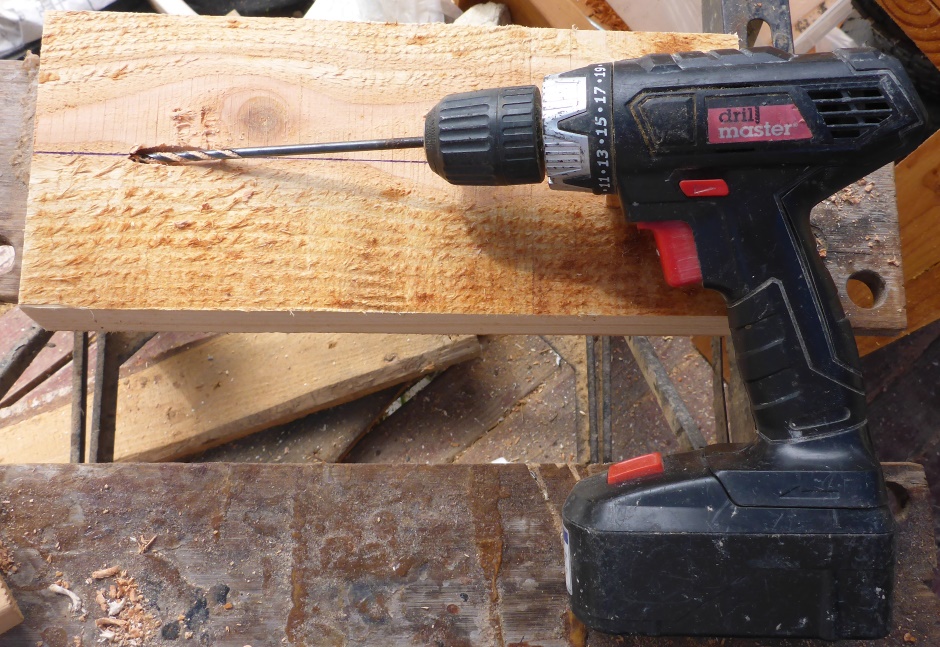
They need to have pre-drilled 3/8" holes for all the possible wall ties.
Ideally buy good straight pieces of 16 foot 2x4, but you can tolerate slightly banana shaped pieces as long as the warping is only slight.
Draw lines right the way across to show which holes are primary holes, ie the X'9" holes. Use small mark lines for the X'3" holes.
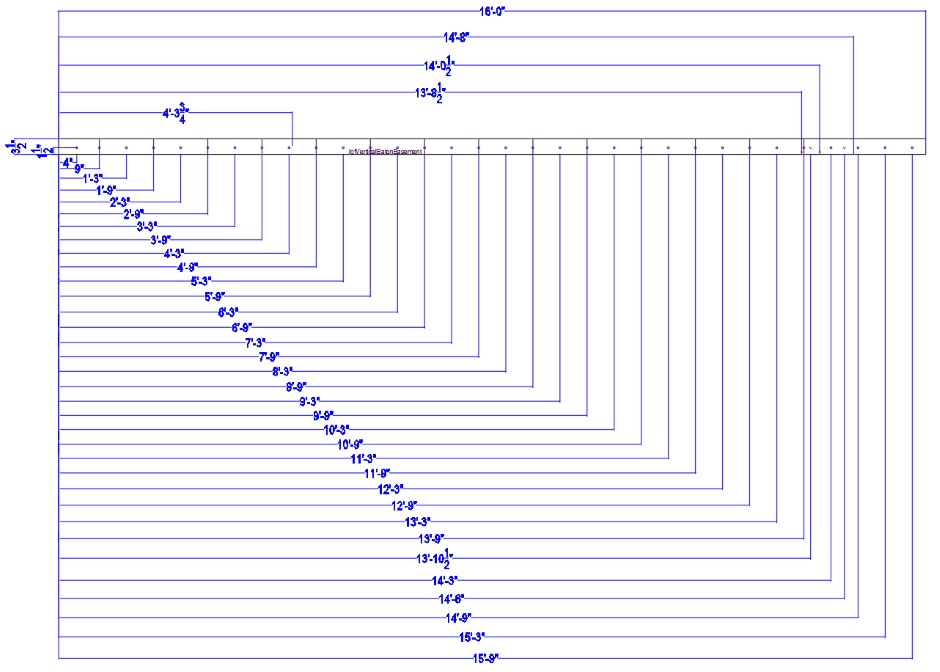
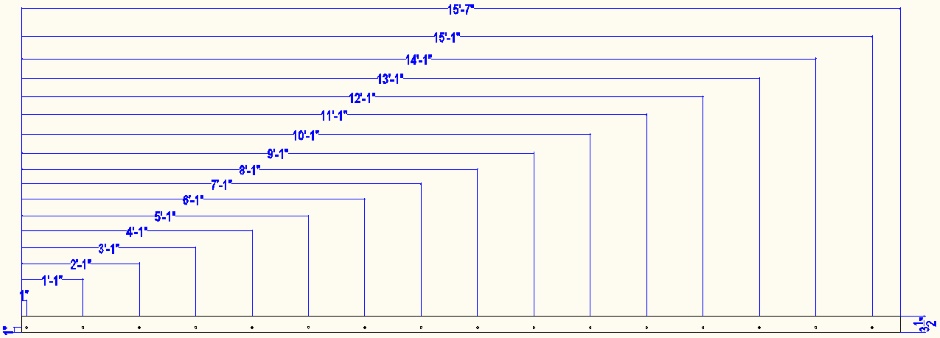
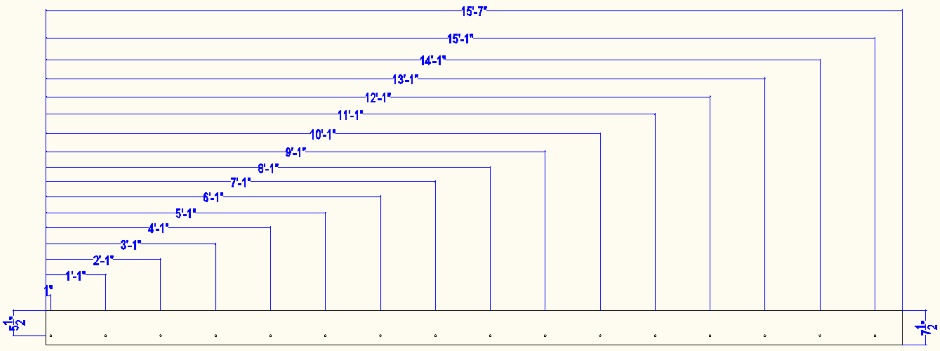
The face-on 2x4s have 3/8" holes for 3/8" threaded rod. These are positioned from the bottom at 4", 9", 1'3", 1'9", 2'3", 2'9", 3'3", 3'9", 4'3", 4'9", 5'3", 5'9", 6'3", 6'9", 7'3", 7'9", 8'3, 8'9, 9'3", 9'9", 10'3", 10'9", 11'3", 11'9", 12'3", 12'9", 13'3", 13'9", 14'3", 14'9", 15'3", 15'9".
Note that the first hole is at 4" (rather than the 3" you would expect. This is necessary to handle the variations in slab flatness height.
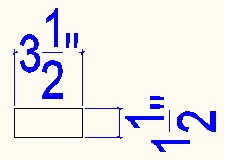
Put the holes 1.5" from the outer edge, except for the "right in the corner" case where the holes are centered (ie 1-3/4" from the edge). Make about half the batons measuring the 1.5" from one edge and half from the other edge, although aside from the markings it does not really matter as they are reversible.
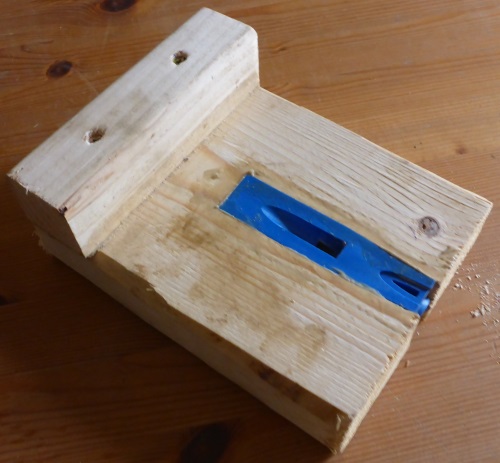
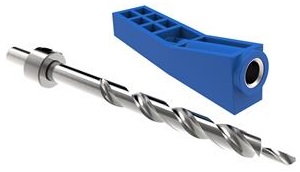
Use a drill press to get the 3/8" holes square and perpendicular. It is convenient to use a Kreg stepped shoulder drill to avoid having to drill a pilot hole.
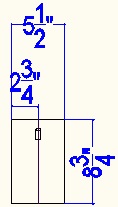
Put a mark at a height from the bottom of 4' 3-3/4" so if you need to add angled bracing you will know where it goes. This figure is half an inch lower than you might think in order to allow for the fact that the slab will average about half an inch lower than the theoretical reference height. This line will align with the bottom of the edge-on 2' long 2x4 piece.
Put a mark on the bottom end to show the position of the column of holes. This is used to align the bottom with the 1' marks on the kicker board.
Try to use straight 2x4s but if they are slightly warped then make them bow towards the concrete (put the markings on the concave side). This is just for consistency and in practice the wood will get held straight by the surrounding bracing.
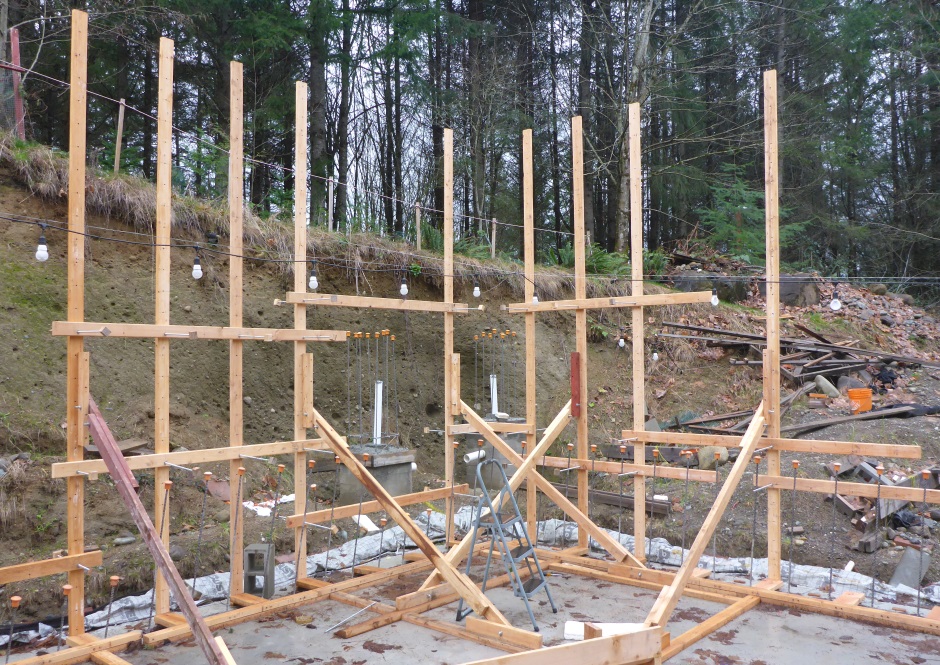
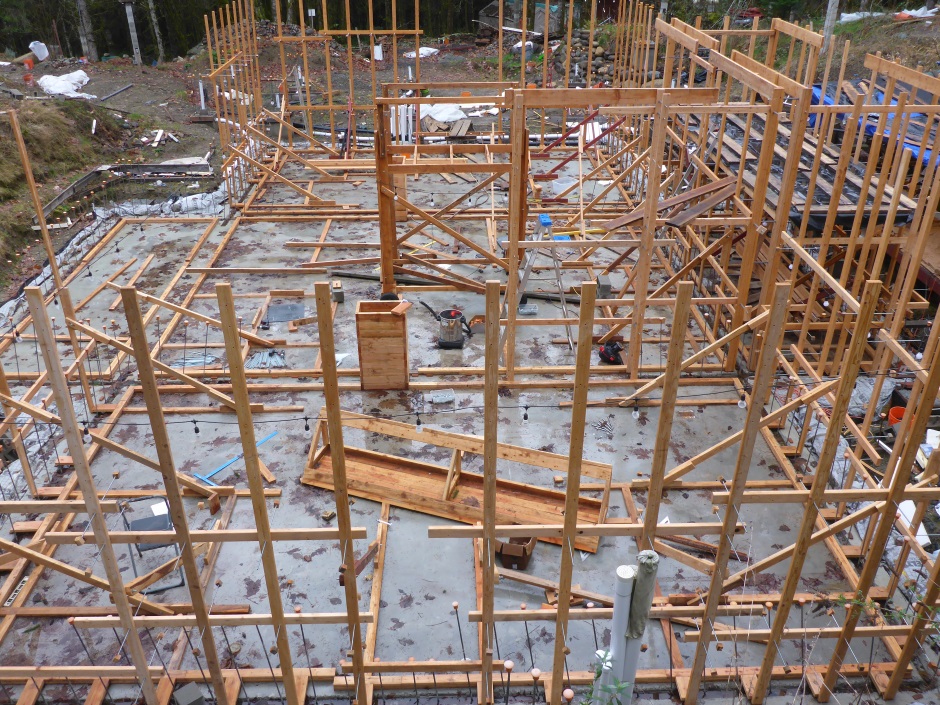
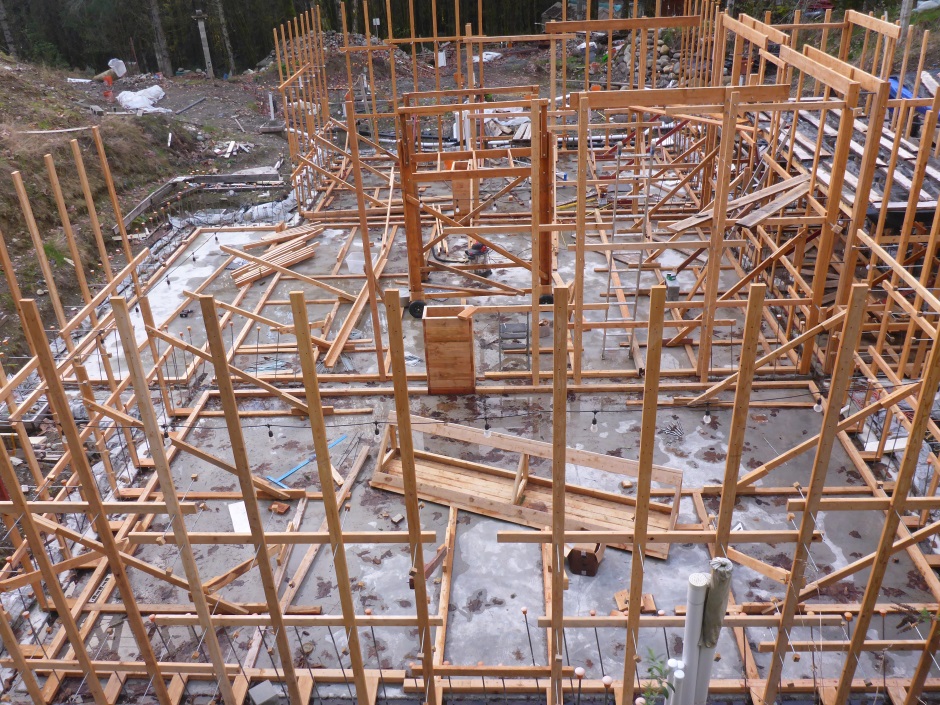
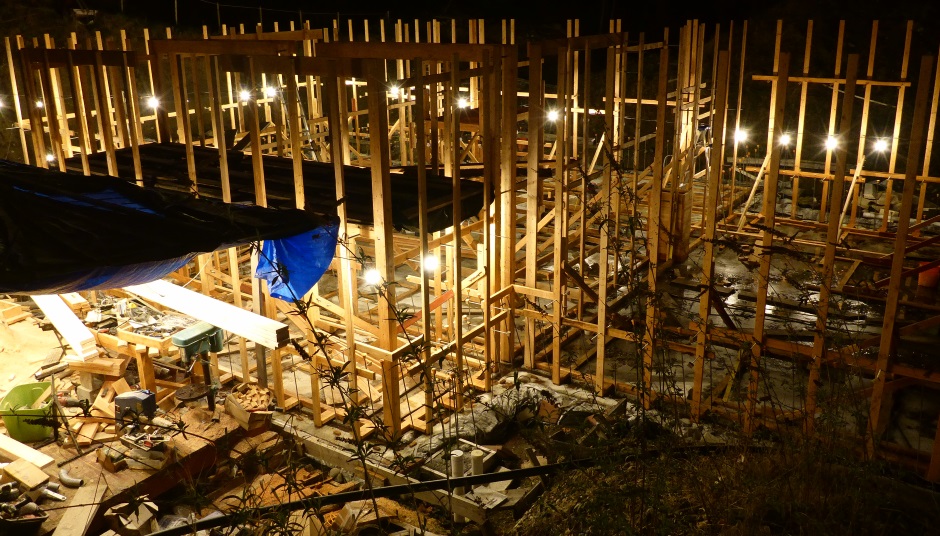
Vertical batons are required on both sides of the wall. The pair of batons is every 2 foot along the wall. You need lots.
Vertical 2x4s where the concrete will go
When initially putting up the EPS for the wall it is necessary to have something to rest it against. That means a flat surface of 2x4s. It also allows a 2x4 sandwich to be used to glue together the 6" and 2" EPS sheets. The vertical 2x4 batons are every 2 feet so there are typically 3 per 8' EPS sheet.
The details for making the vertical 2x4 batons are given above.
The bottom of the vertical 2x4 goes at official slab height as per the the CAD drawings, ie if the slab is in practice a bit low then a wood shim is used under the end of the 2x4.
Make 2x6 spacers
Temporary spacers are needed from the inner kicker planks
to the inside edge of the temporarily positioned inner vertical 2x4
batons. The length of the spacer is...
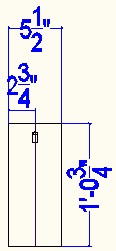
Wall concrete thickness (8" or 12") + 1/4" (thin ply) + 1/2" (thick
ply)
For an 8" cavity wall, that is 8-3/4" (1' 0-3/4" for a 12
cavity).
Cut the spacers (using a chop saw) from 2x6 lumber so they are 5-1/2" in the other dimension (which is sufficient to keep them properly perpendicular). Make sure you have got the length accurate.
Draw a line down the center to allow you to get it properly aligned when you fit it.
On the outer edge of the spacer drill a Kreg jig angled screw hole on the center line of the spacer. Use a custom made Kreg jig.
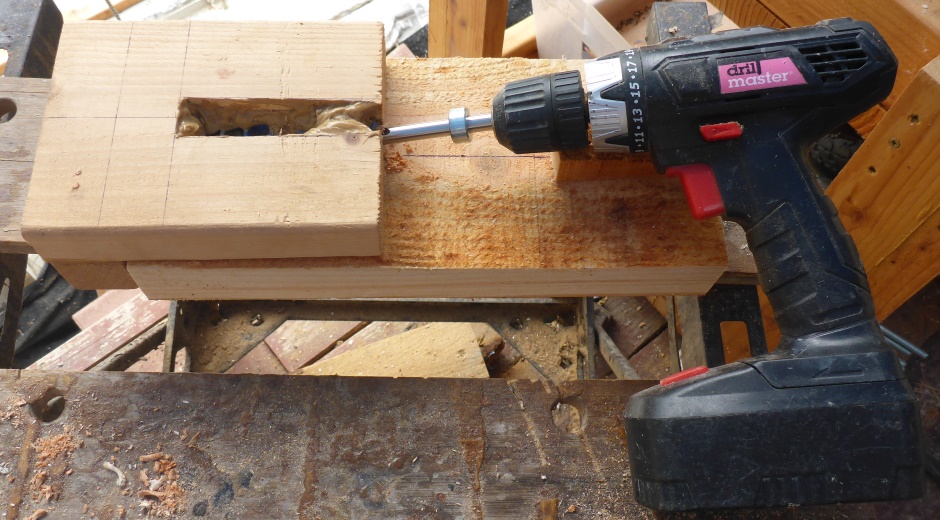
Drill the hole for the screw all the way through.
Fit the spacers
The spacers are attached using two 3" screws from the screwed kicker plank. The holes from the screwed kicker plank will later be used to screw to the vertical 2x4 batons (two screws in different holes compared with the centered hole used previously).
The spacers are not down on the slab (because the screwed kicker is above the nailed kicker) so you need to use a spirit level to get them horizontal as you are screwing them to the vertical batons.
Cut 3/8" threaded rod
The length should be 2' long for an 8" cavity wall, but it is ok to be 1/8" less to get five from a 10' length of rod. Clamp the rod in a sawing bench and cut using a reciprocal saw fitted with a metal blade. For a 12" cavity the required length is 2'4". From a 10' length of rod you would get four 12" cavity rods and a left over length (8" long). It is good to cut the threaded rod at 2'6" so that it can later be used as the middle hold-downs for the metal roofing.
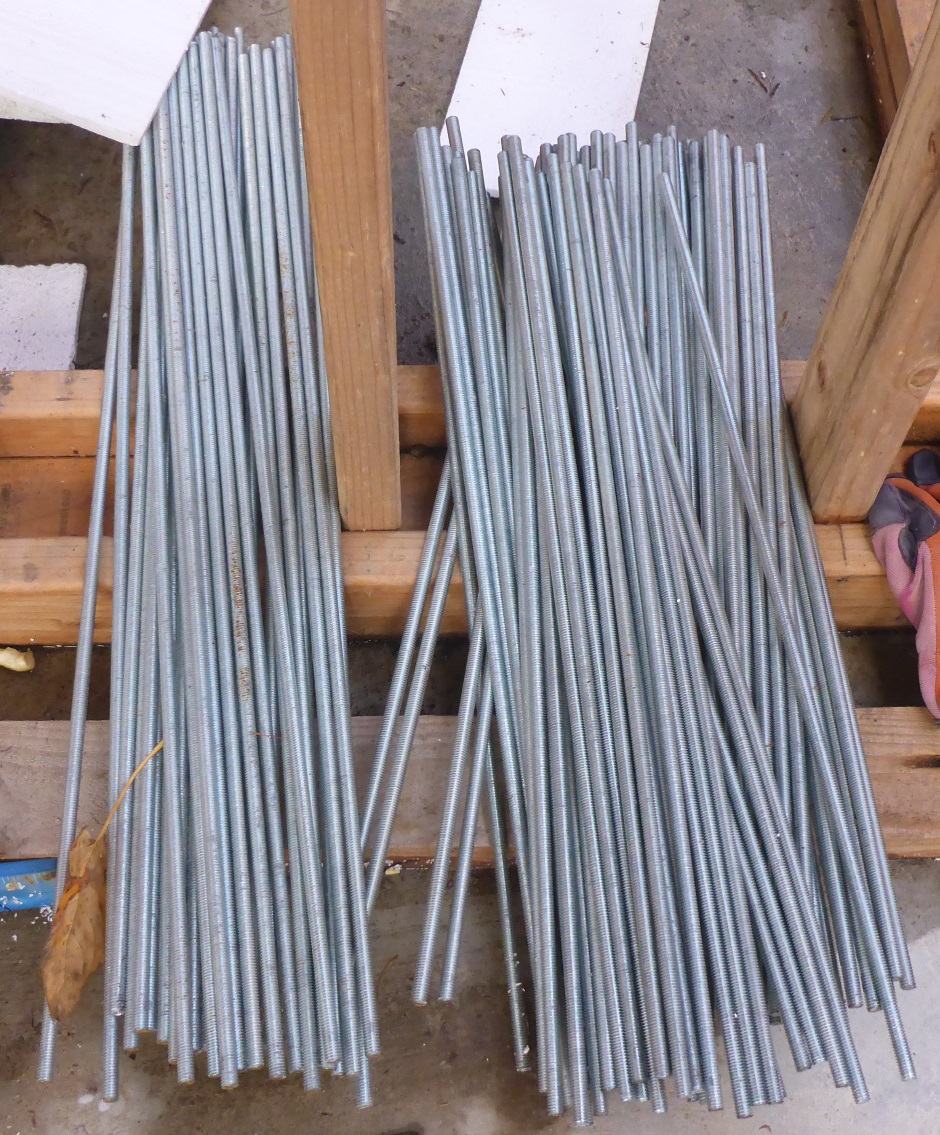
The rods for an 8" cavity internal wall are only 1' 4-3/4" long (call it 1'5"). These lengths are useful for the small hold-downs for the roof.
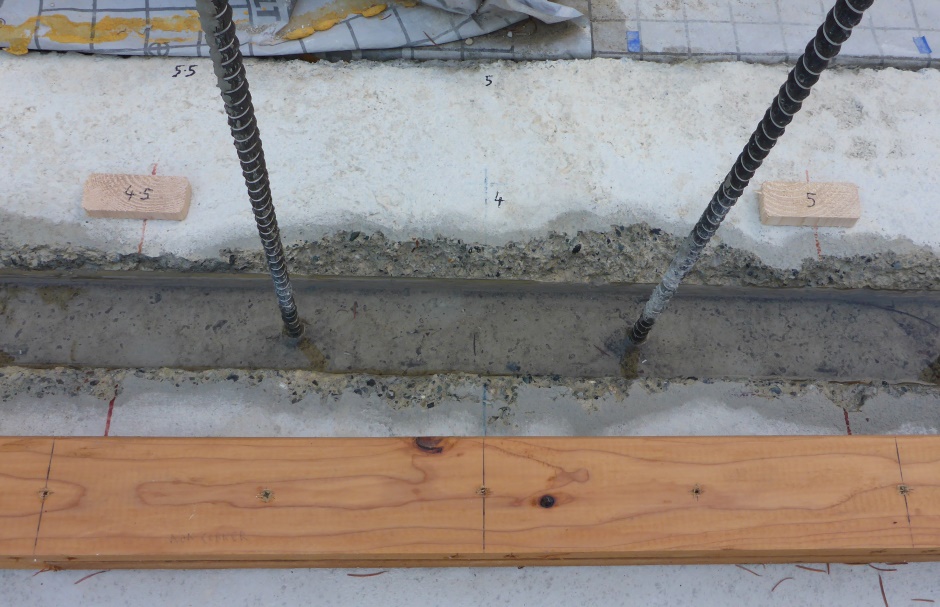
Make and place shims for vertical batons
The shims are made from chopsaw cut 2x4 lumber and are placed (but not glued) under the vertical 2x4s that need to be raised up.
The middle markings on the slab at the tie rod positions give the thickness of shim required. Place a shim at the primary tie rod locations with the thickness as indicated by what is written on the slab.
Make internal horizontal bracing
These bracing parts are typically made from 8' long 2x4s, but longer or shorter is also ok, particularly as varying the length plus or minus 2 foot allows the joins to be staggered.
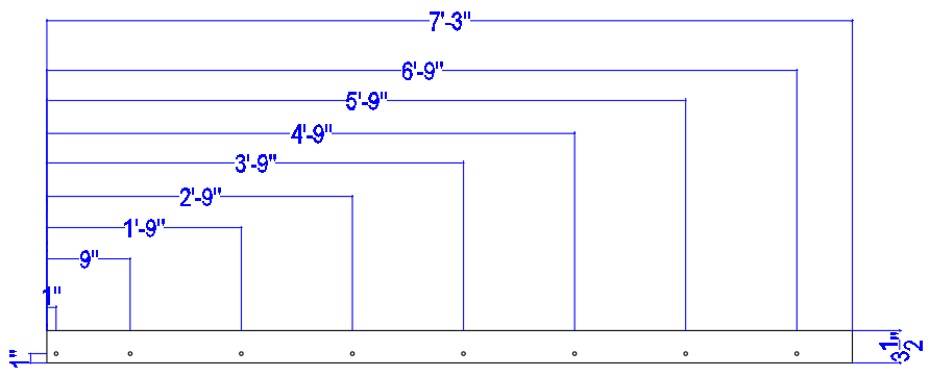
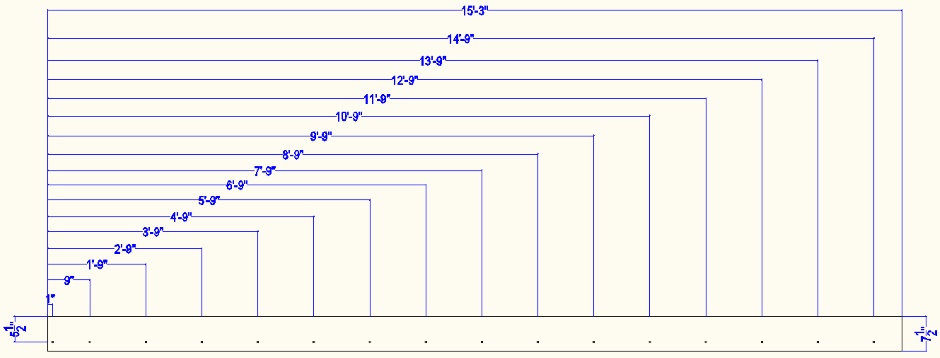
For a 12" cavity wall, the length is 7' 3"...
It is best to do left and right hand variants when you mark out the wood (even though you could just reverse half of them and have the markings on the hidden side).
Holes of 3/8" diameter are drilled 1" from the edge. It is good to use a Kreg stepped shoulder 3/8" drill bit to avoid having to drill pilot holes.
In practice make the length 1/16" shorter than shown in the drawing to allow for tolerance.
Use straight lumber but if the wood is slightly warped, put the bow towards the center of the building (for consistency), ie mark out on the concave side.
For the non-corner case, the length is some integer number of feet and the first hole is 6" from the end (minus 1/16" off the length for clearance).
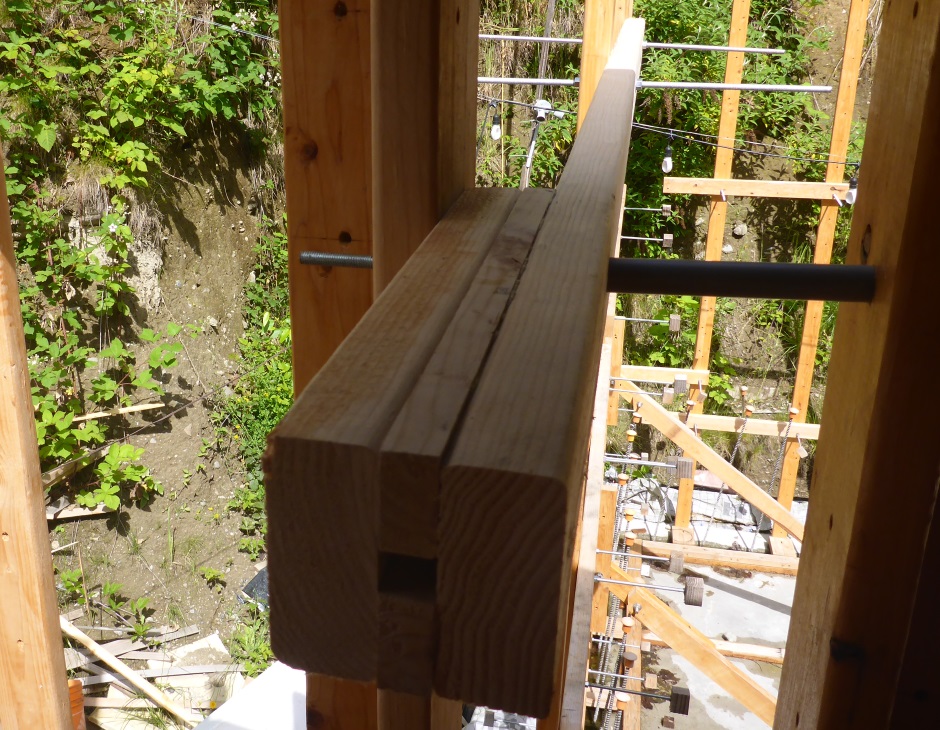
Make top of wall horizontals
These are the same as the other horizontals except they are 2x8 (1.5x7.5) and the holes are 5.5" from the top edge (the top edge is the important edge). The actual length depends on the length of lumber available even though the drawing shows using 16' lumber.
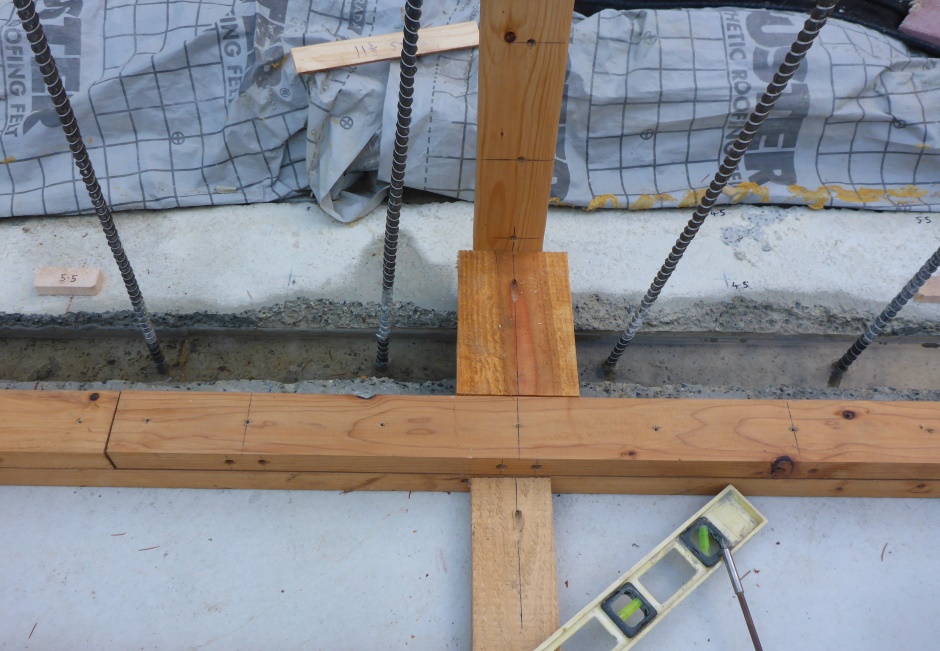
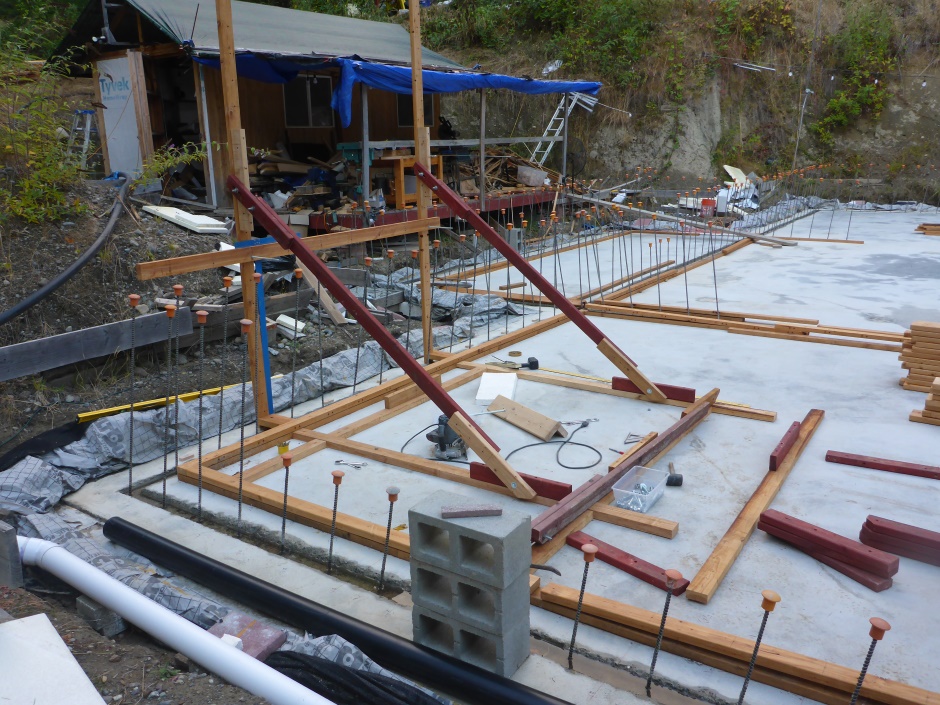
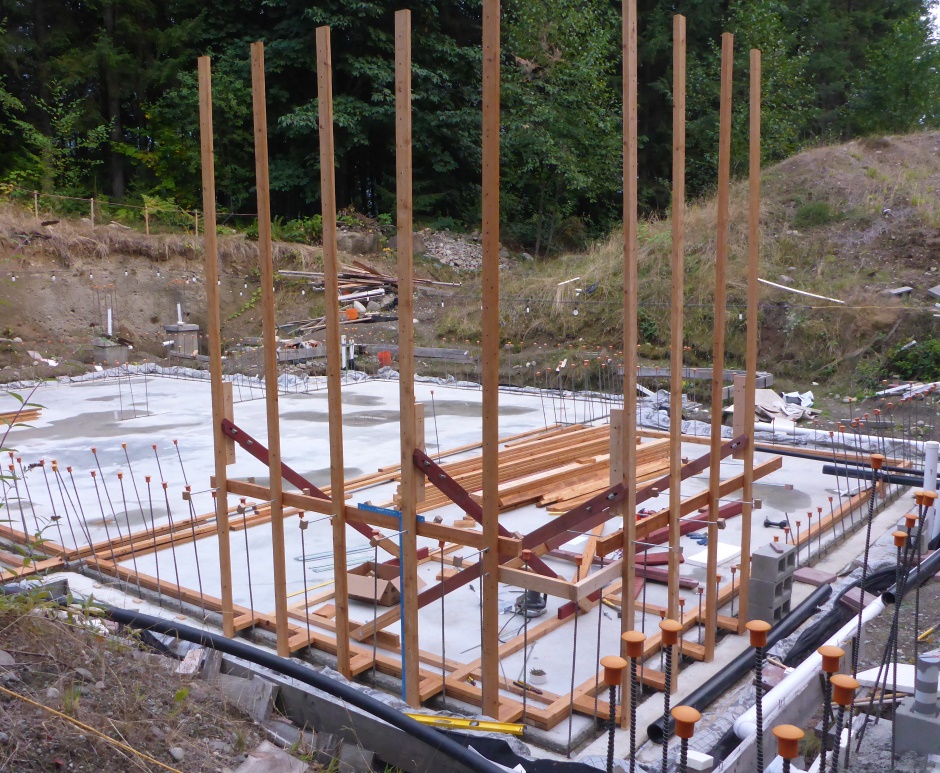
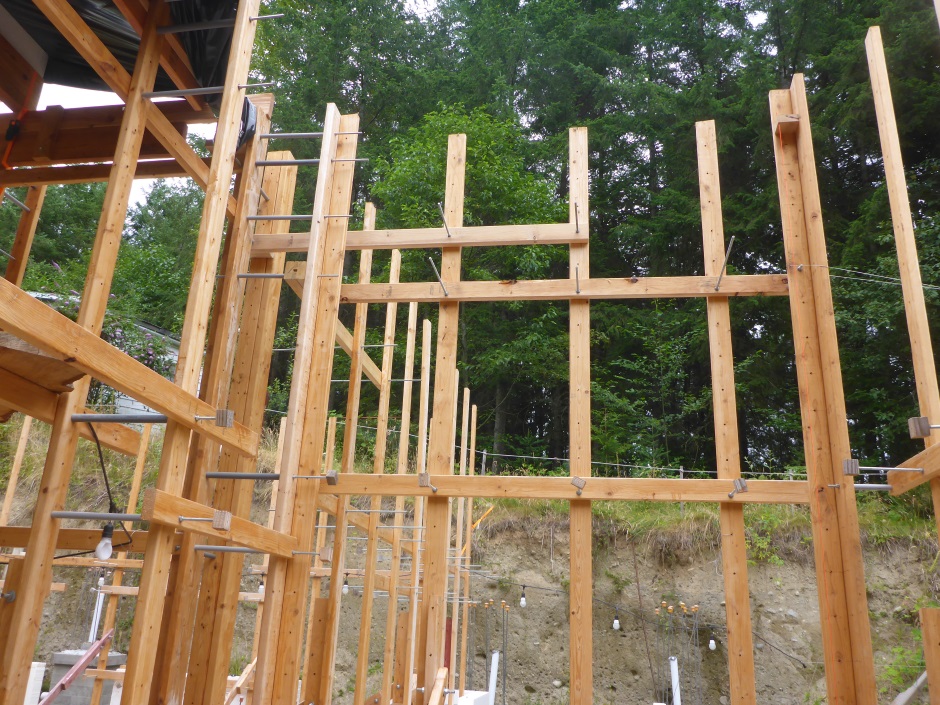
Fit in wall concrete position the internal vertical 2x4 batons
Note that it is only the primary batons that are fitted.
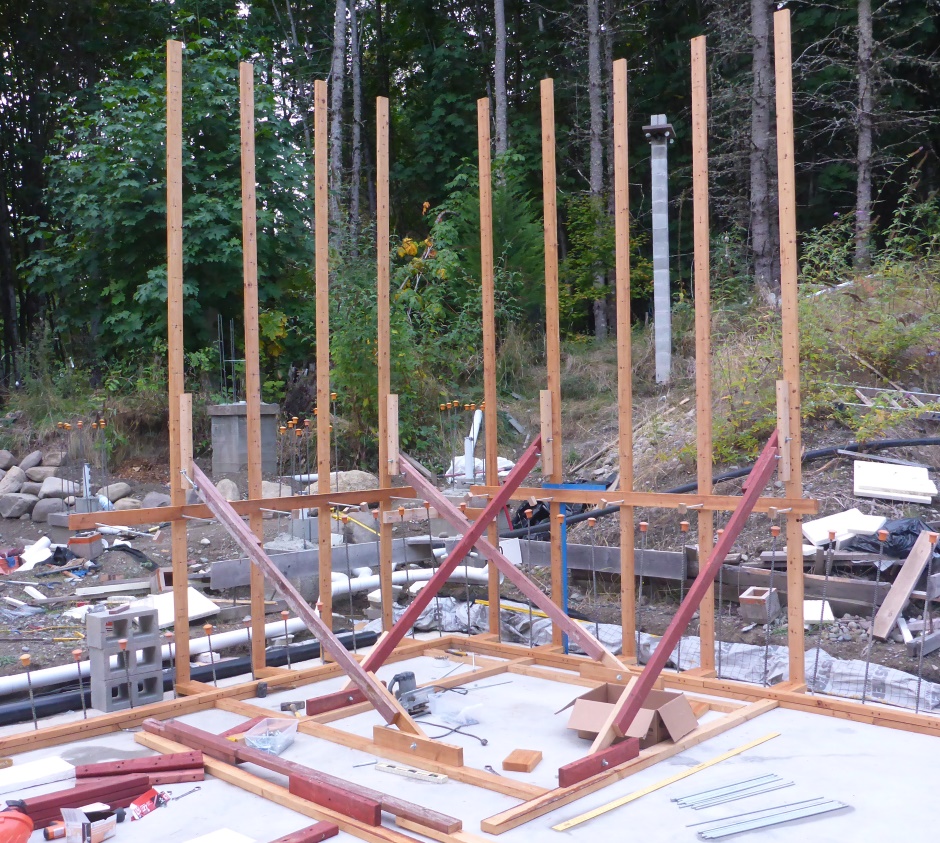
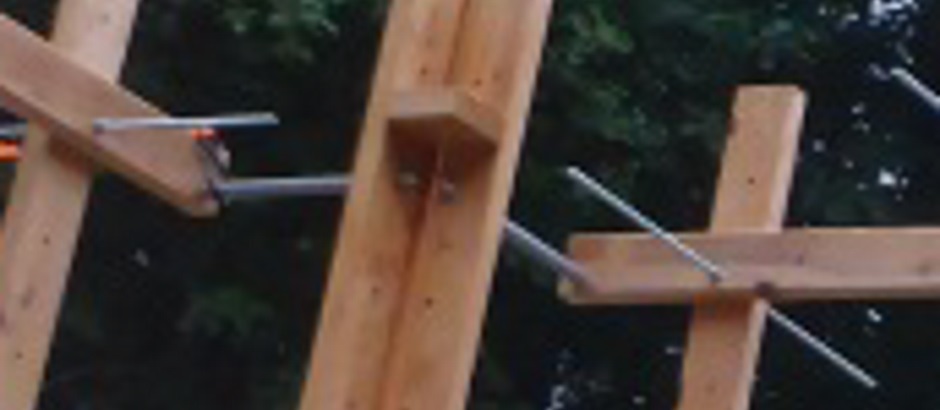
For the batons with angle bracing, the vertical 2x4 baton has an edge-on 2' long piece of 2x4 attached to accept the wall bracing mechanism and is held accurately vertical using the bracing mechanism.
Attach the angled bracing (using the middle bolt hole for 8" and the bottom hole for 12") to hold the vertical 2x4s vertical.
To stop the vertical 2x4s falling sideways, attach the horizontal bracing typically at the 3'9" height hole by pushing through a 3/8" stud tie. Temporarily put a nut on the outer end. Make 11-5/8" of threaded rod protrude outwards beyond the vertical 2x4 baton as this will be later used for holding the EPS.
Aligning the Kreg hole on the spacer with the hole line on the vertical 2x4 baton should mean that the baton is vertical.
The bottom of the vertical 2x4 baton (with its shim under it) is attached to the spacer using a single Kreg angled screw from the spacer.
Typically also fit horizontals at the temporary mezzanine height As needed also fit other horizontals such that the joins overlap with other horizontals.
Get the 2x4 batons vertical using a long spirit level and tighten the half inch nuts on the angled bracing.
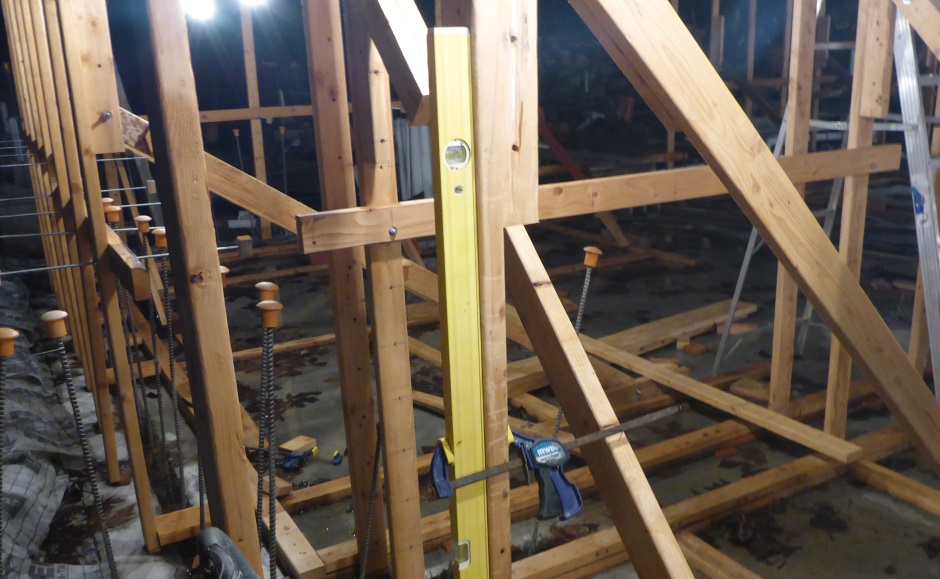
Using the internal horizontal bracing to hold them, fit the vertical 2x4 batons that do not have angled bracing.
If you want you can use temporary corner pieces to connect at the convex corners, but this is not really necessary.
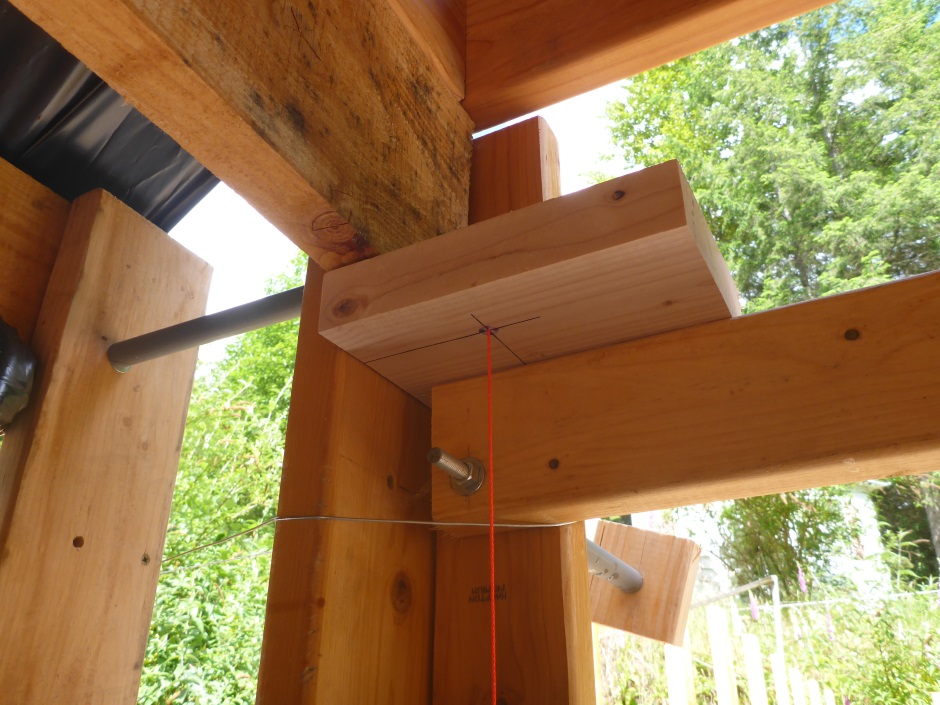
A better approach is to fit a 2x6+2x4 corner assembly and use 1/2" conduit spacers.
For internal corners use a temporary 2x4 spacer assembly.
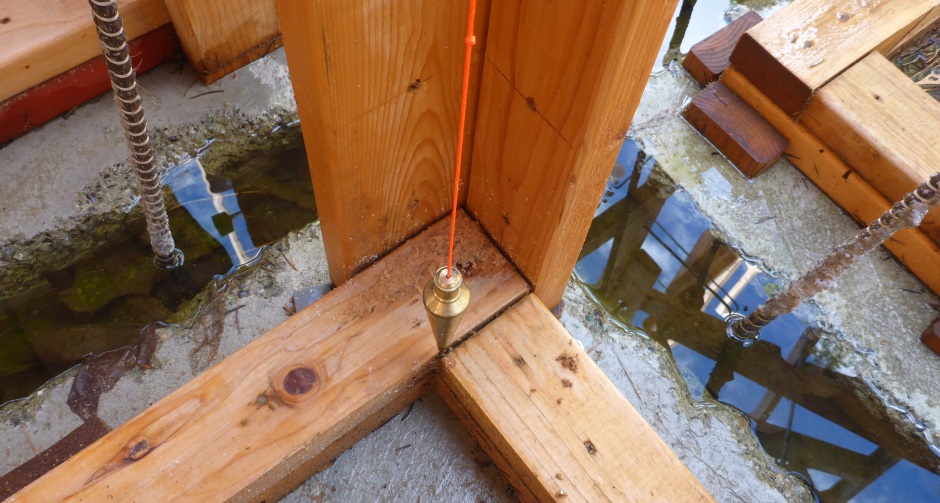
It is important to get the building square and vertical. The easiest way is to setup a pumb-bob at all the corner pieces. Use a screw-on piece of wood at the top to attach a string that is 3-1/4" in from the corner. If the corner is accurately vertical then the pumb-bob should point to the inner corner of the nailed down kicker boards.
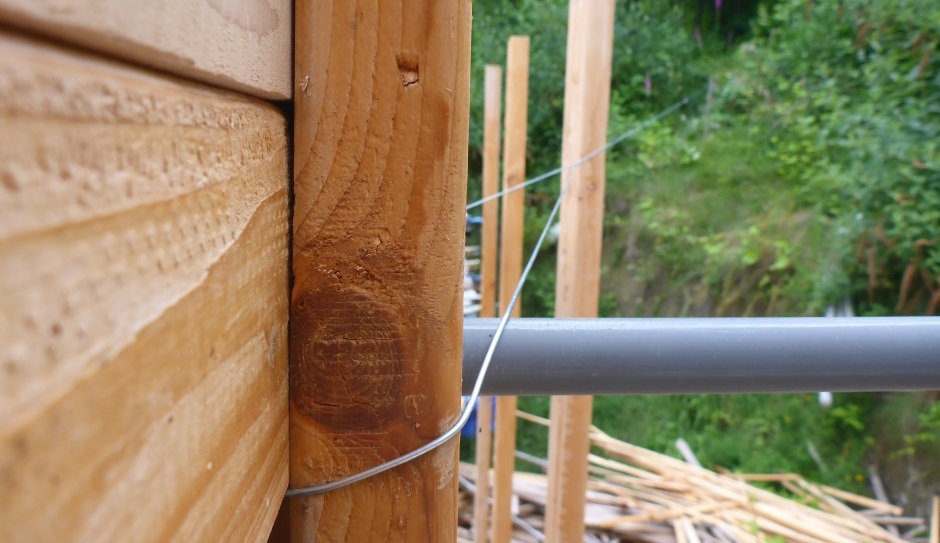
If the building needs a bit of pulling to get it square and vertical, a double piece of garden wire to a stake can be twisted to pull on the corner peice.
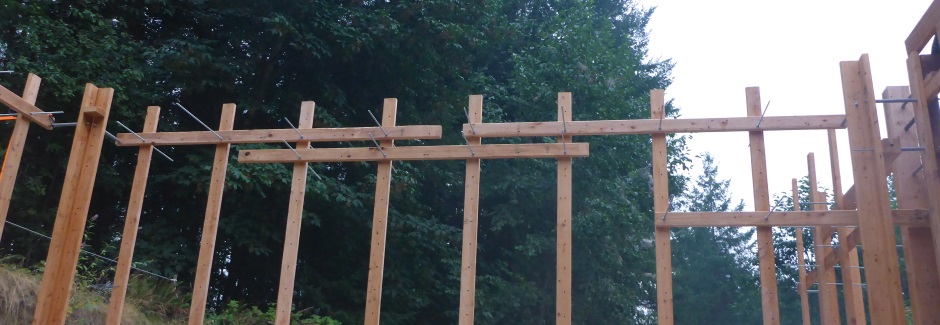
Fit about 3 horizontal 2x4s up the vertical wall batons. Use the X'9" holes in the vertical batons.

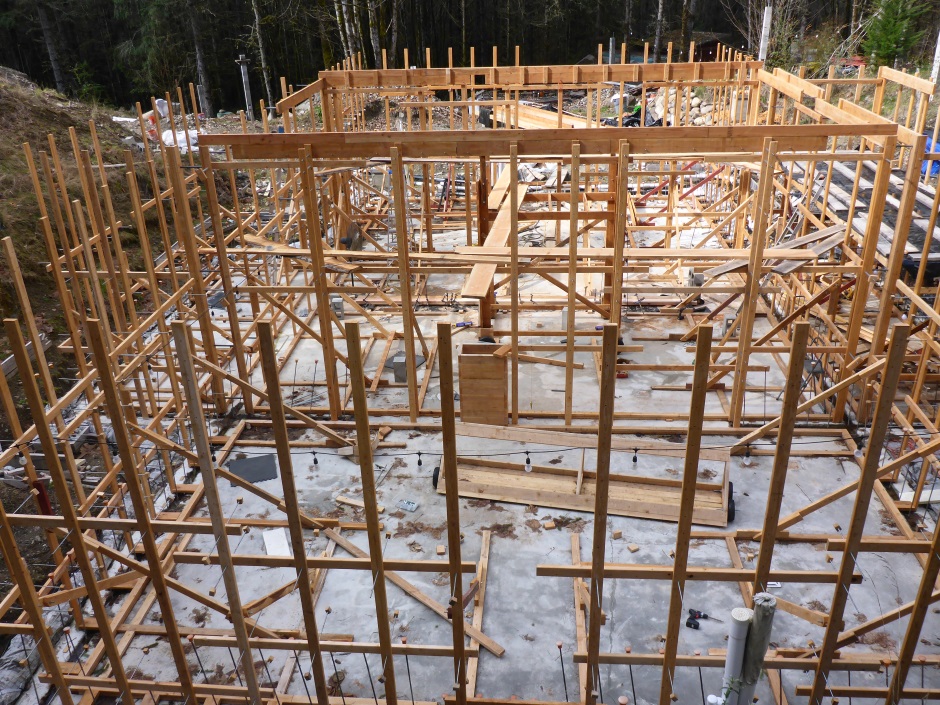
For the horizontals at the top of the vertical batons, use the X'3" holes as well as the X'9" holes. (This is so that most of the EPS can be fitted with the top horizontals still in place.)
Adjust angled bracing
Adjust the vertical 2x4 batons to be vertical in both axis. Use a long spirit level.
Add additional threaded rod wall ties in all X'9" positions
Fit the 2' long (for 8" cavity) (2'6" for 12" cavity) wall tie rods. 11-5/8" of threaded rod needs to protrude outwards beyond the vertical 2x4 baton.