Home Site Map - Techniques - Structure -
Carnation Walling - Window Bucking
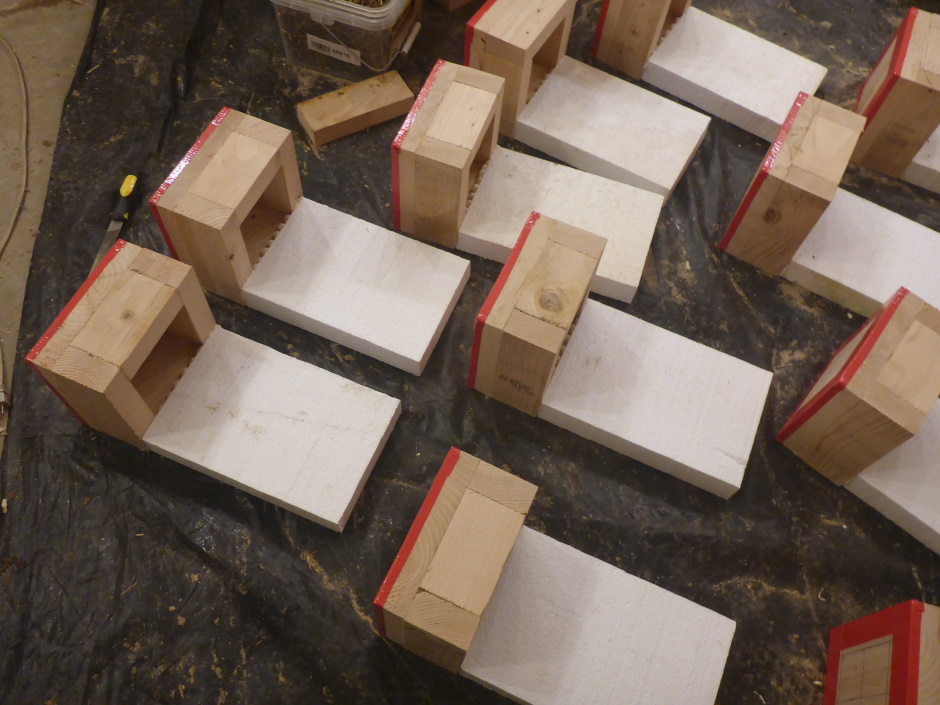
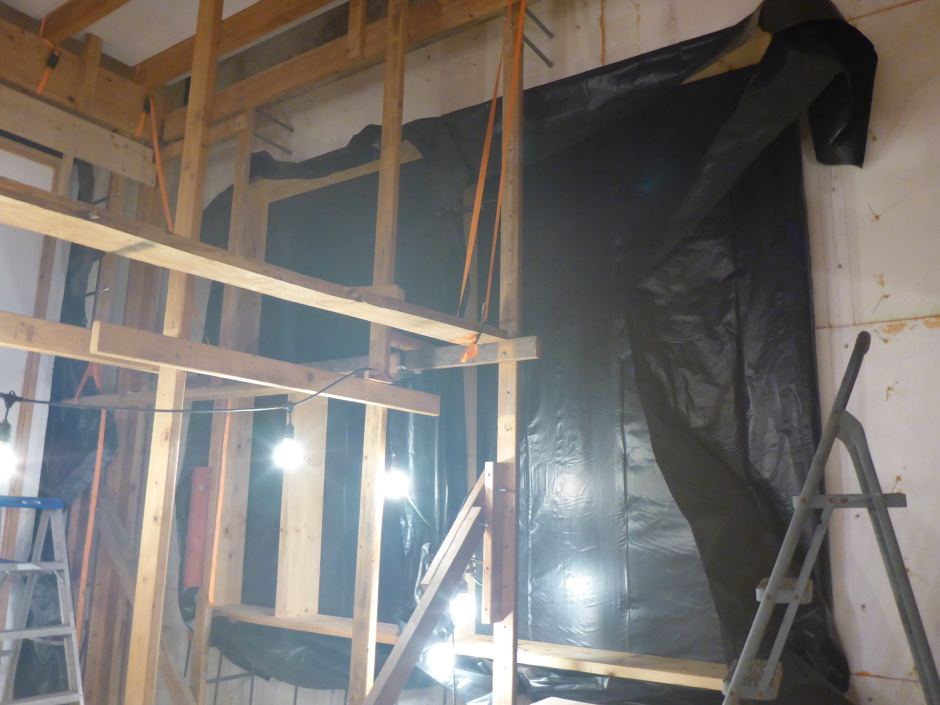
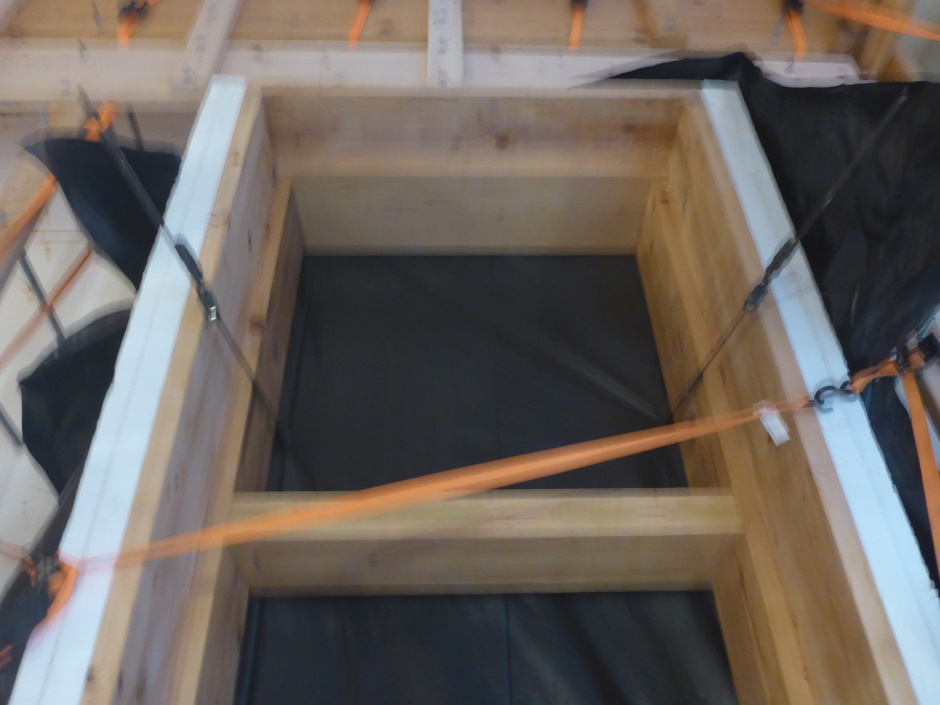
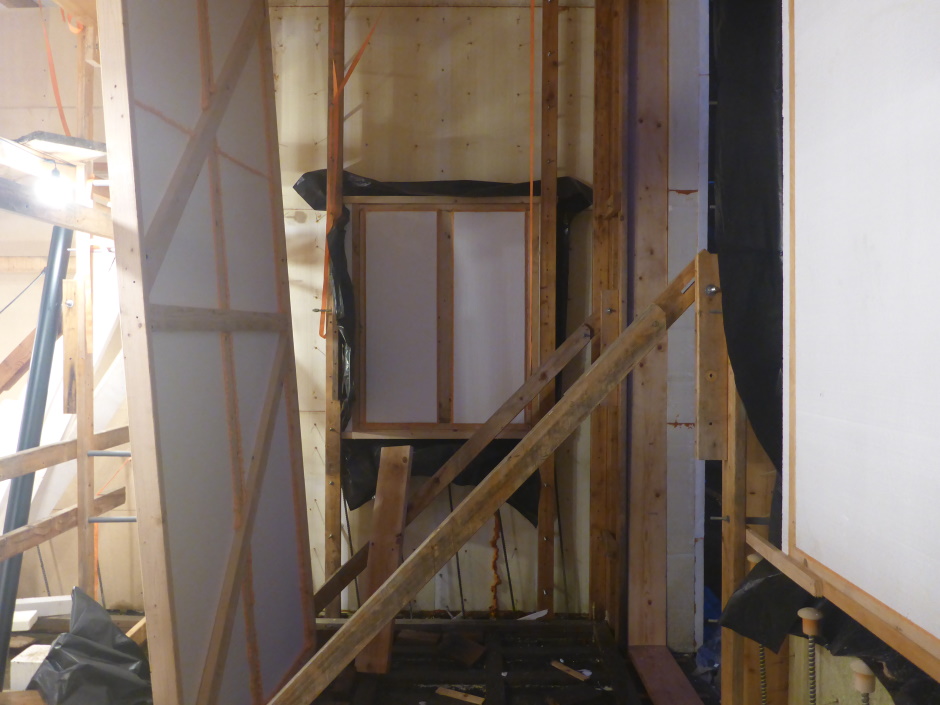
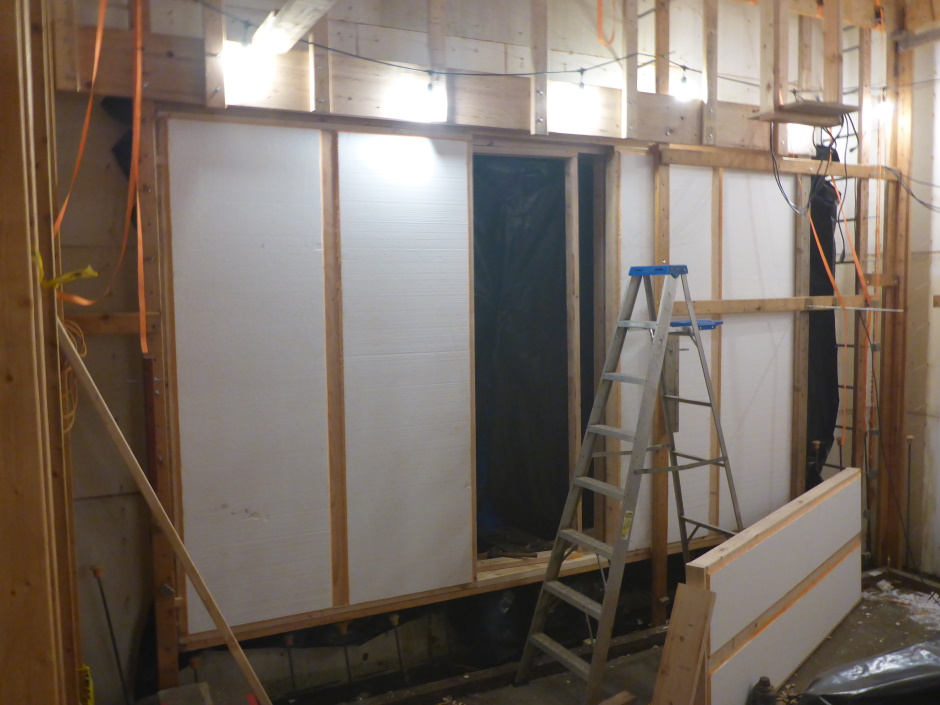
![]() In the window openings form the in cavity and projecting window
bucking with wood surrounded by EPS.
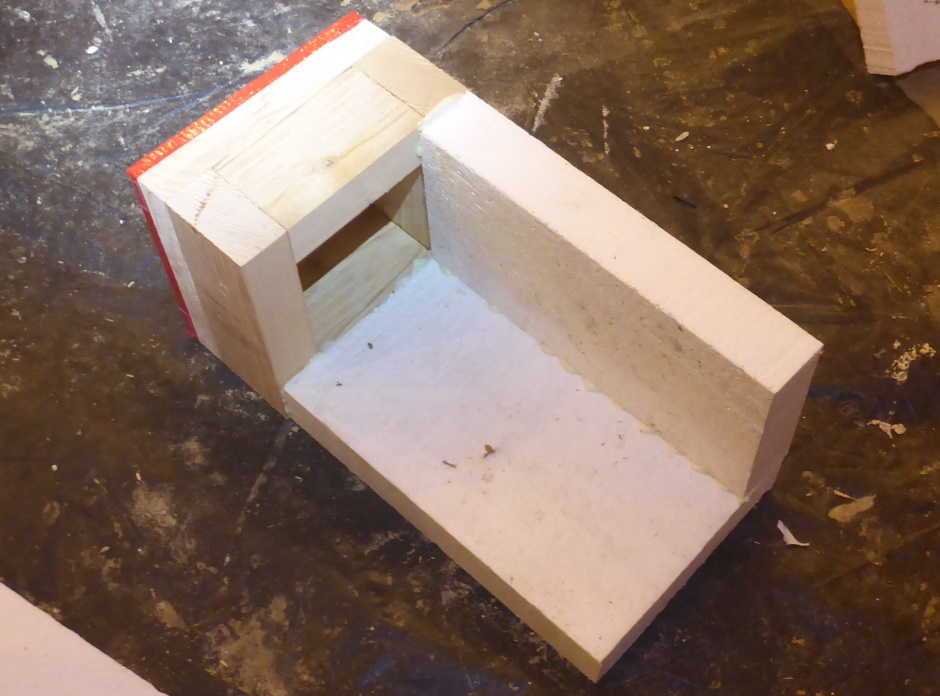
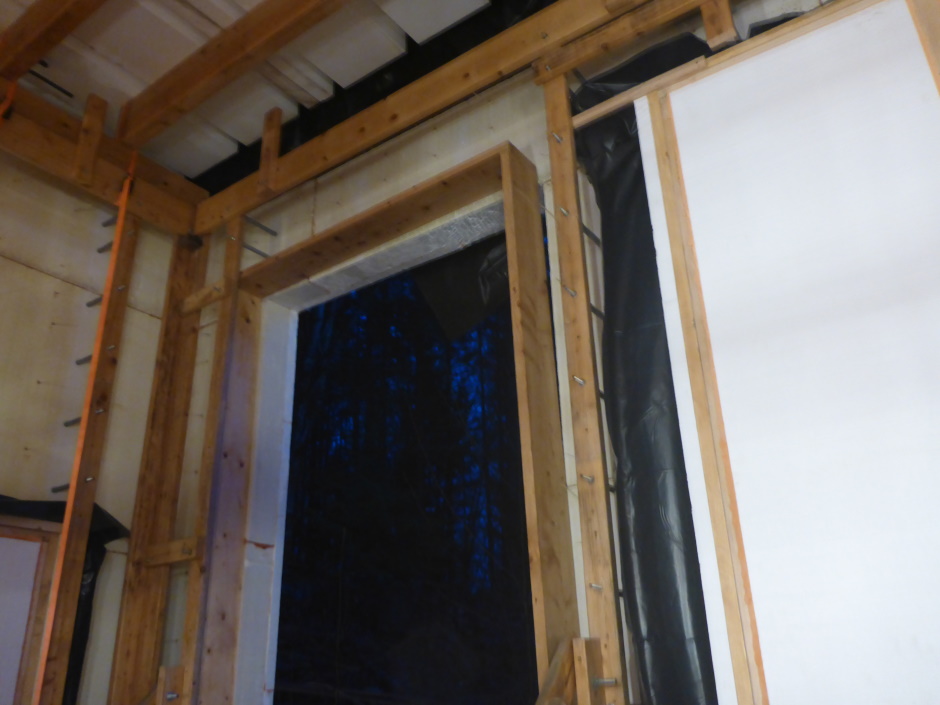
In the window openings form the in cavity and projecting window
bucking with wood surrounded by EPS.
Fit window bucking
The bucking design
There is "projecting" bucking that the window will eventually attach to and forms the window sills, and there is "cavity" bucking that stops the concrete leaking out of the cavity during the concrete pour.
There should be EPS properly cut all around the window opening before you push the projecting bucking horizontally into the hole from the inside of the building. (The EPS is cut to go all the way to the projecting bucking (minus 1/8" clearance all the way round).) Having the EPS all the way round first avoids the wall splaying out at the top of the window. You may need to trim the EPS to make the bucking fit, but hopefully the EPS sheets will have been cut and fitted reasonably accurately.
There is no great difference between the bucking for windows and the bucking for doors. For some doors there is no cavity bucking at the bottom and the protruding bucking is direct onto the slab. (It is screwed to the nailed down kickers on the slab to stop it moving around.)
For holes in internal walls, only the projecting bucking is used as EPS is not used on internal walls and also there is no need to ever be able to replace the wood due to rot as it is totally in a warm dry environment.
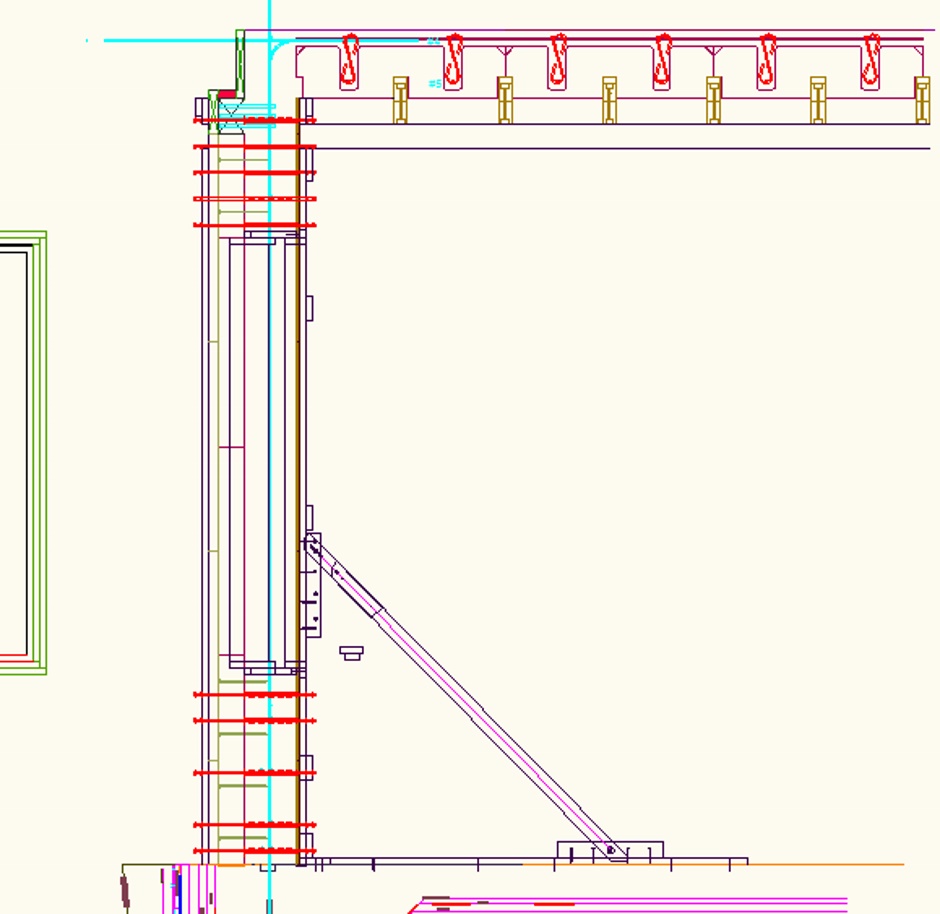
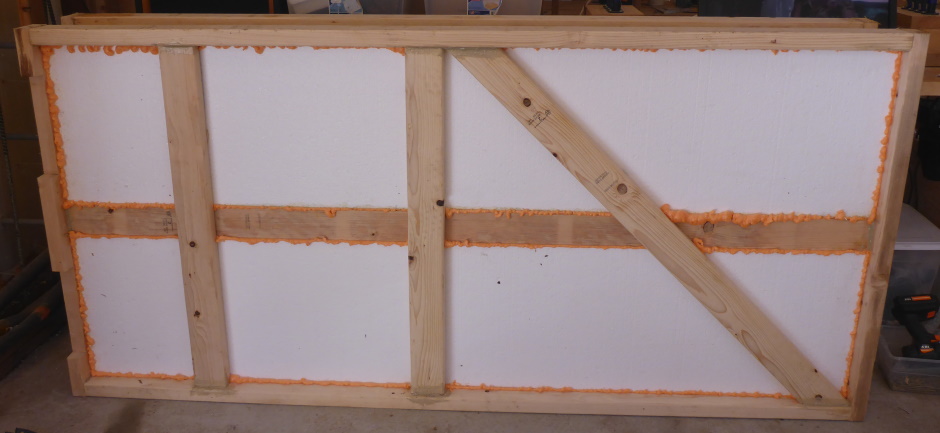
Here is the design for the 12" cavity external wall case...
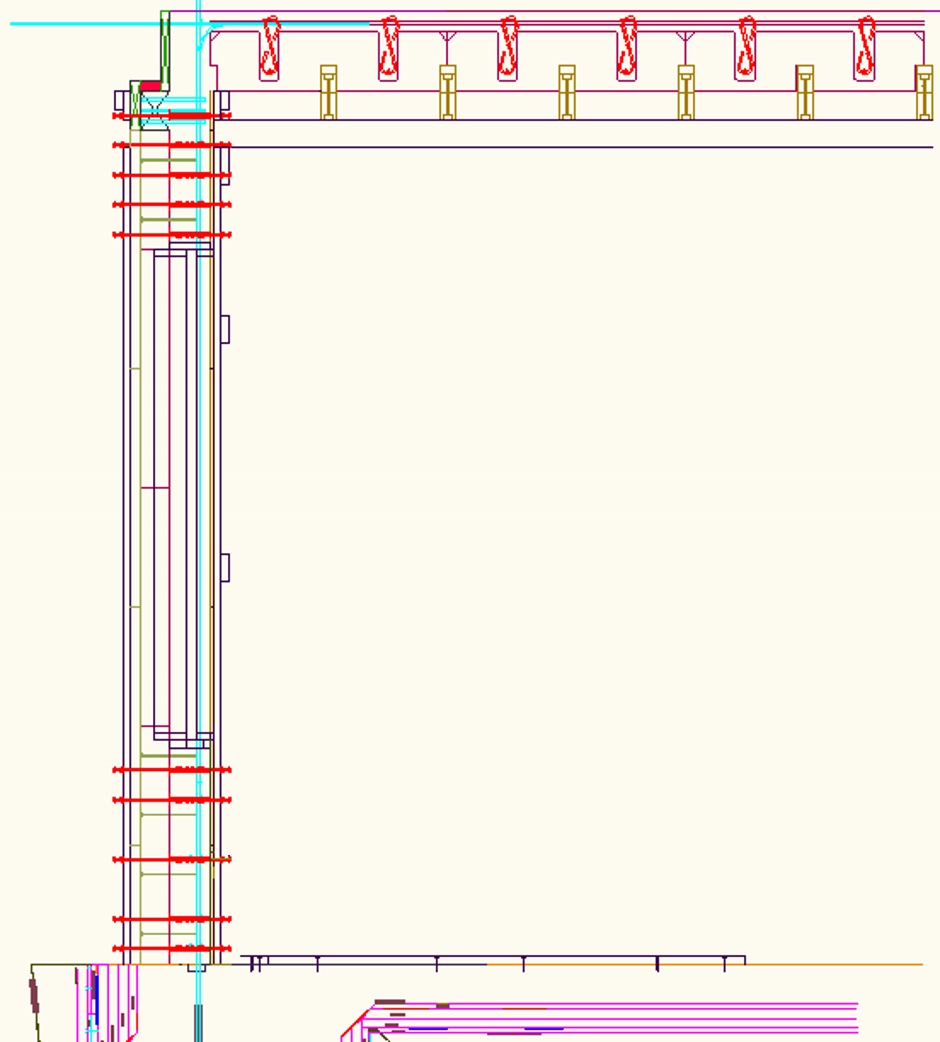
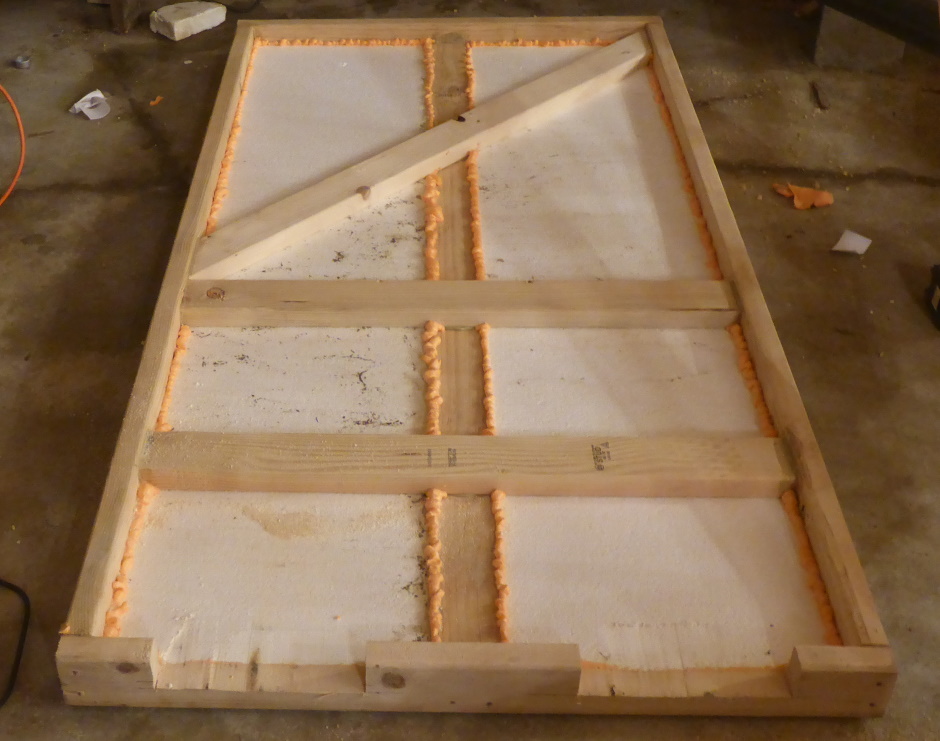
And here is the 8" case...
Note that the cavity bucking gets cut away a bit after the concrete pour.
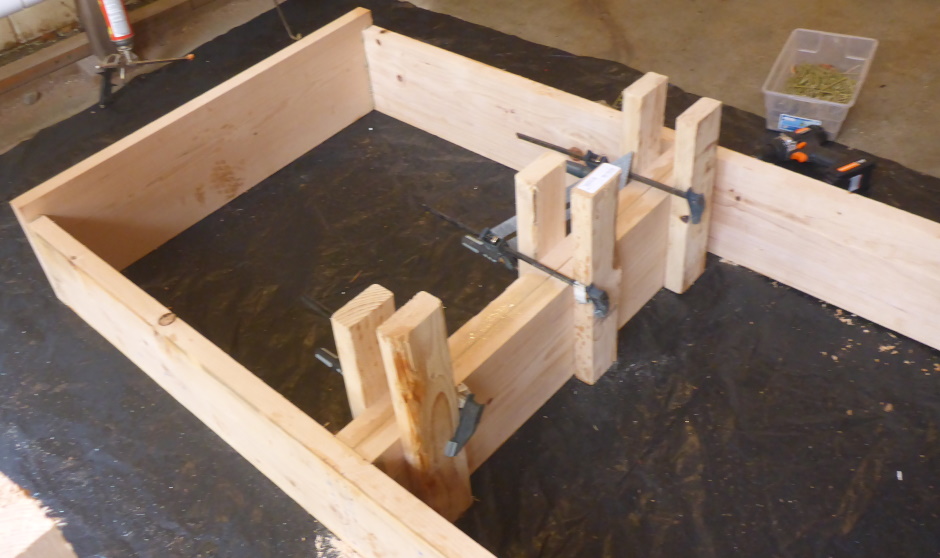
Make Squaring Bucking
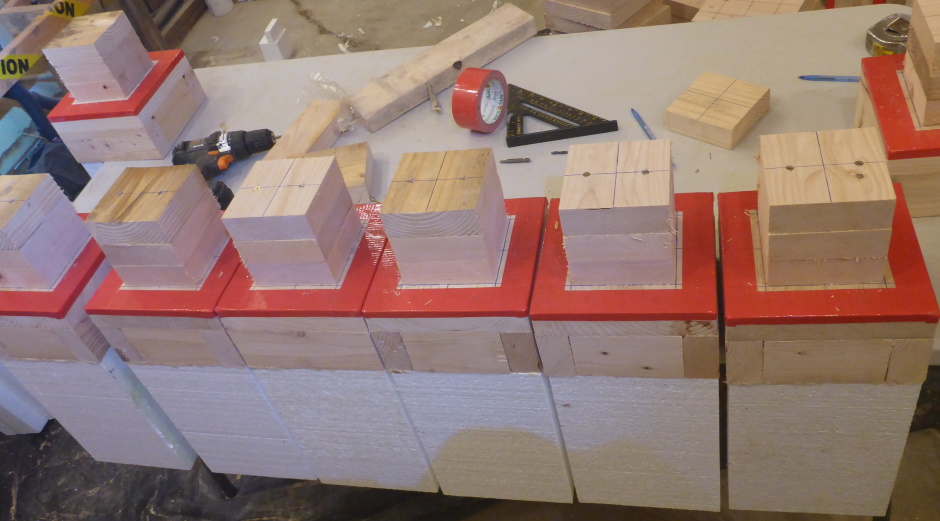
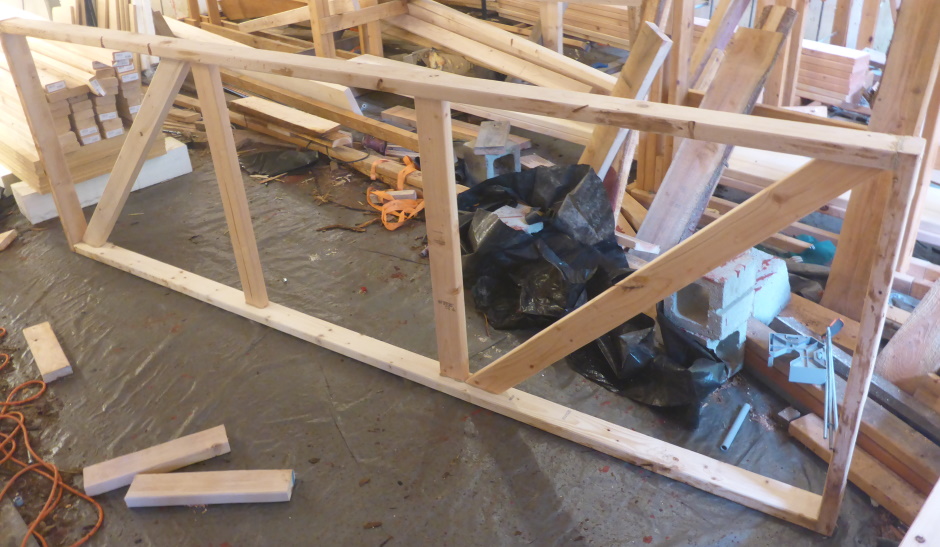
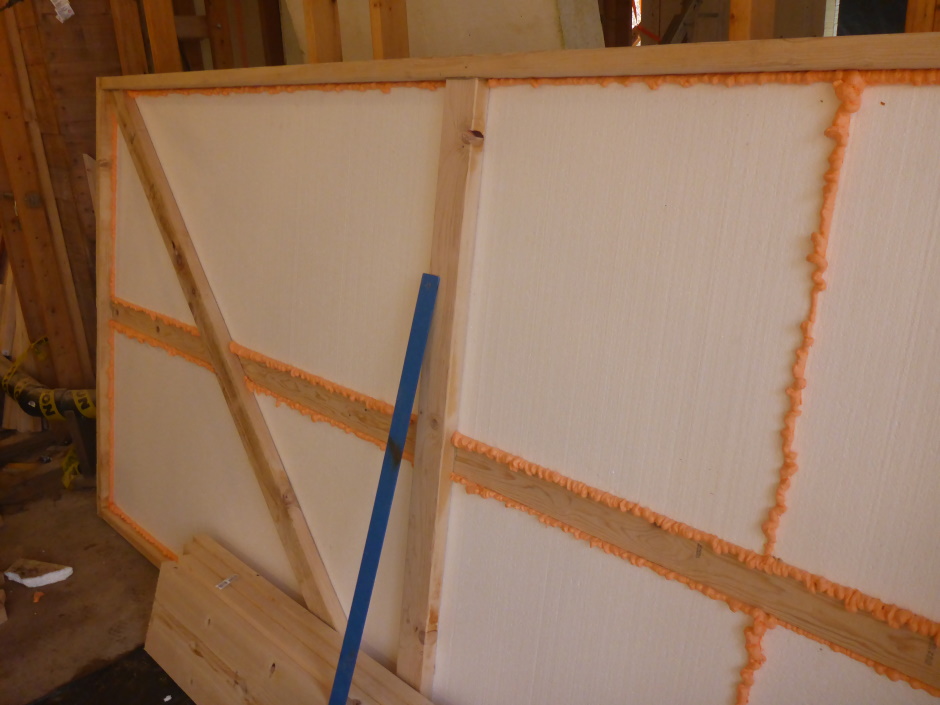
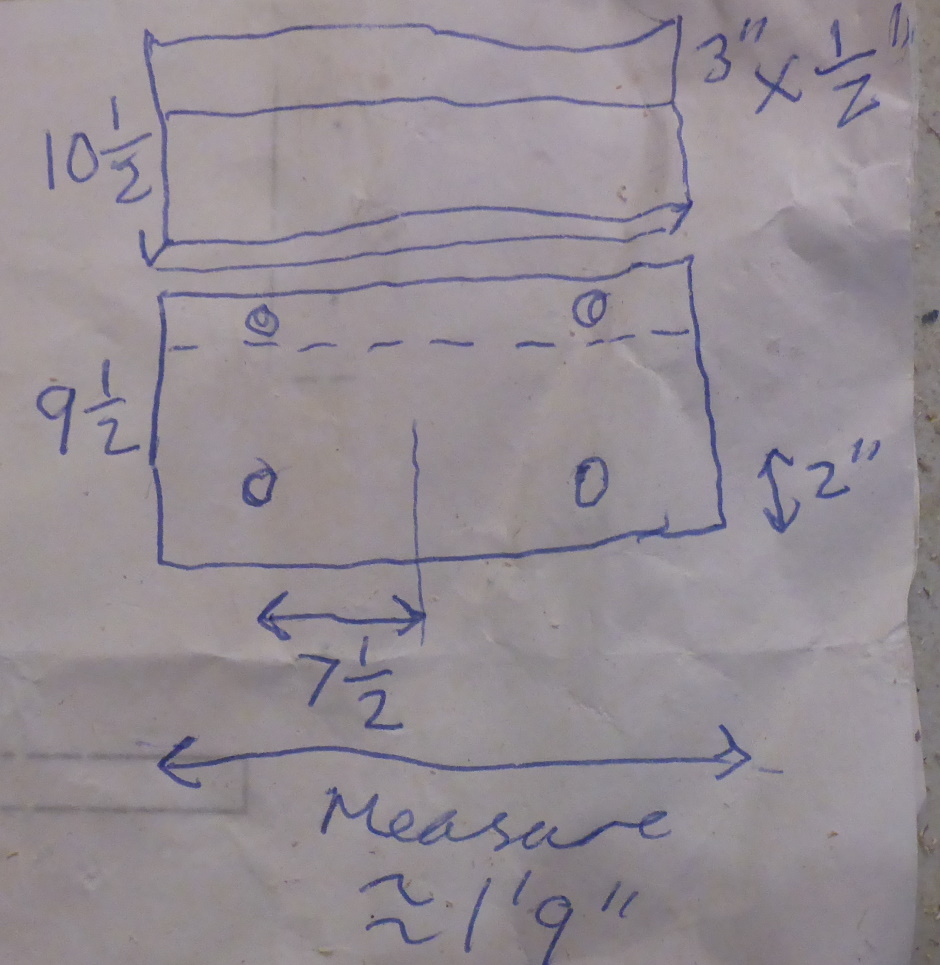
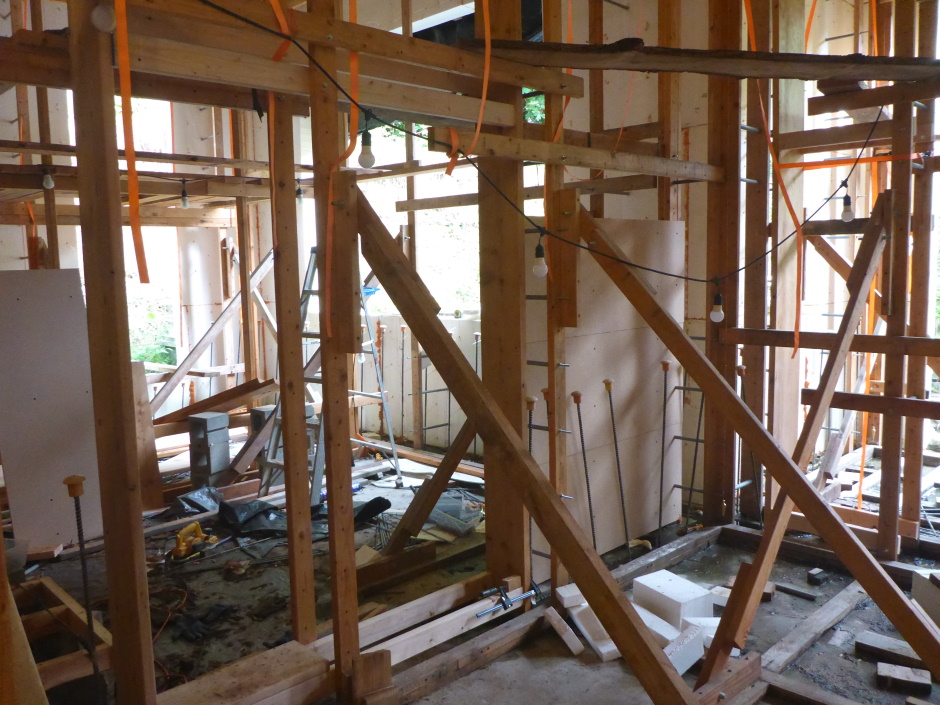
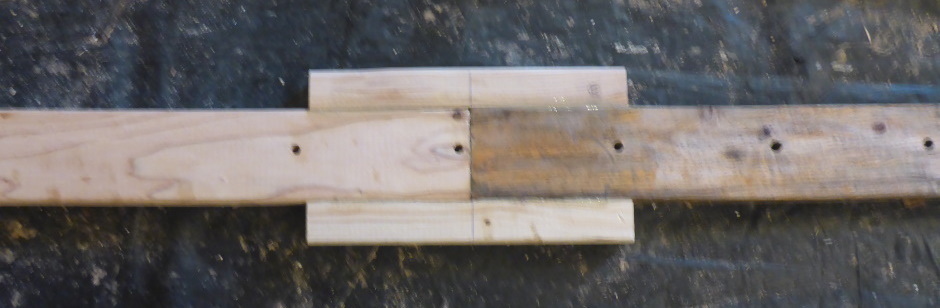
This is a rectangle of 2x4s with the same dimensions as the projecting bucking, ie on the outside it is 3" wider and taller than the window rough opening. It is only used during the concrete pour. It can be reused on windows of the same size on other levels of the house. It goes into the cavity bucking on the inside of the wall and is used to hold everything square and to help take the weight of the wet concrete above. It has one or more 45 degree triangulation pieces of 2x4 as well as a vertical 2x4 in the center. The vertical 2x4 is nearest the center of the wall. A horizontal length of 2x4 is used to hold the sides out at the right dimension.
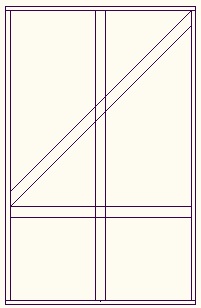
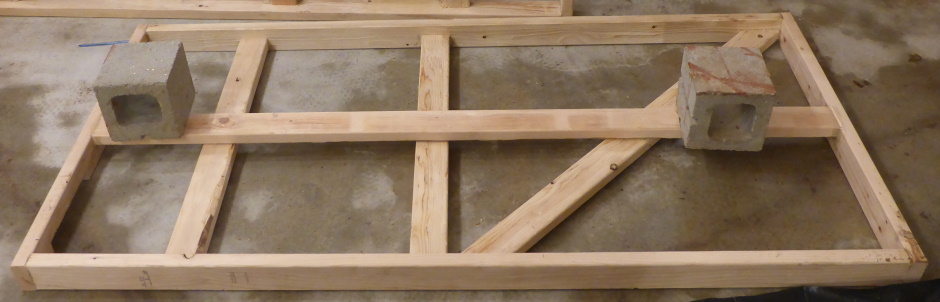
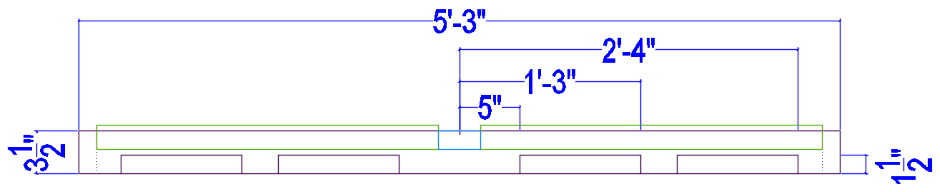
The bottom piece of 2x4 needs to have notches corresponding to where the concrete fill holes are. Start by finding the center. Measure 5" either side of the center and that is the start of the rectangular holes on each side. The notches are 10" wide and 1.5" deep. In the center, 10" of wood is used for the internal bracing to push on. The rectangular holes then repeat on 1'1" centers.
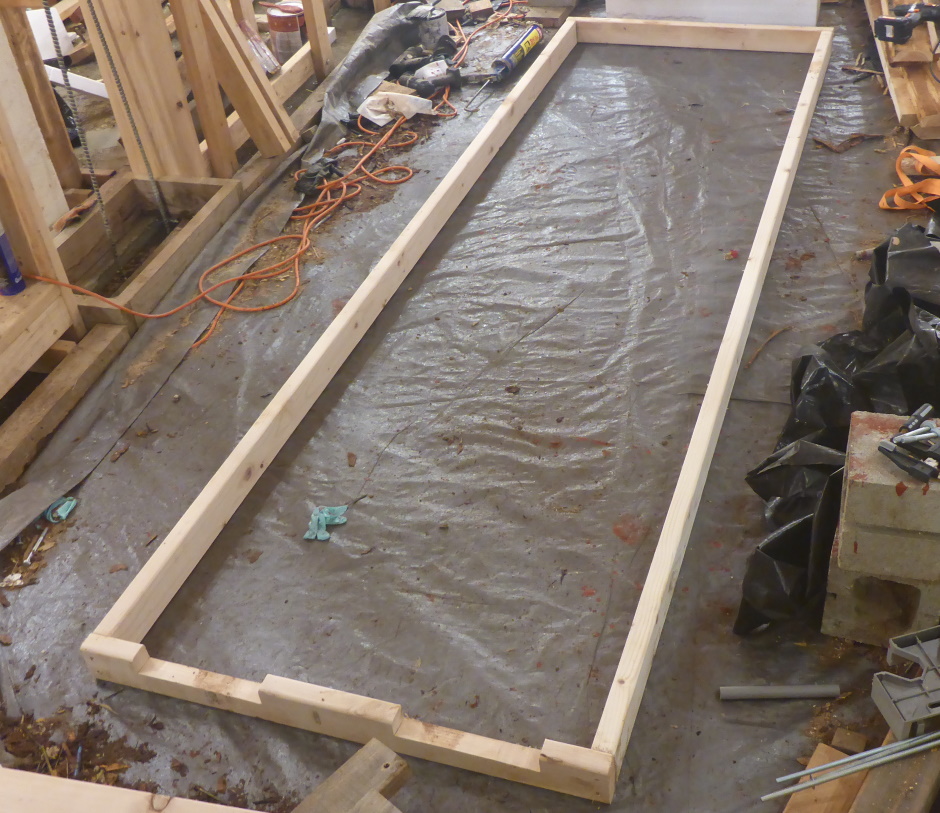
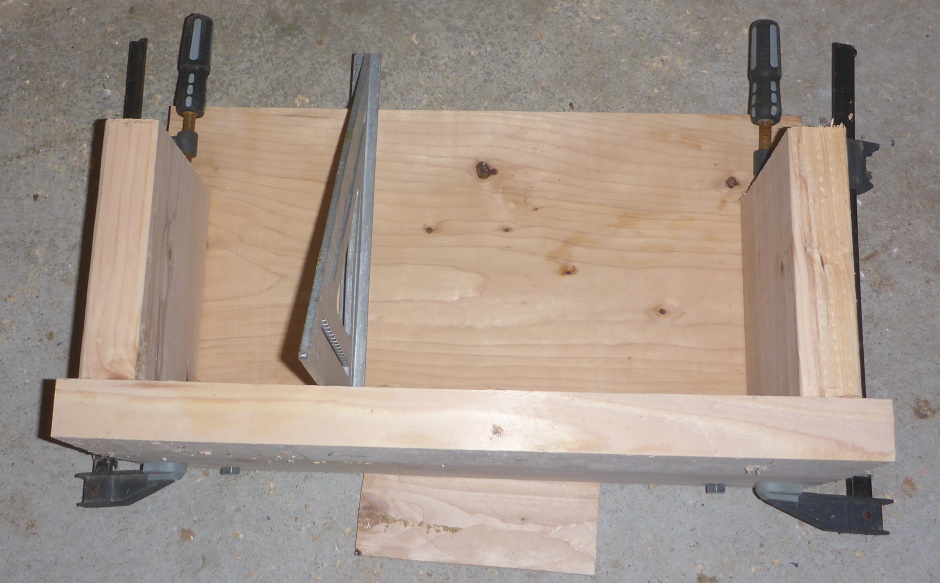
First put together the rectangle (adding PL-Premium glue to all joints), making it approximately square using an L shaped square or T square.
Before the glue dries, to get the rectangle accurately square by ensuring the diagonals are exactly the same before the glue is allowed to dry overnight. When everything is square and the glue has fully dried, add (and glue) the triangulation diagonal piece.
It is good to fill the inside of the squaring bucking with 2" EPS sheeting as it will make the building warmer ahead of the windows being added. It will be two vertical EPS sheets each side of the center vertical 2x4.
The squaring bucking is the same for both the 12" and 8" cavity cases.

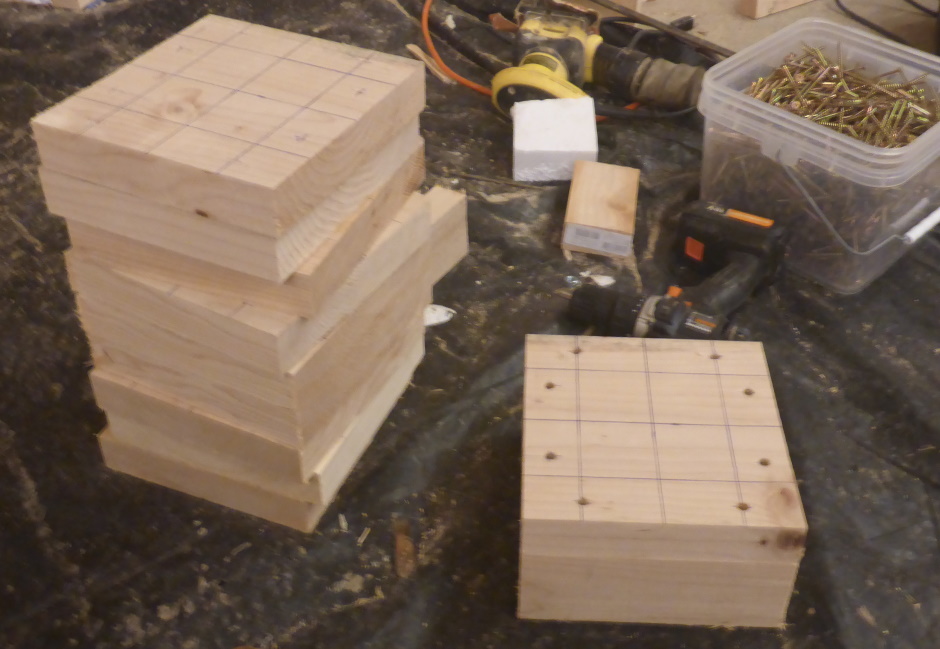
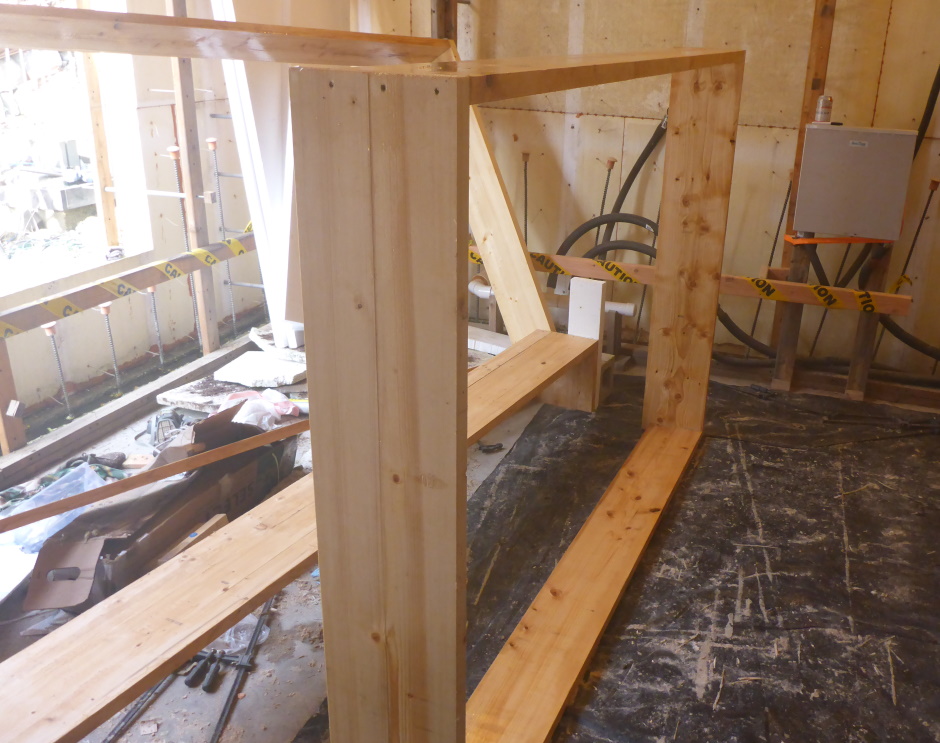
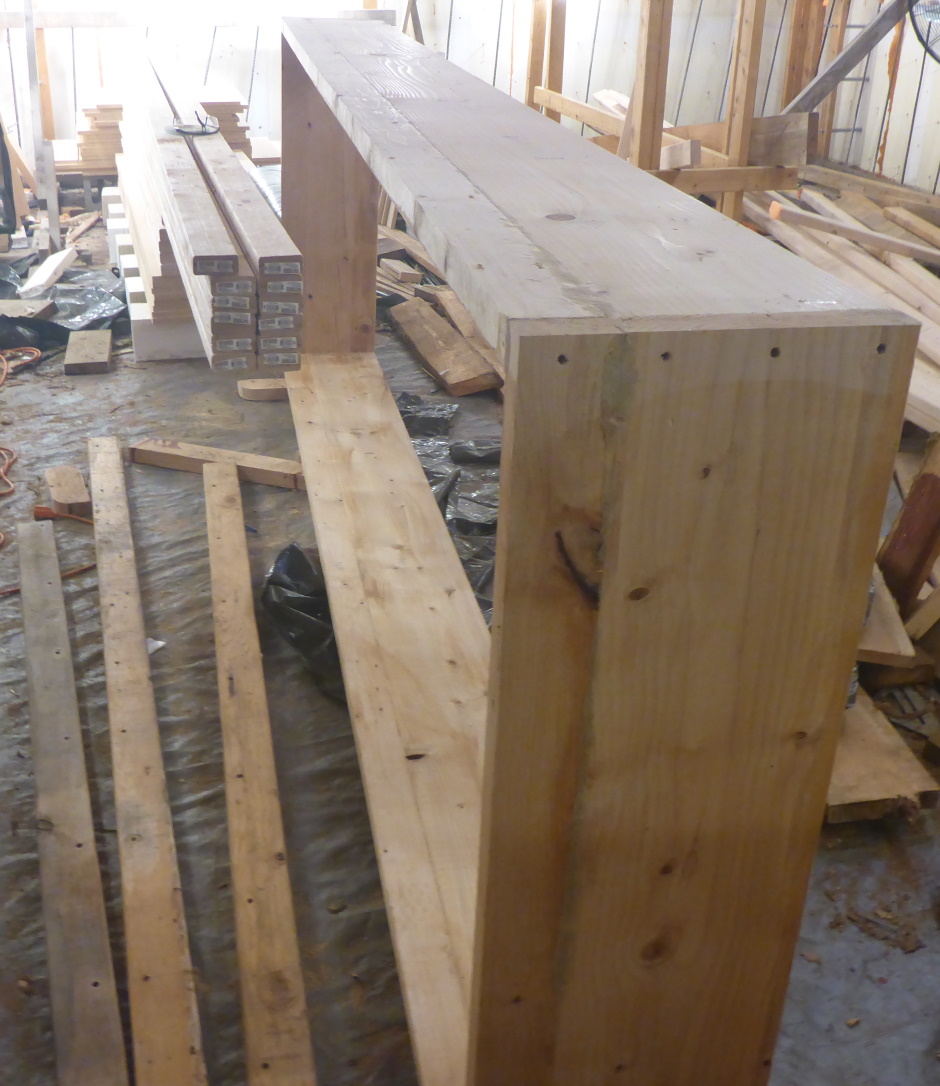
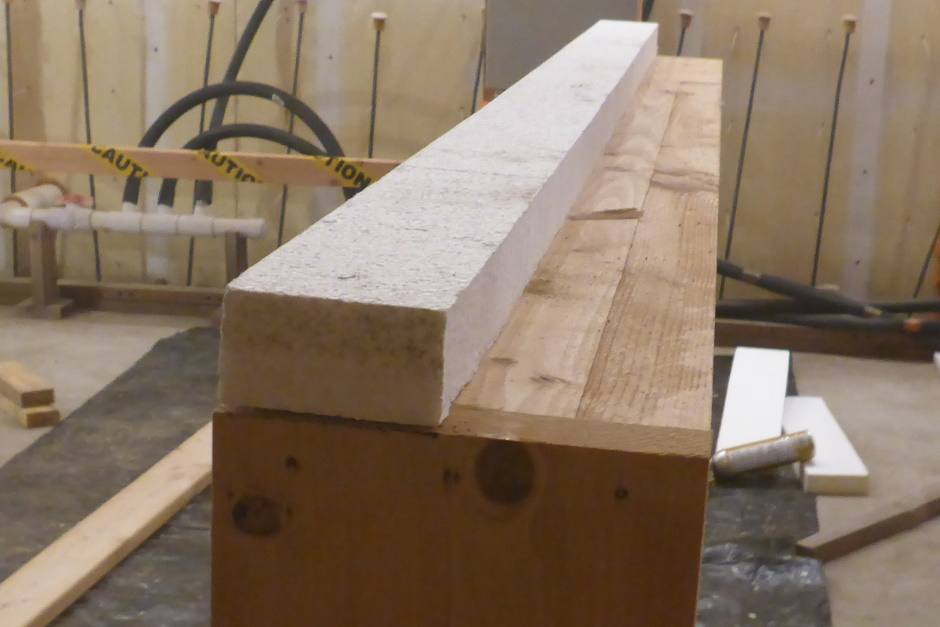
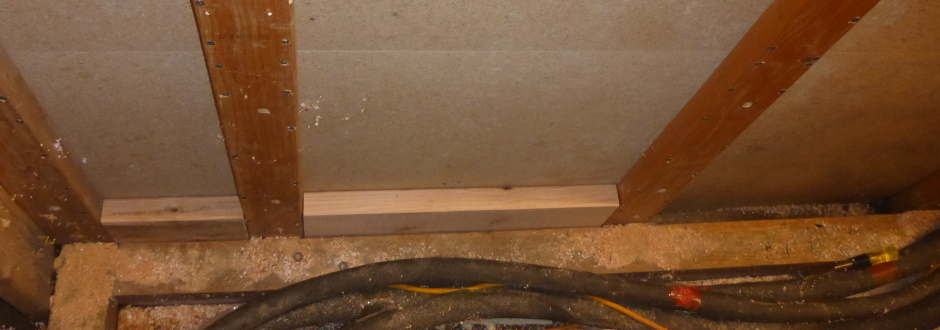
Make Projecting Bucking
For the 12" cavity case, using 10-1/2" wide lumber (buy 2x12) for the top and bottom and 9" (buy 2x10) for the sides, construct a rectangle that forms the rough opening of the window. The outside edge is flush (so it can take the window nail fin all the way round). The top and bottom pieces overlap the side pieces. If the window is an 8'x5' rough opening then the inside dimensions of the rectangle should be 8'x5'. There is no need or desire for any diagonal bracing within the rectangle.
For the 8" cavity case, use 6-1/2" wide lumber (buy 2x8) for the top, bottom, and sides.
Try to use good straight lumber, but if the lumber is slightly warped then you will want to arrange for the bow to be inwards. The padded 2x4 cross that will be added later will push out any bow. If there is a slight bend in the other dimension then make the window bucking bow to the outside of the house (this is just for consistency).
This lumber rectangle will be permanently visible and will form part of the window sill inside the house so you want it to be unblemished. It will be sanded later to clean off any concrete residue and any dried glue.
Glue (with PL-Premium) and screw.
You can use the squaring bucking as a guide to get it square while the glue is drying.
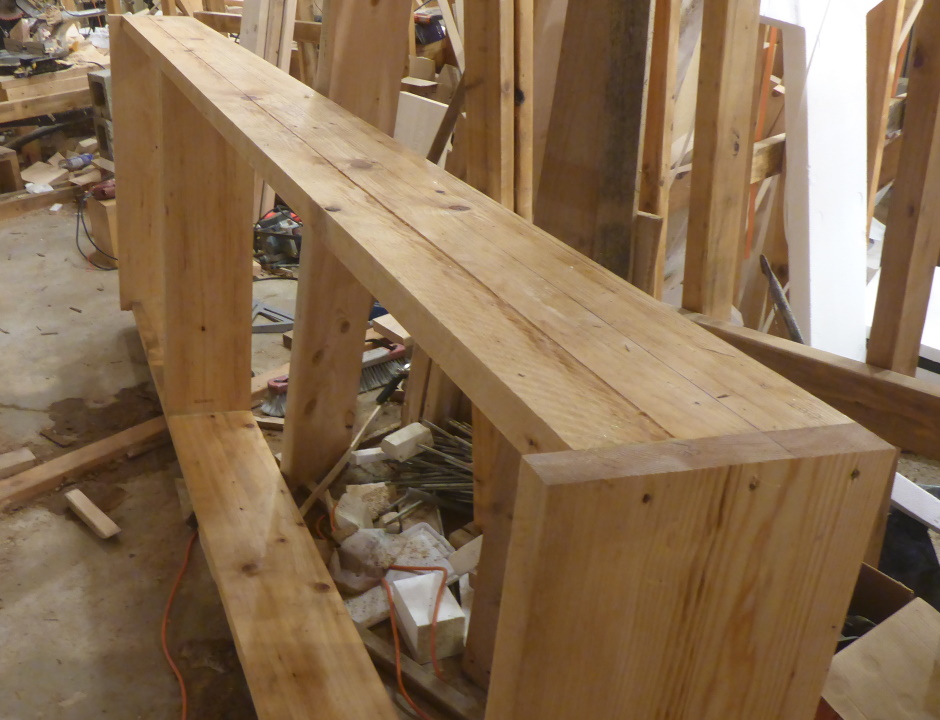

Apply several coats of varnish clear wood protection to all sides of the wood rectangle to protect it from moisture. The inside edge will be sanded and varnished later (just before fitting the window) so for the moment the varnish is just for weather protection.
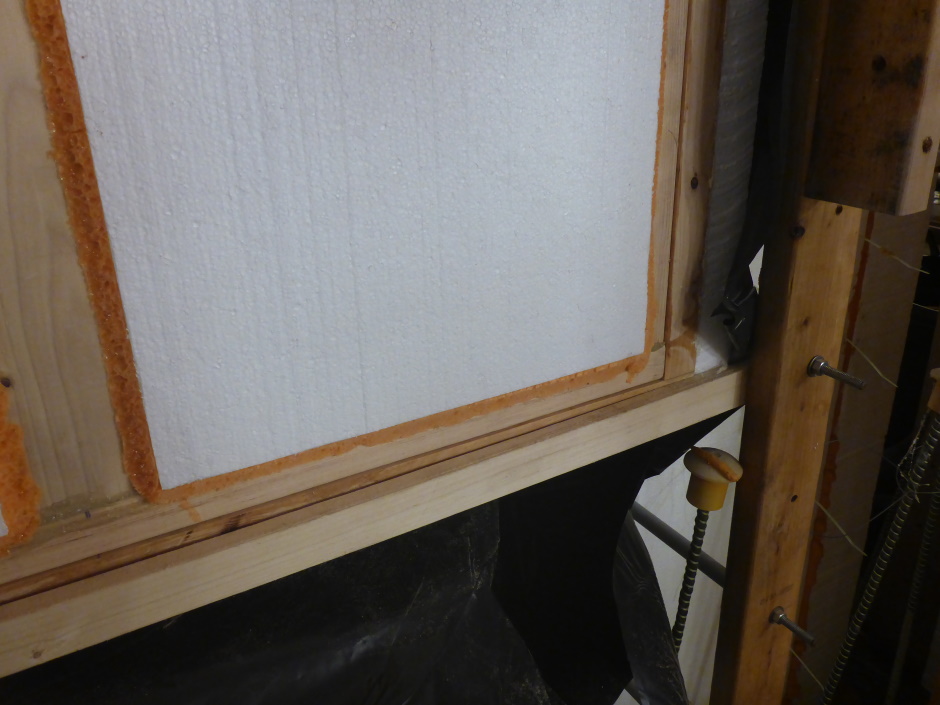
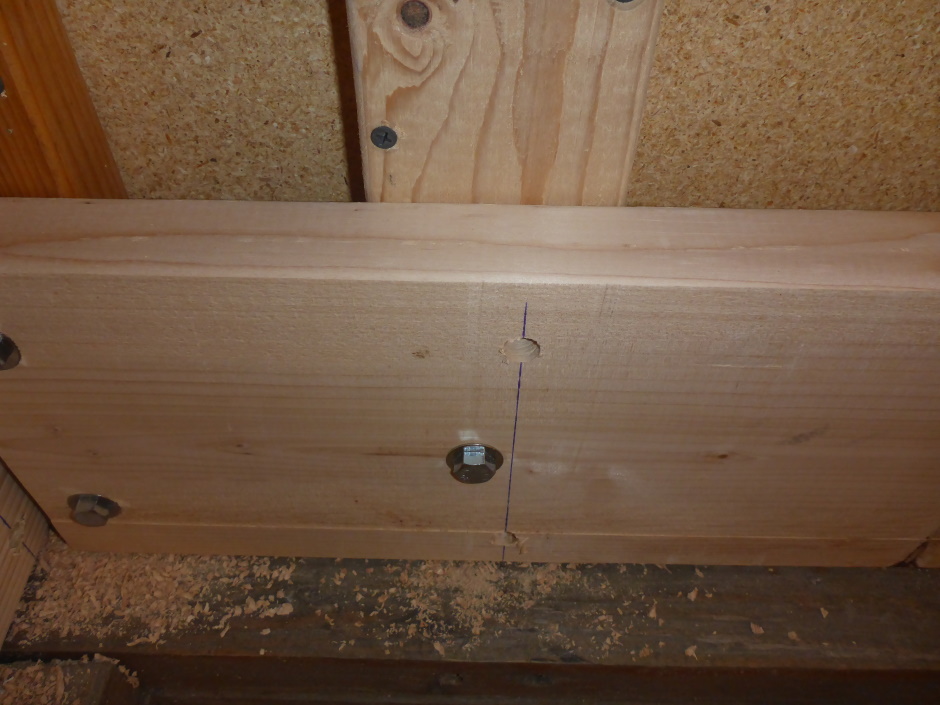
Draw a line on the sides to show the insertion distance into the wall EPS. This line is 3-1/4" from the nail fin outer edge.
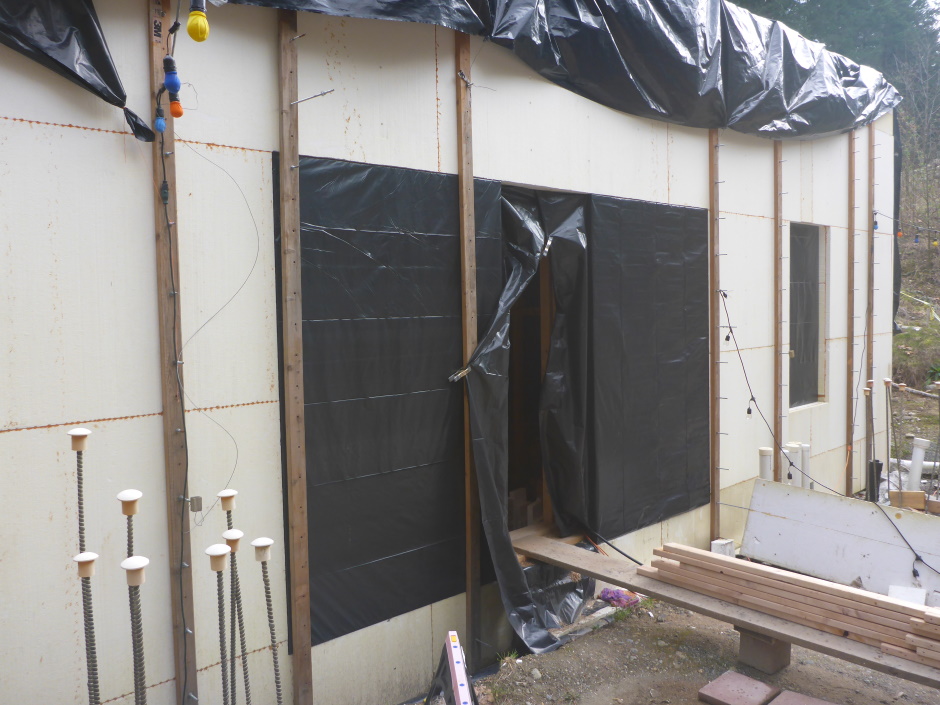
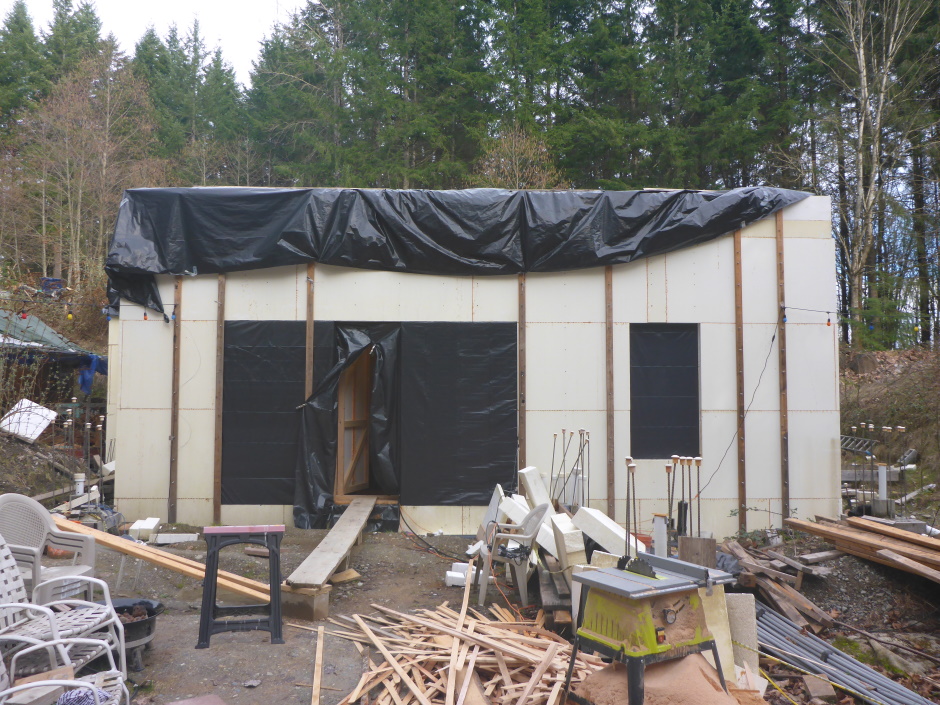
Apply some pieces of 2" double sided carpet tape on the outside of the projecting bucking (in the insertion area). Wrap the outer open face and the sides with black 6mil polyethylene sheet . This forms a temporary window to keep the rain out. Keep the polyethylene sheets at least 6 inches longer than the concrete cavity width (1'6" in the case of a 12" cavity). It is ok for the side polyethylene sheet to flap around a bit. Although not in practice necessary, the polyethylene sheet also separates the wood from the concrete which will keep the building inspector happy.

Fit Projecting Bucking
For the fitting of the bucking you need to temporarily remove and vertical and horizontal batons that are in the way.
The Projecting Bucking is first fitted to the hole in the EPS. It typically needs two people to lift it in.
For the 12" cavity case, the Projecting Bucking is 10-1/2" wide at the top and bottom and 6-1/2" wide for the 8in cavity case. For the 12" cavity case, 3-1/4" of it goes into the EPS and that leaves 7-1/4" (at the top and bottom) protruding into the concrete wall cavity, and at the sides it protrudes 5-3/4". For the 8" cavity case it protrudes 3-1/4" top, bottom, and sides.
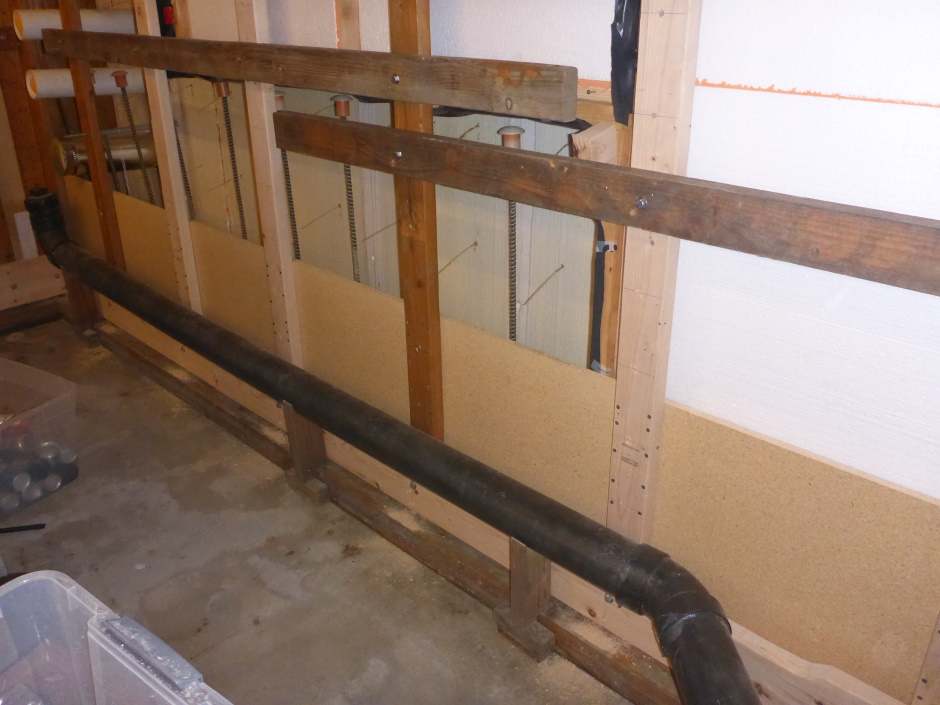
Make Cavity Bucking
For the 12" cavity case, make a rectangle of Cavity Bucking using 10-1/2" wide lumber (buy 2x12) with 1-1/2" glued on to make it 12" wide. The 1.5" extra bit is on the outside of the cavity (against the EPS). Other width combinations to make 12" can be used. If the cavity is only 8" then the Cavity Bucking is 8" wide (buy 2x10).
The Cavity Bucking is deliberately in both the width and the height made 1/8" larger than the rough opening+3" size so there is 1/16" tolerance clearance all the way round.
Try to use good straight lumber, but if the lumber is slightly warped then you want to arrange for the bow to be inwards. It will be pushed outwards by the Squaring Bucking and Protruding Bucking. If there is a slight bend in the other dimension then make the window bucking bow to the outside of the house (this is just for consistency).
Get the rectangle approximately square using an L shaped square or T square.
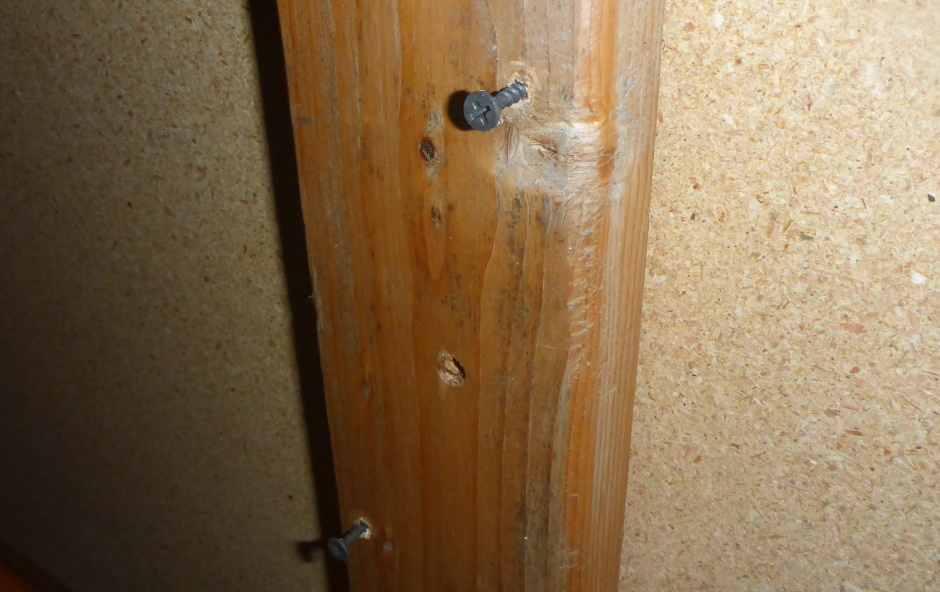
Glue (with PL-Premium) and screw. Make sure the diagonal dimensions are exactly the same before the glue dries.

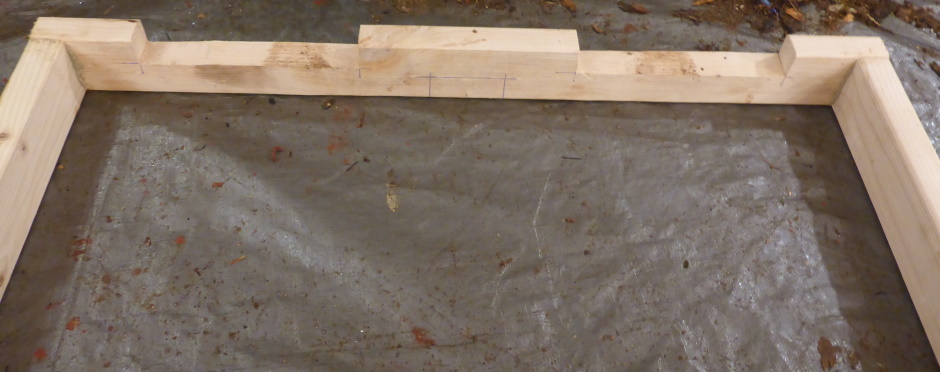
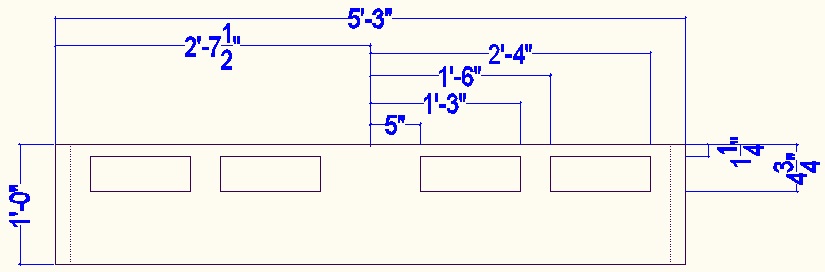
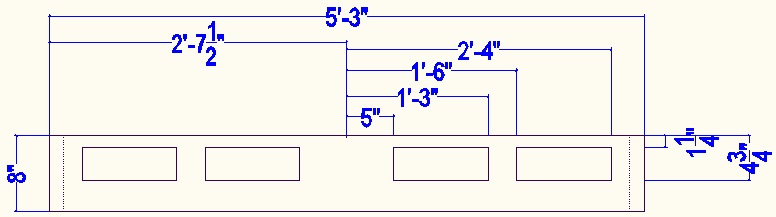
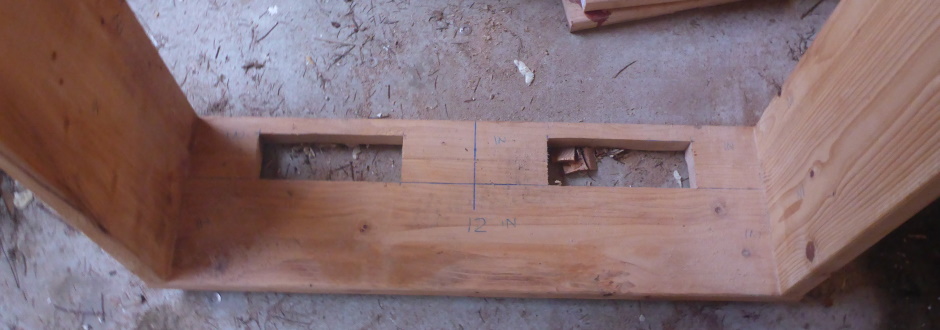
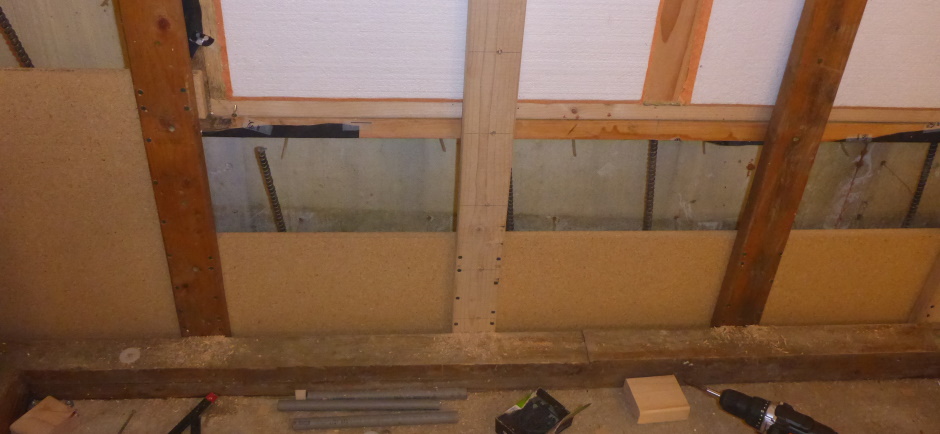
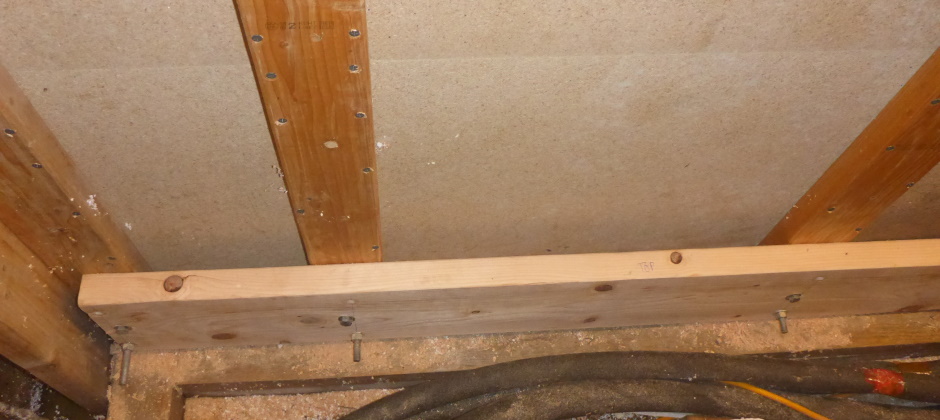
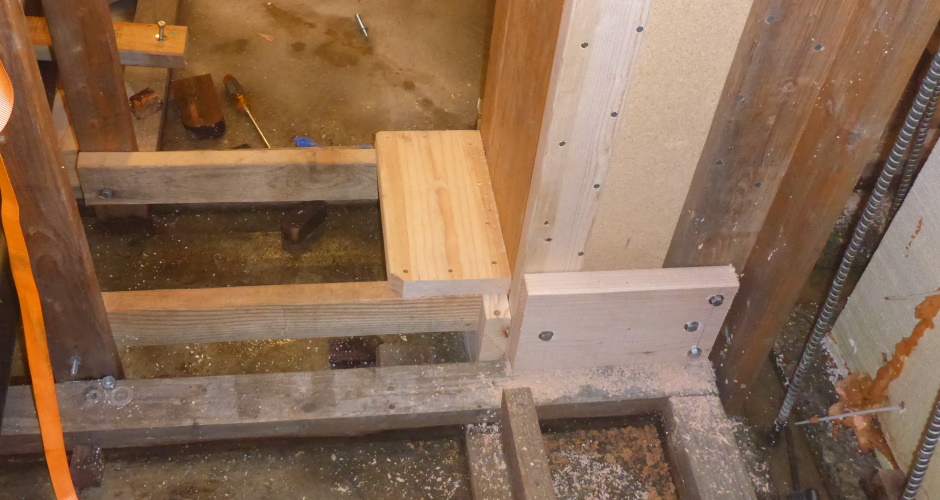
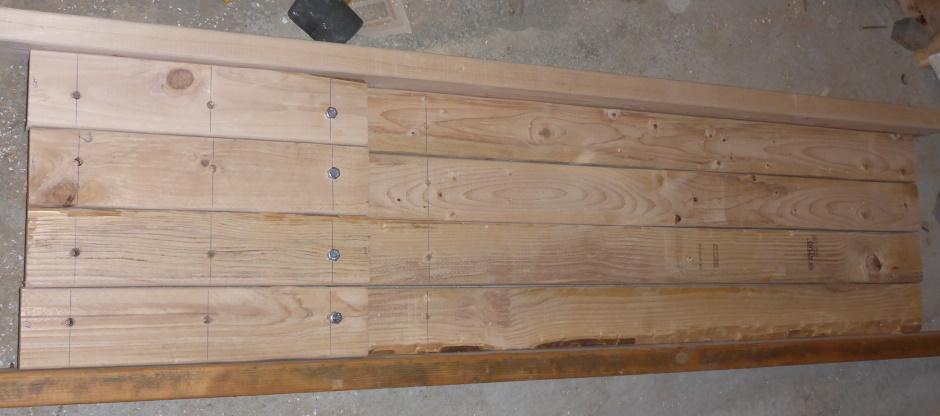
Cut holes in the bottom of the Cavity Bucking. The holes are 3.5" tall and 10" wide. Measure 5" either side of the center and that is the start of the rectangular holes on each side. In the center, 10" of wood is used for the internal bracing to push on. The rectangular holes then repeat on 1'1" centers. The holes start 1-1/4" from the edge nearest the center of the house (This needs to be right to match up with the edge of the Protruding Bucking above and the cut holes in the squaring bucking). T shaped 2-by plugs will be used with props from the top to seal the holes once the concrete rises up the wall.
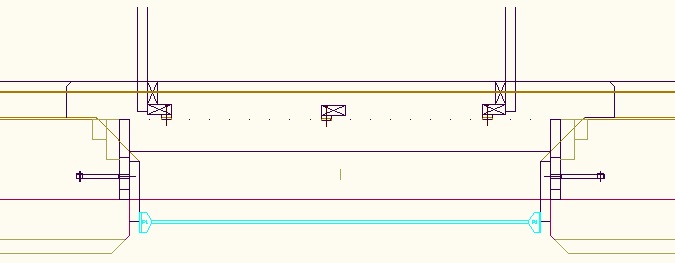
Here is the 12" cavity case (for a 5' wide window)...
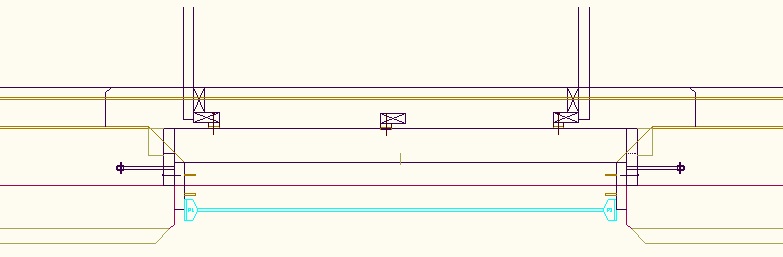
And the 8" cavity case...
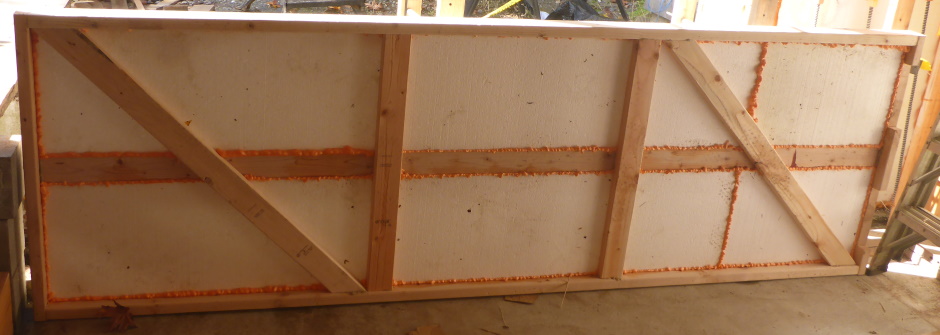
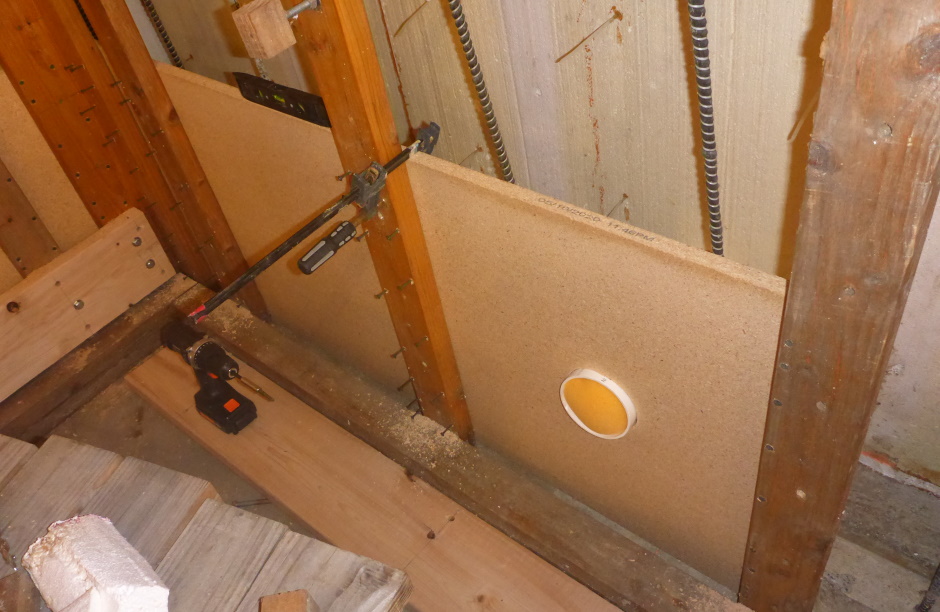
It is necessary to make it possible (after the concrete pour) to cut at 45 degrees the side edges of the windows on the inside. This is done by using EPS to avoid concrete in the area that will be cut. For the 12" cavity case, onto the sides glue with foam adhesive nearest to the inside of the house one 2" thick piece of EPS that is 6" wide. On the outside of that, again nearest the inside of the house, glue on to the sides a piece of 1.5" wide 1.5" EPS. For the 8" cavity case, there is just one piece of 2" thick EPS that is 3-3/4" wide.
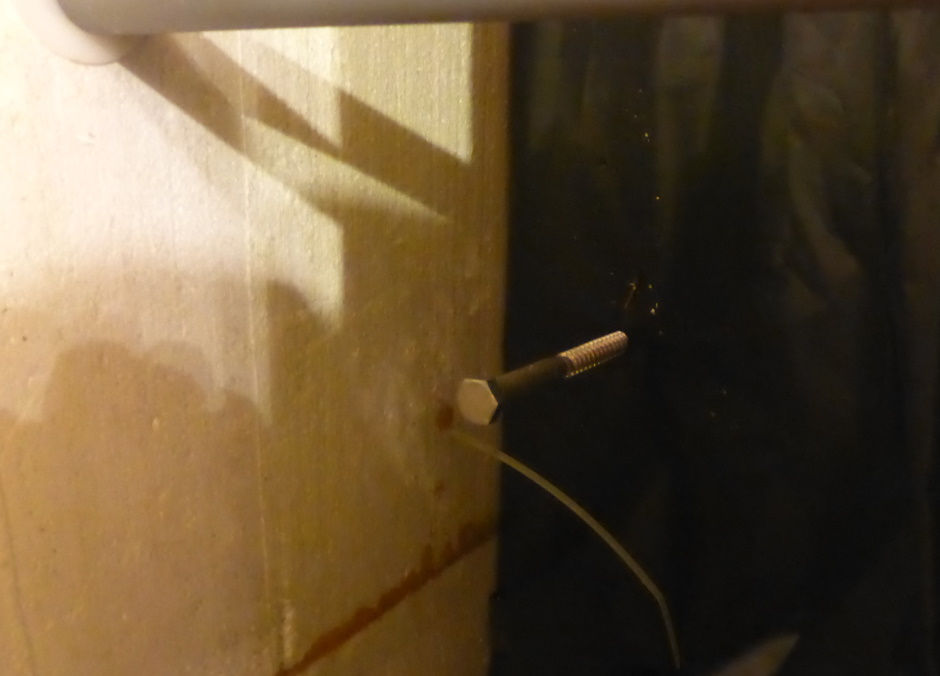
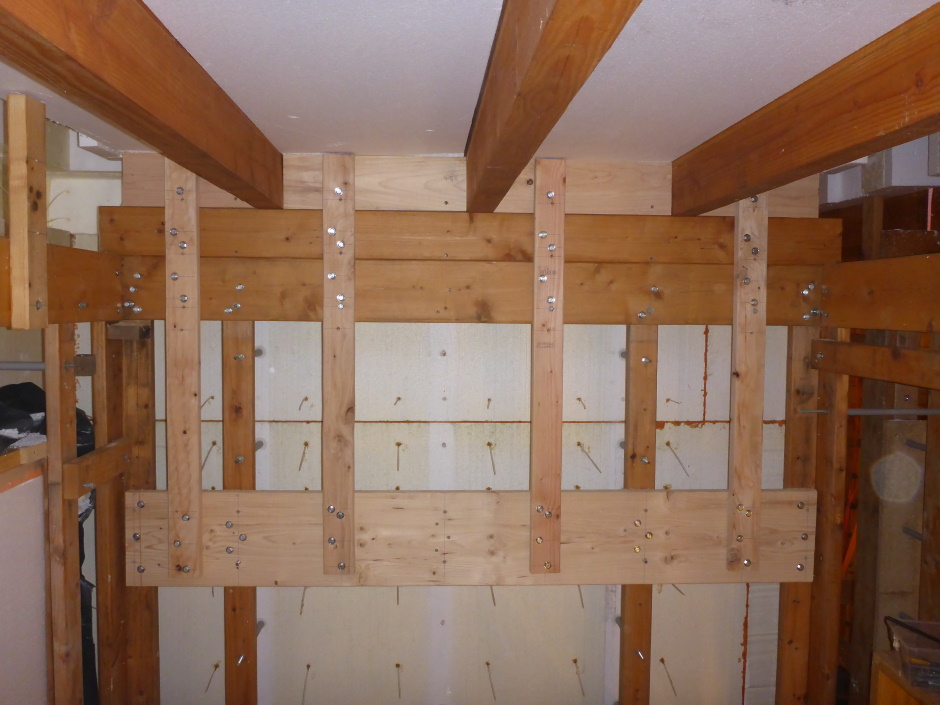
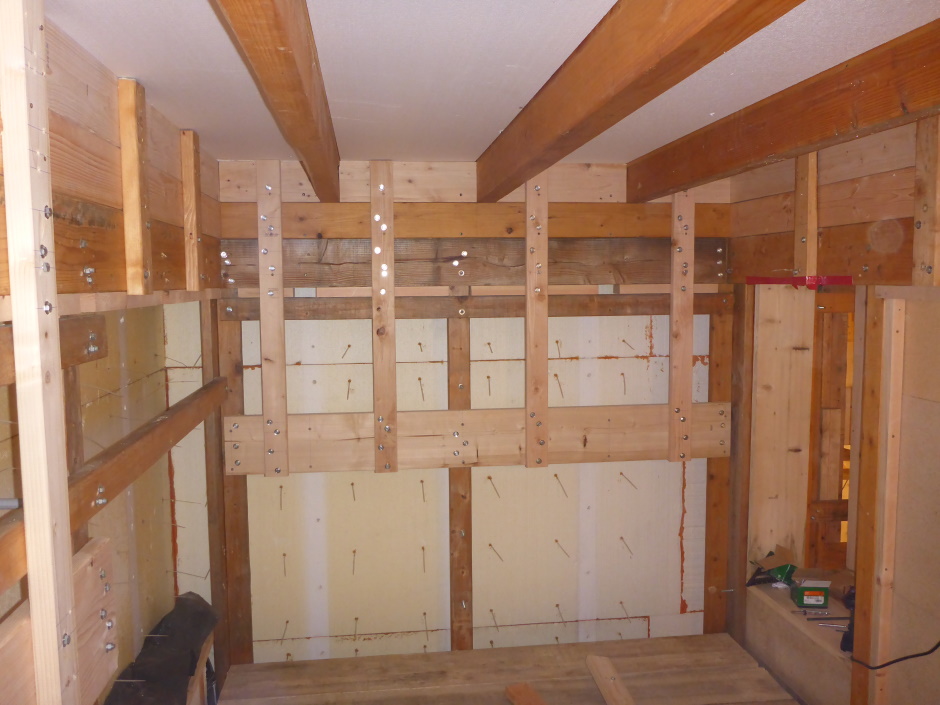
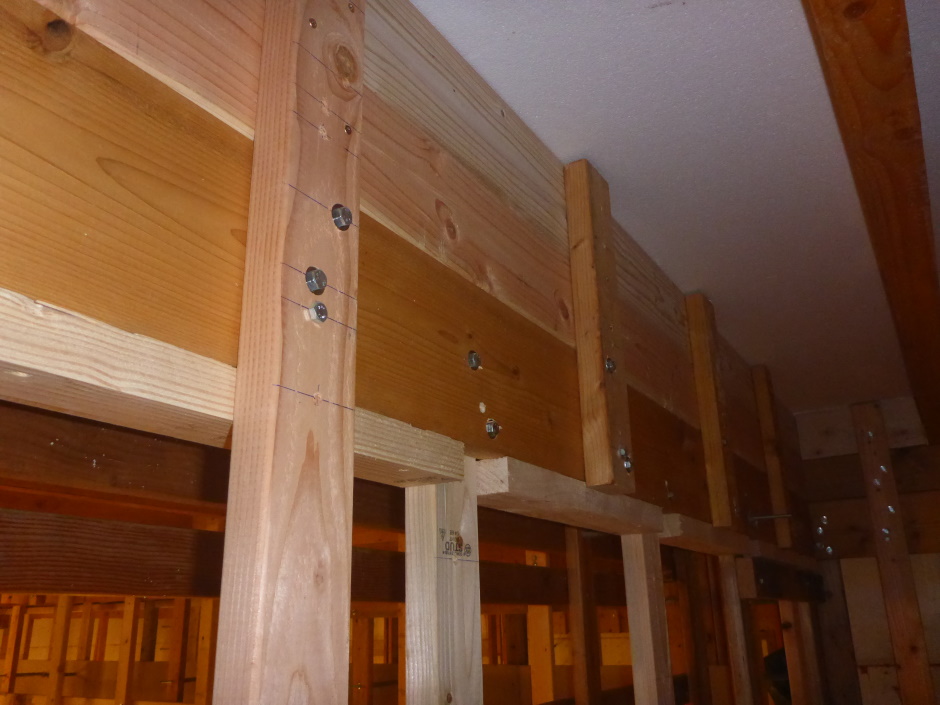
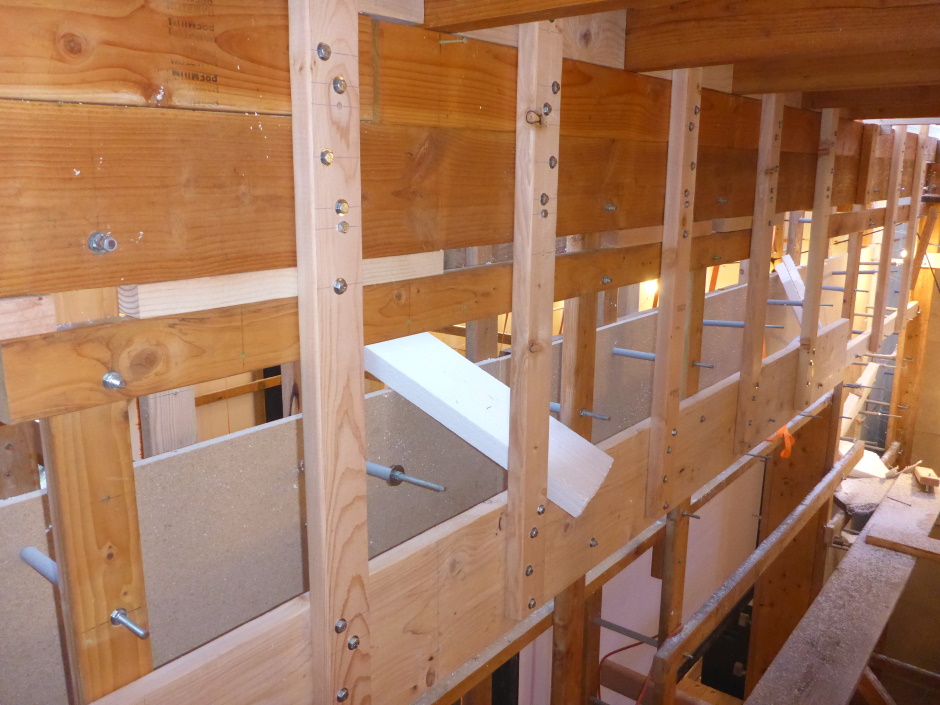
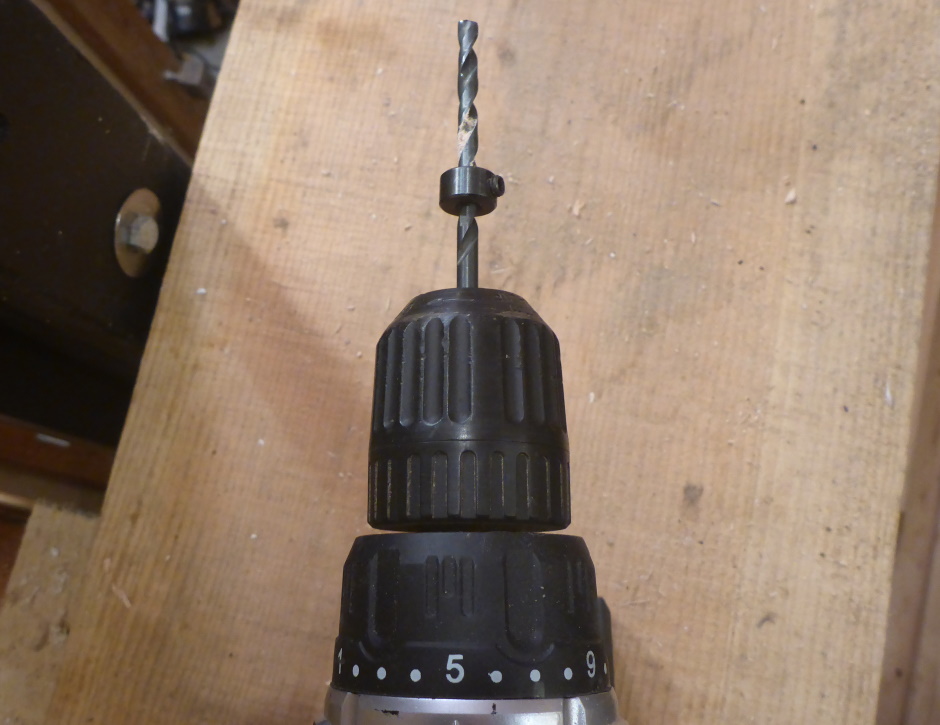
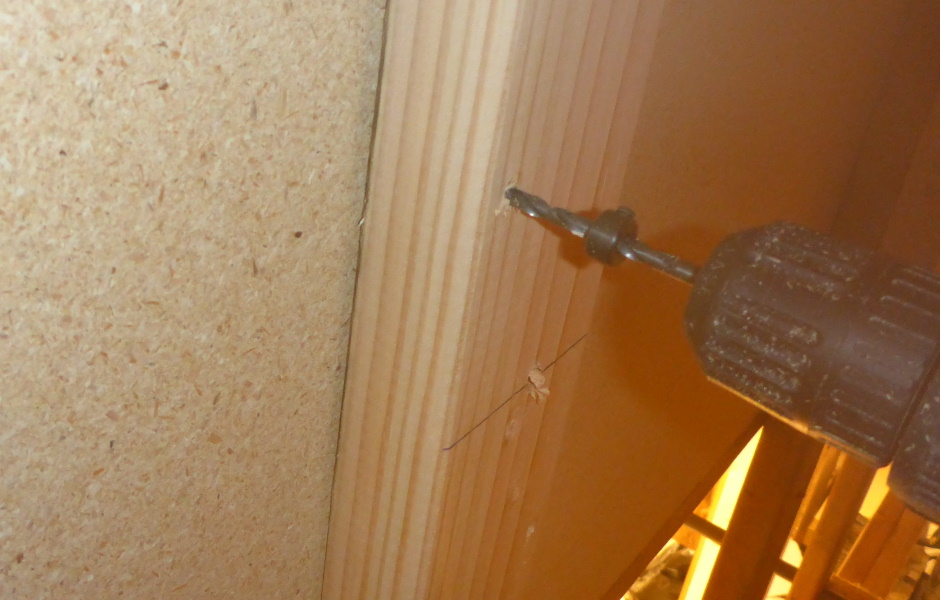
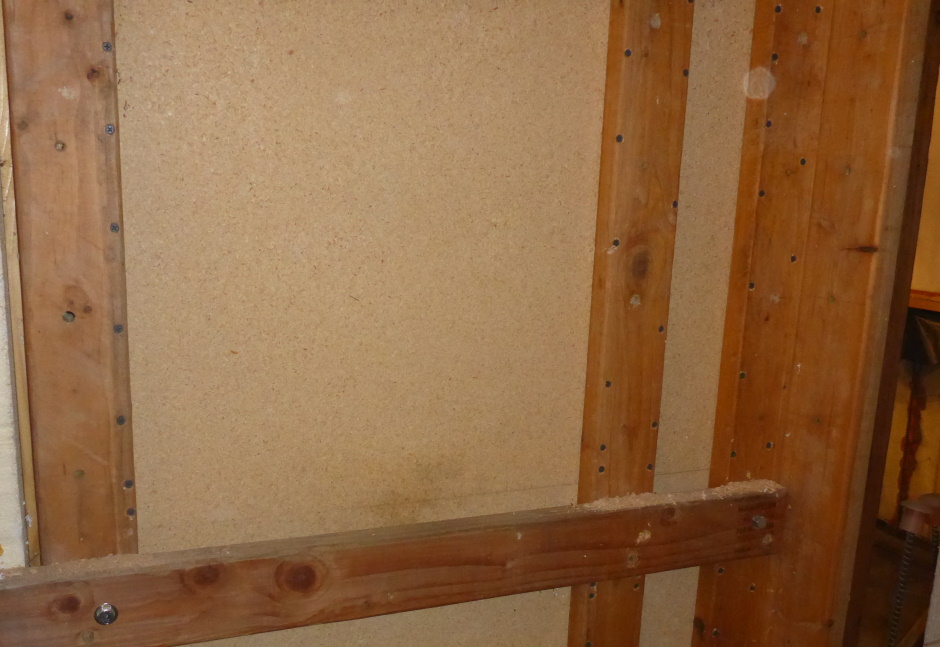
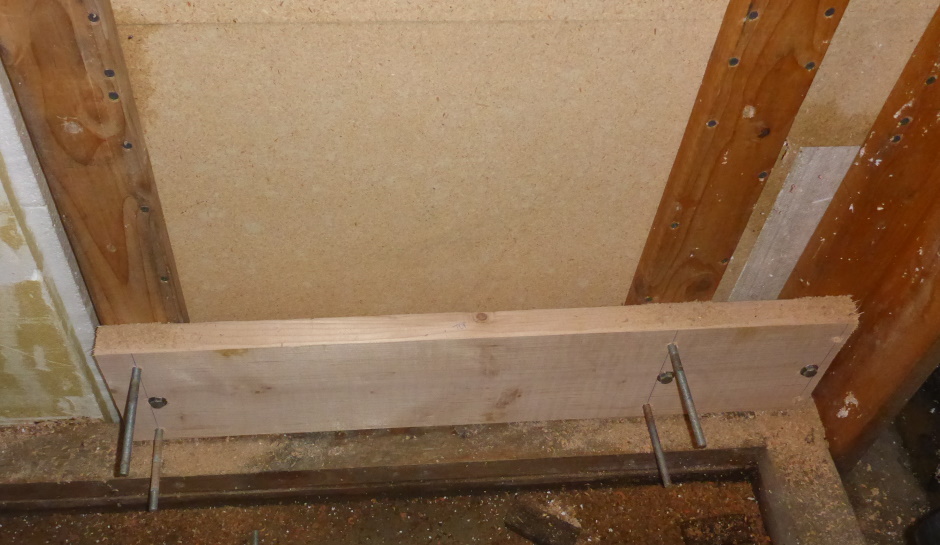
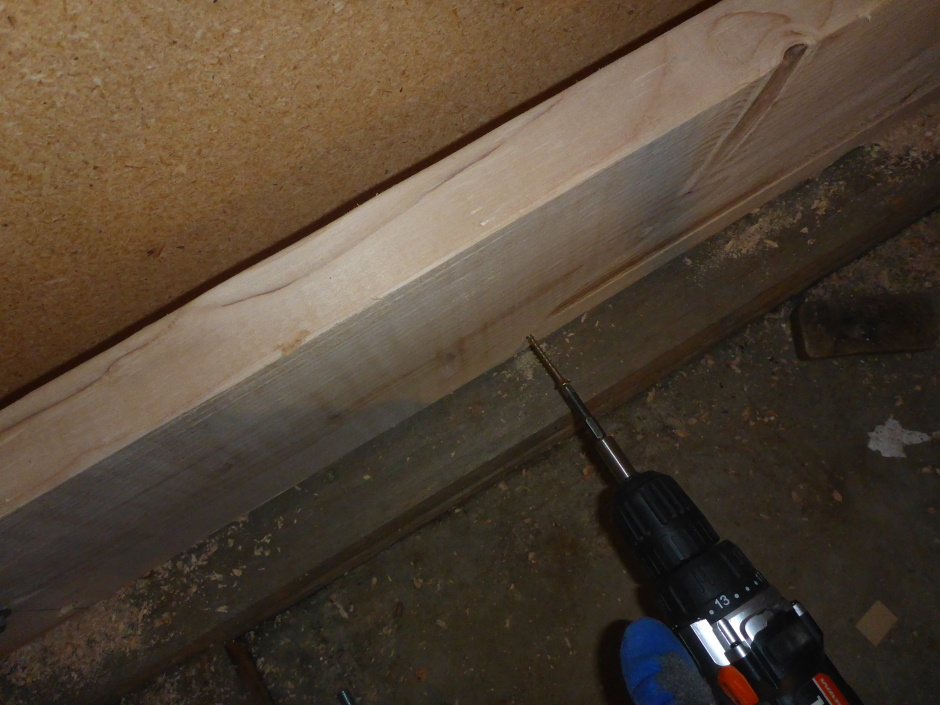
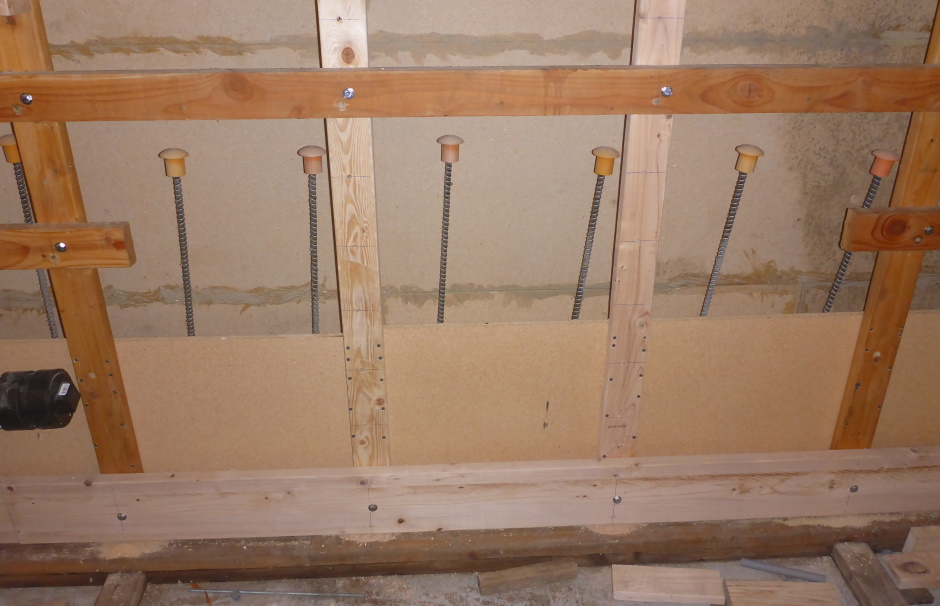
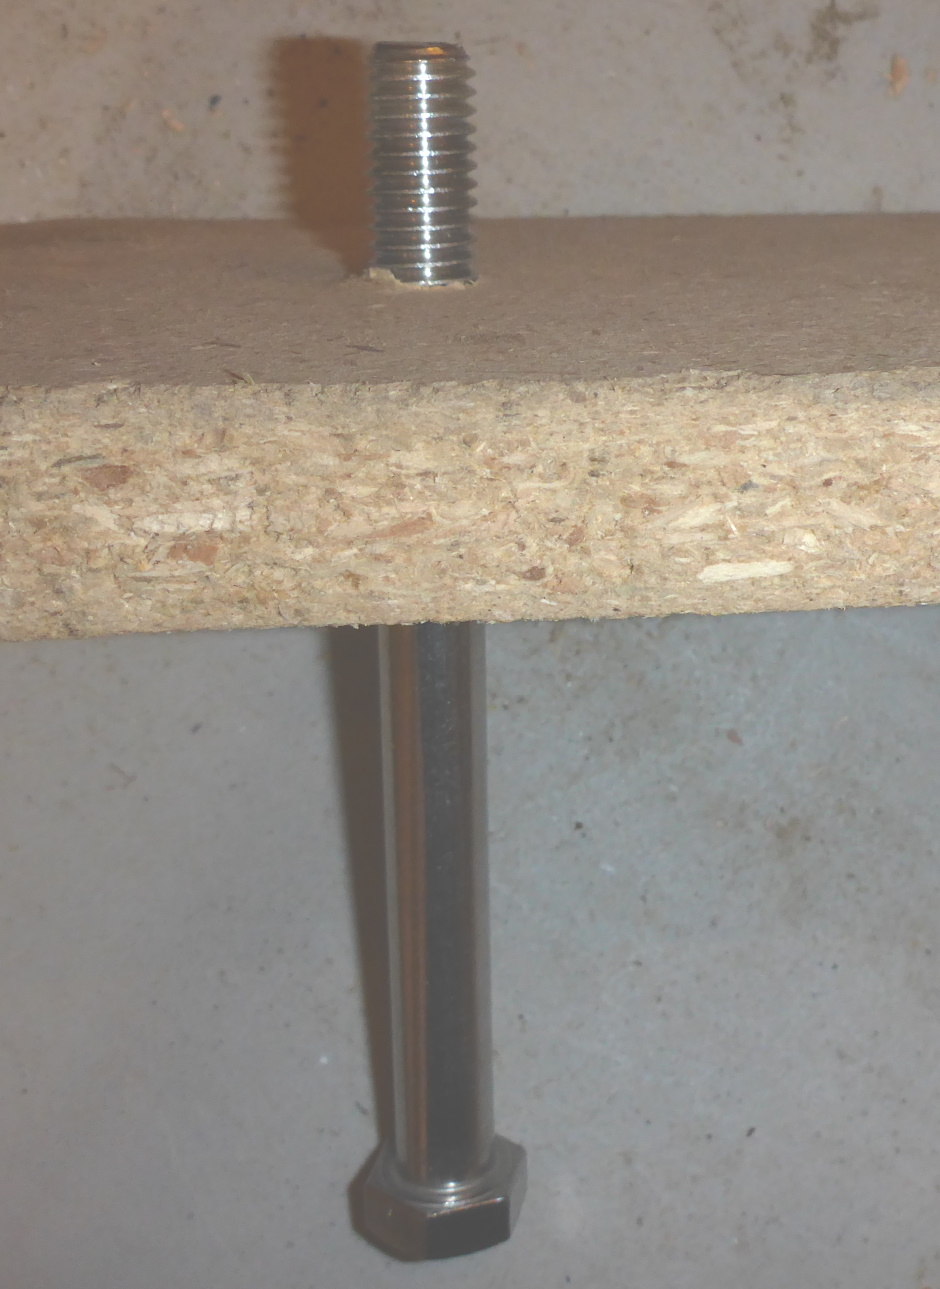
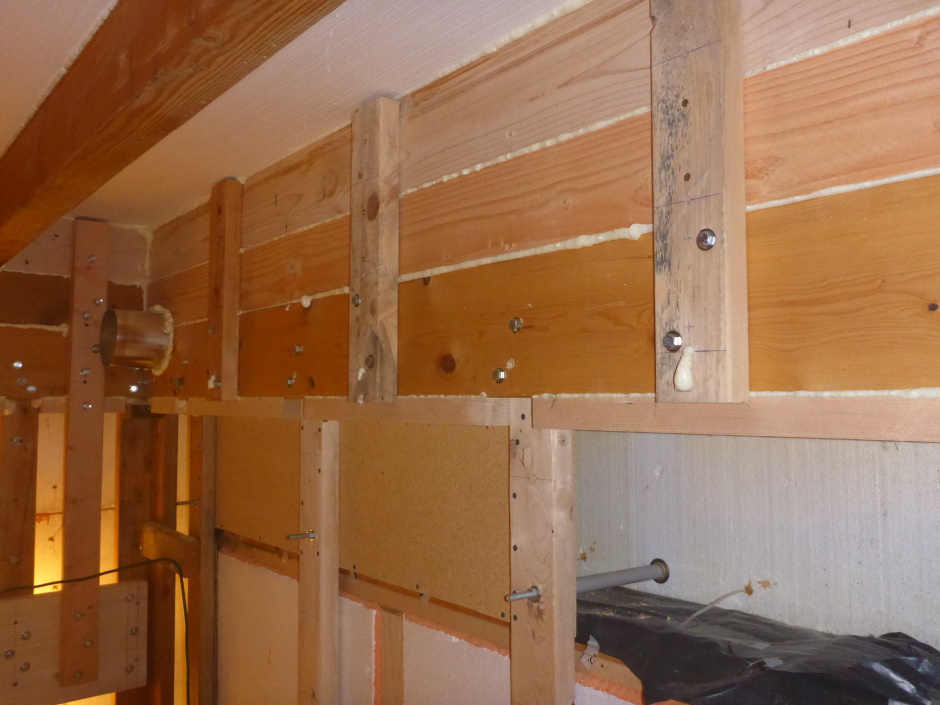
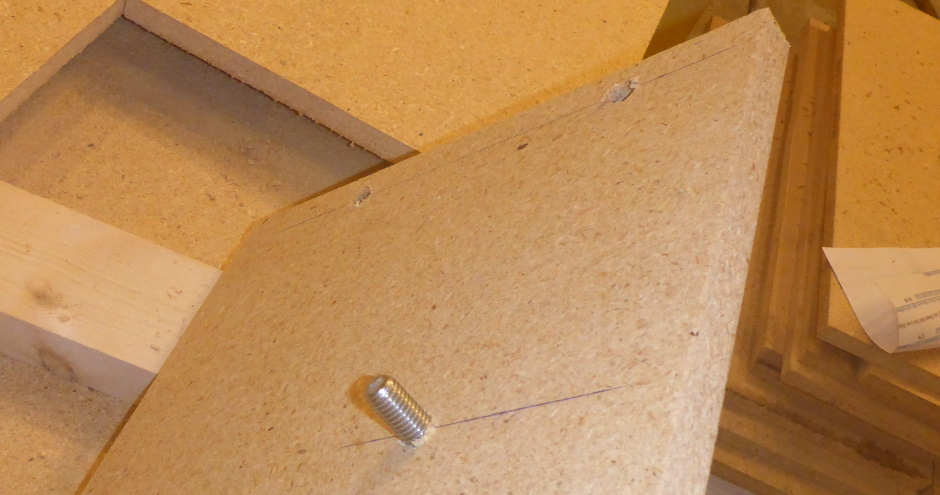
Drill holes in the lumber rectangle for the concrete anchoring studding. For the 12" cavity case, these holes are 3-1/2" in from the external edge of the cavity bucking. For the 8" cavity case, they are 2-1/2" in from the external edge of the cavity bucking. On the sides the studs are designed to be at the X'6" points (to avoid the wall ties). That means they can be at 6", 1'6", 2'6" etc measured from the inside edge of the TOP lumber that forms the Cavity Bucking. Make sure you measure from the top. Potential holes are on 1' centers. The holes are 1/2". On the top and bottom potential holes are at 6" and 9" from the outside edge of the frame and then the double potential holes on 1' centers after that. The actual holes chosen (6" or 9") will depend on the relative location of the wall ties that need to be avoided. If you happen to know the position of the wall ties then you don't need to drill all the holes. You will only need studs about every 3 feet, so again you can avoid drilling all holes.
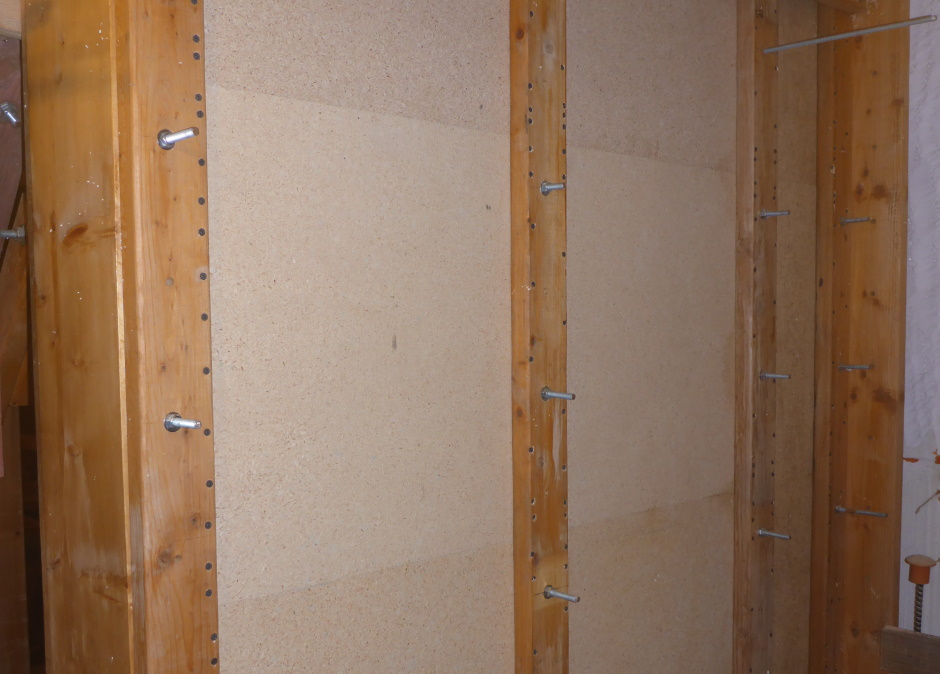
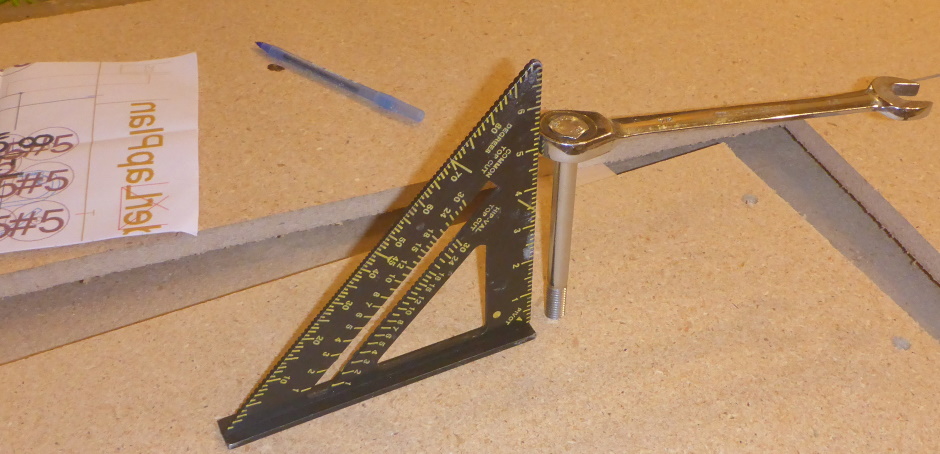
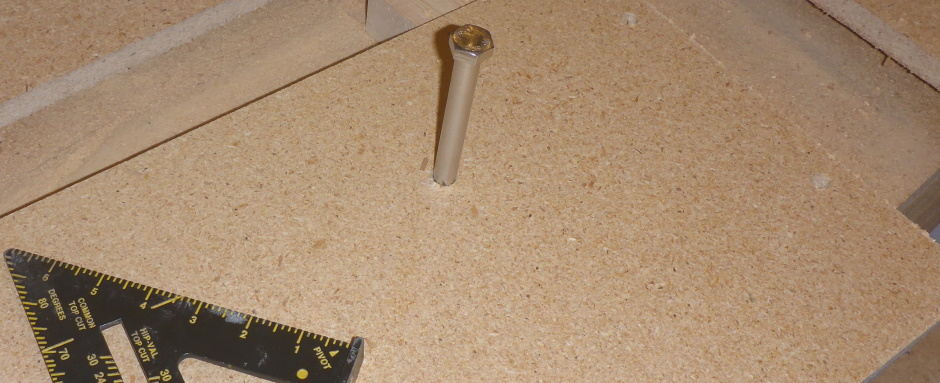
In the 1/2" holes will go 8" long galvanized 1/2" threaded studs that protrude out into where the concrete will be. They have a washer held by two nuts near the end which will provide the anchor in the concrete. They will eventually be glued in place with PL-Premium adhesive after the bucking assembly is in place. For the moment we just want the holes.
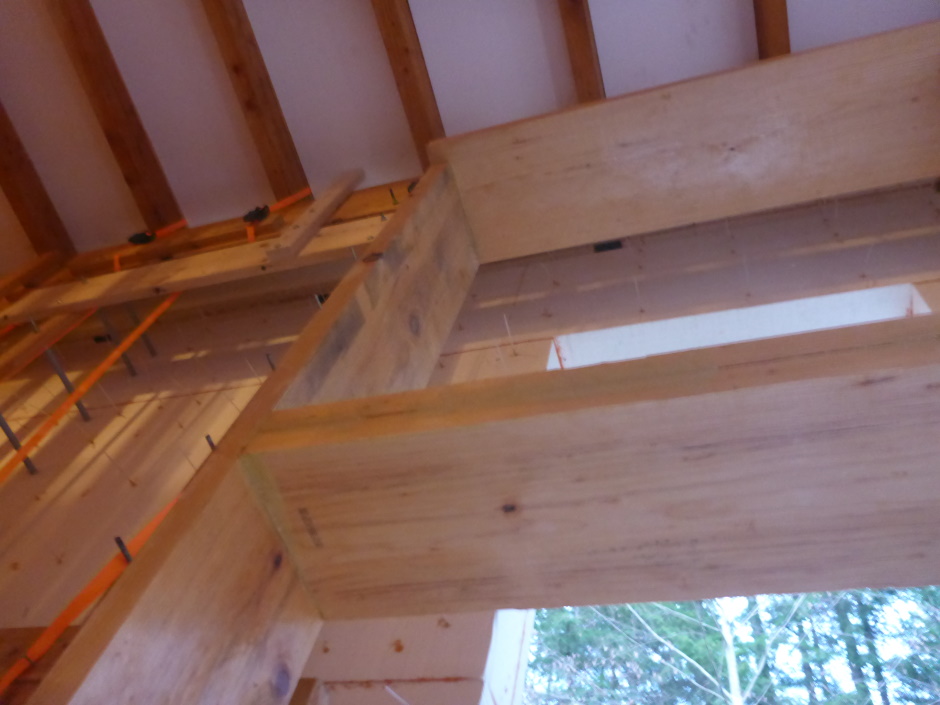
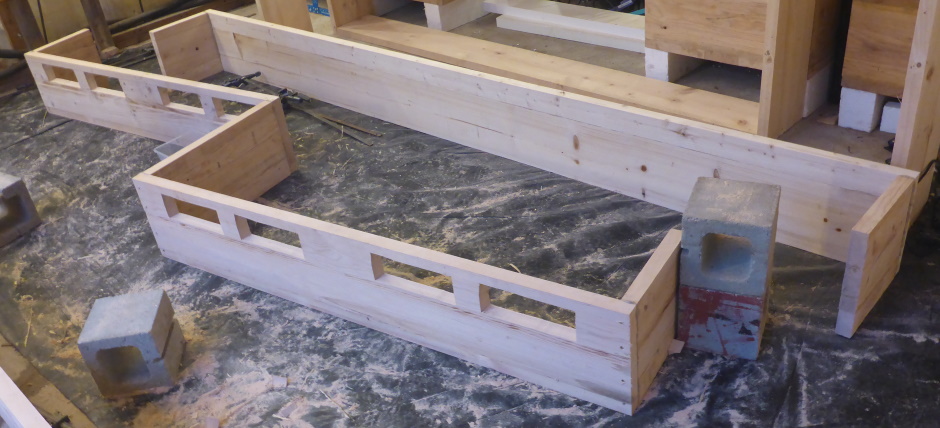
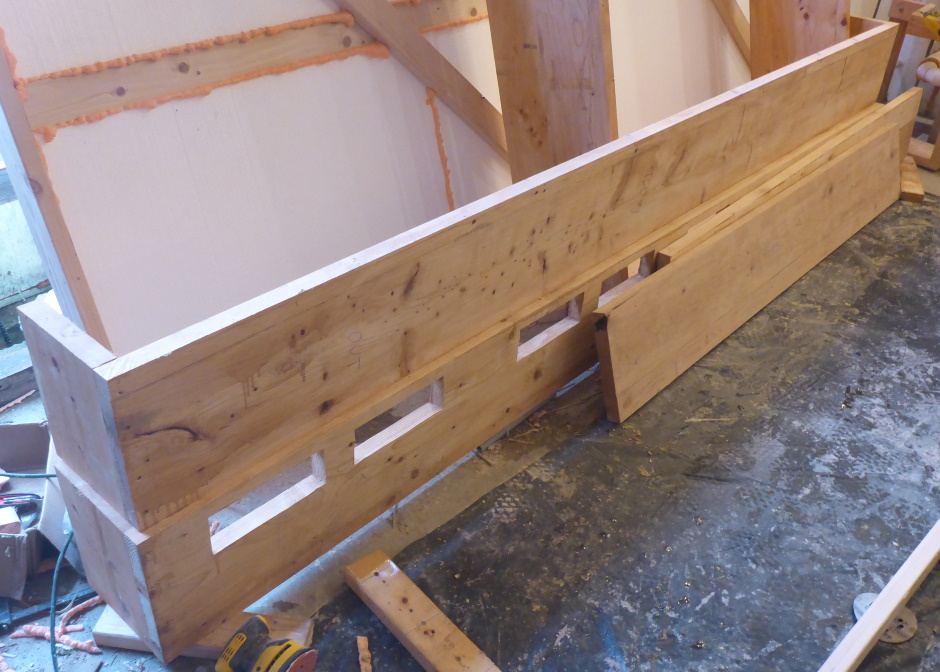
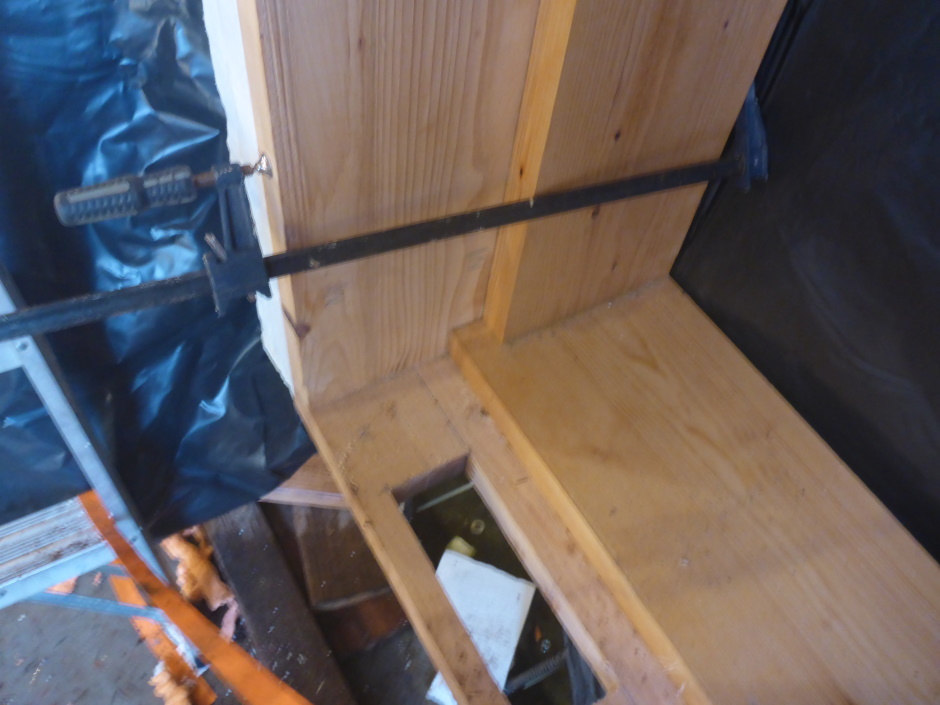
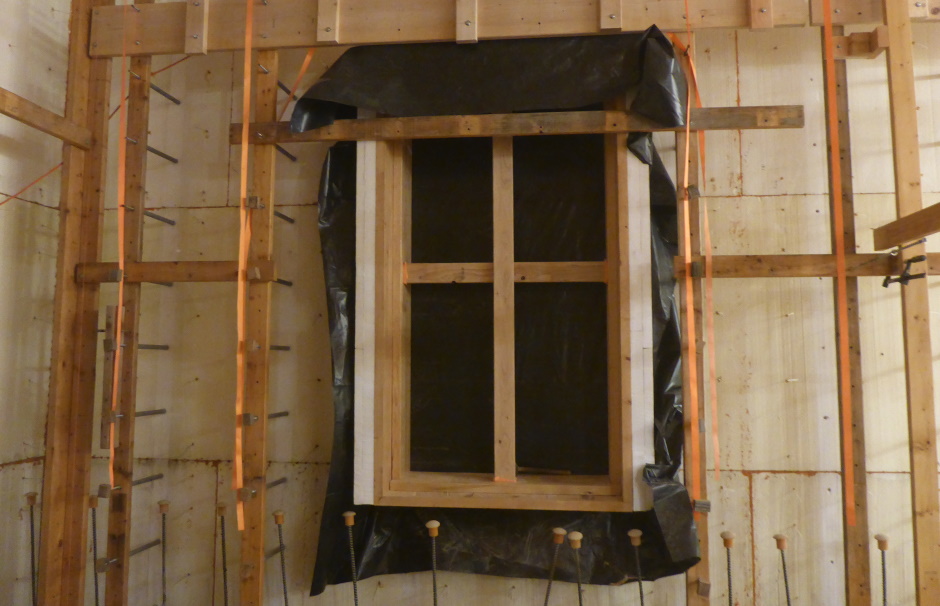
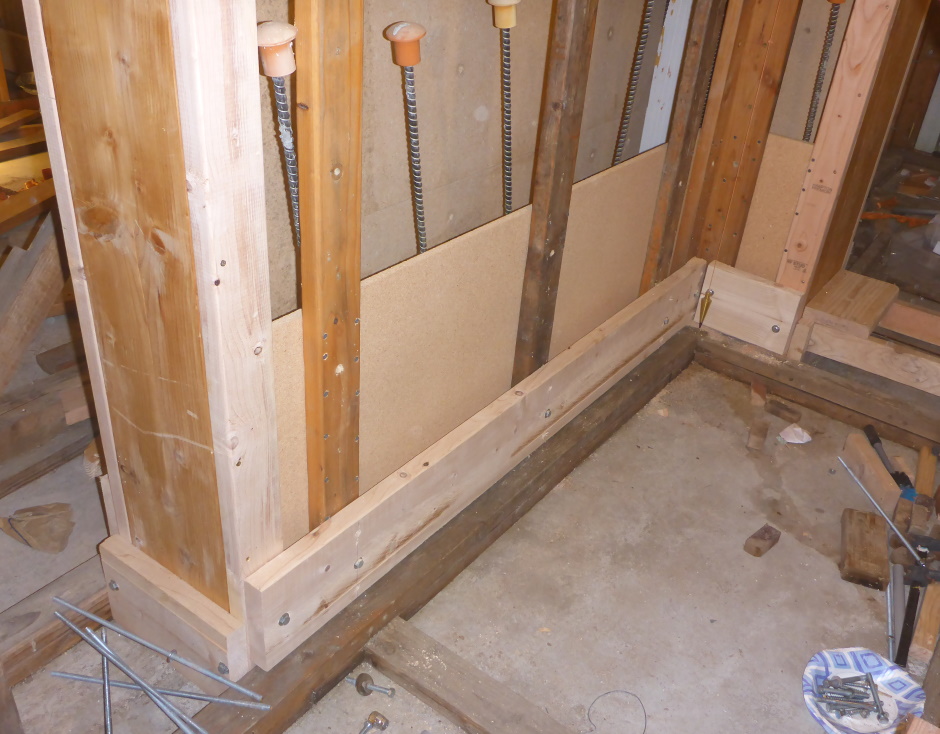
Fit Cavity Bucking
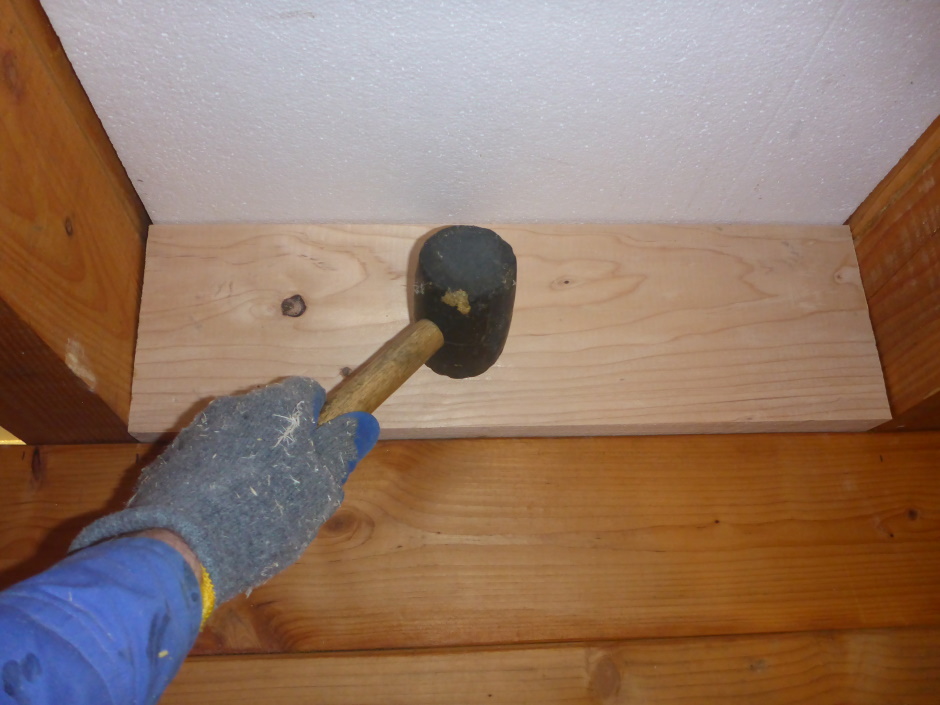
Fit the Cavity Bucking rectangle over the in-place Projecting Bucking. You will need a couple of people hold it and another person who is positioning any temporary wood props found to be needed. Even with the 1/8" clearance you may need to gradually work the sliding bucking into the cavity bucking (but make sure you do not damage the wall EPS).
The Projecting Bucking is in its final location so it is ok to be screwed with wood screws from the Cavity Bucking side. The marked line on the Projecting Bucking gives the exact position for the two to be connected together. Use 2.5" wood screws about every 2 feet. There will be no screw heads visible in the window surround (which is an advantage with Carnation Walling).
Another advantage of Carnation Walling over using ICF is that there is no need to lift the bucking assembly up to clear the inner ICF EPS.
The Cavity Bucking goes under the polyethylene sheet, ie the polyethylene goes on the edge of the concrete.
Use some bits of 2" double sided tape to fix the polyethylene sheet to the Cavity bucking so it does not flap around and get in the way.
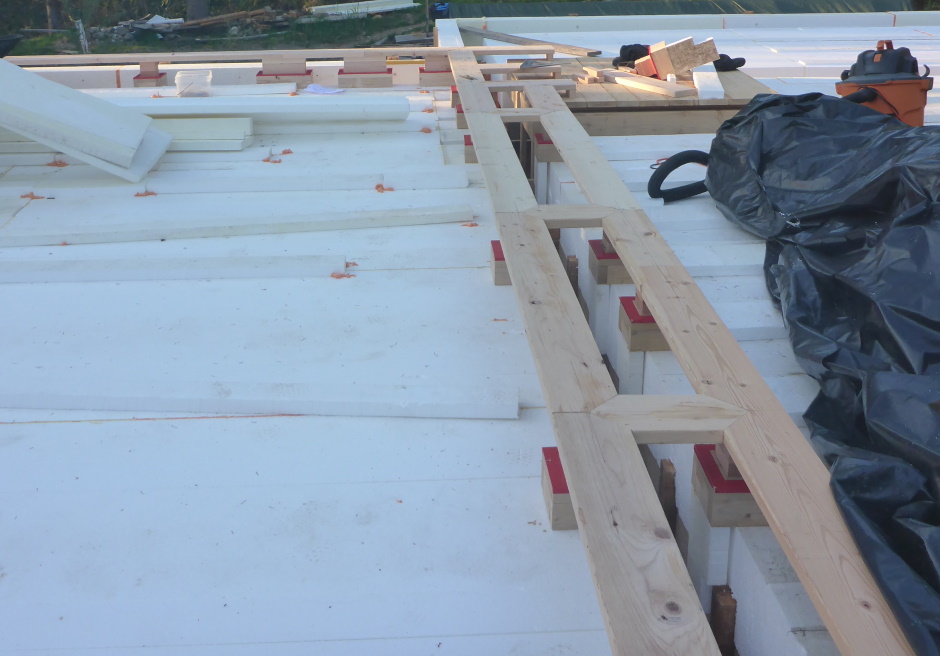
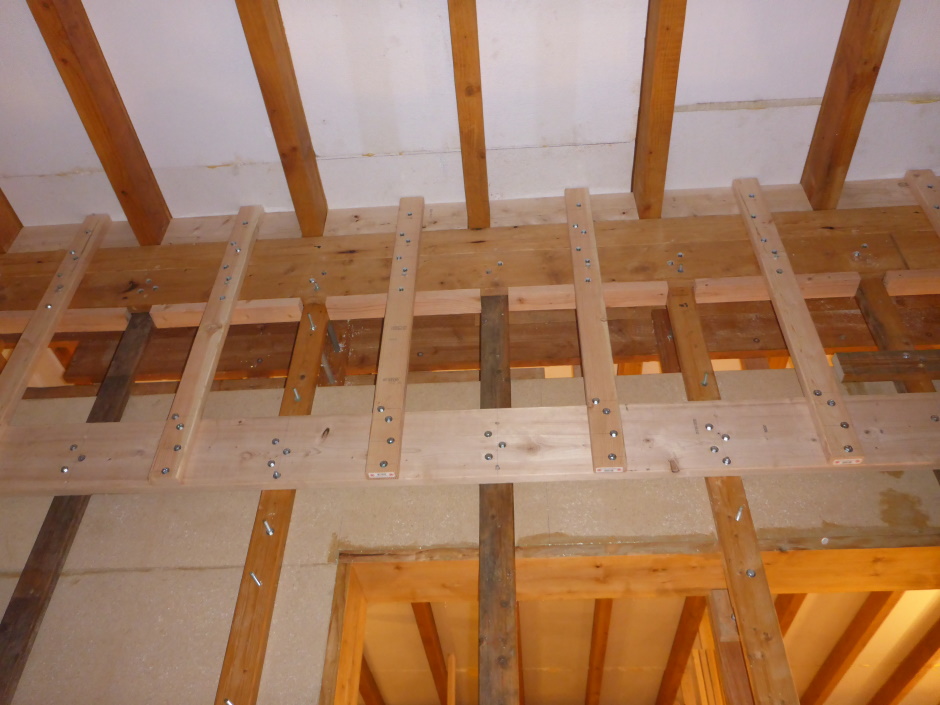
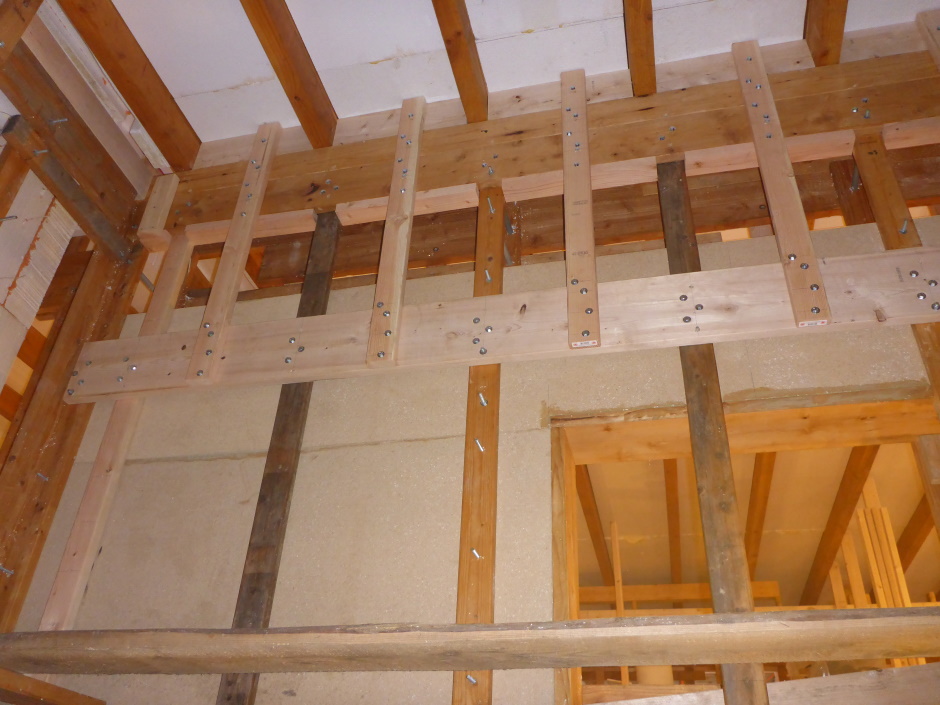
As needed, get the additional vertical 2x4 batons (and horizontal as appropriate) added at the earliest opportunity. When fitting you need a 3/4" spacer (from a vertical baton) to take the place of the 3/4" particleboard. This is to hold the vertical 2x4 baton the right distance (3/4") from the edge. From a horizontal baton the spacer needed is 2-1/4".

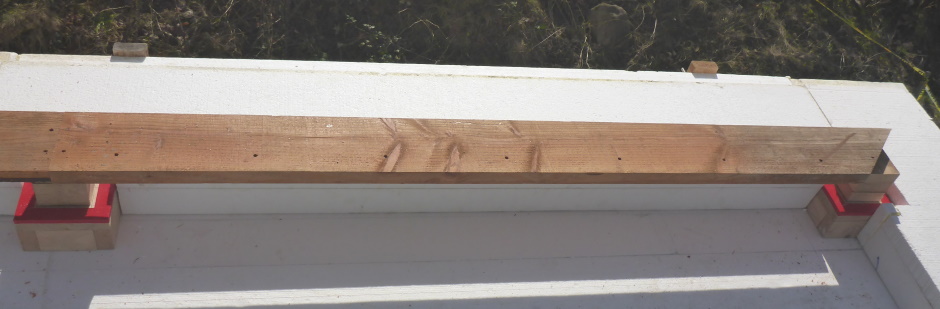
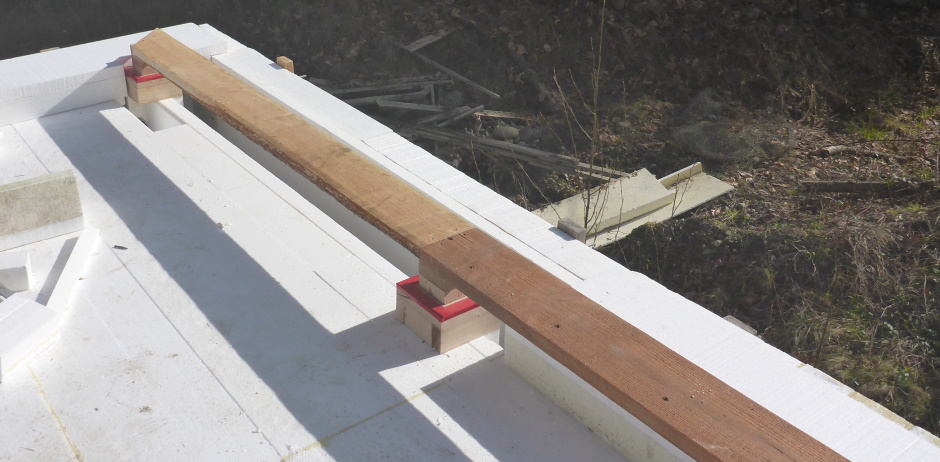
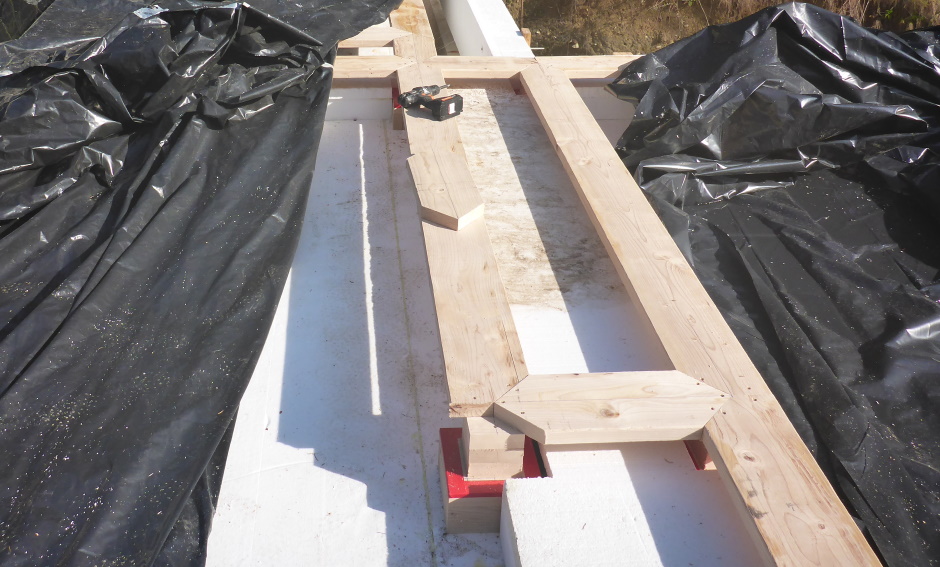
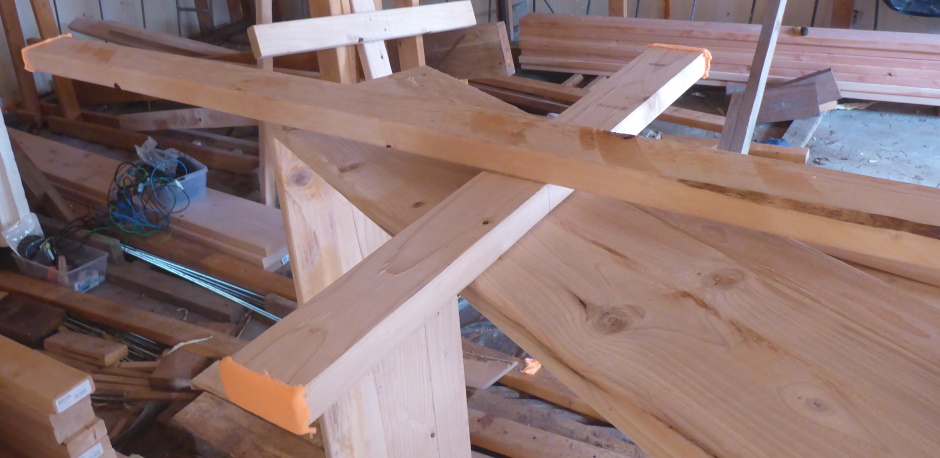
Make and fit padded cross into Protruding Bucking
This is a vertical and horizontal cross of 2x4 with a thin covering of cloth at the ends that is used to take the weight of the wet concrete. It stops the top sagging and prevents the sides from bowing in, both of which would be a problem when it later comes to fitting the window. The overall size is the window rough opening vertical dimension. It needs to be added from the inside to the Protruding Bucking because there is plastic on the outside of the Protruding Bucking. It is just held in place by friction. The cross can be reused for windows of the same size on other floors.

Fit Squaring Bucking
This just slides in from the inside.
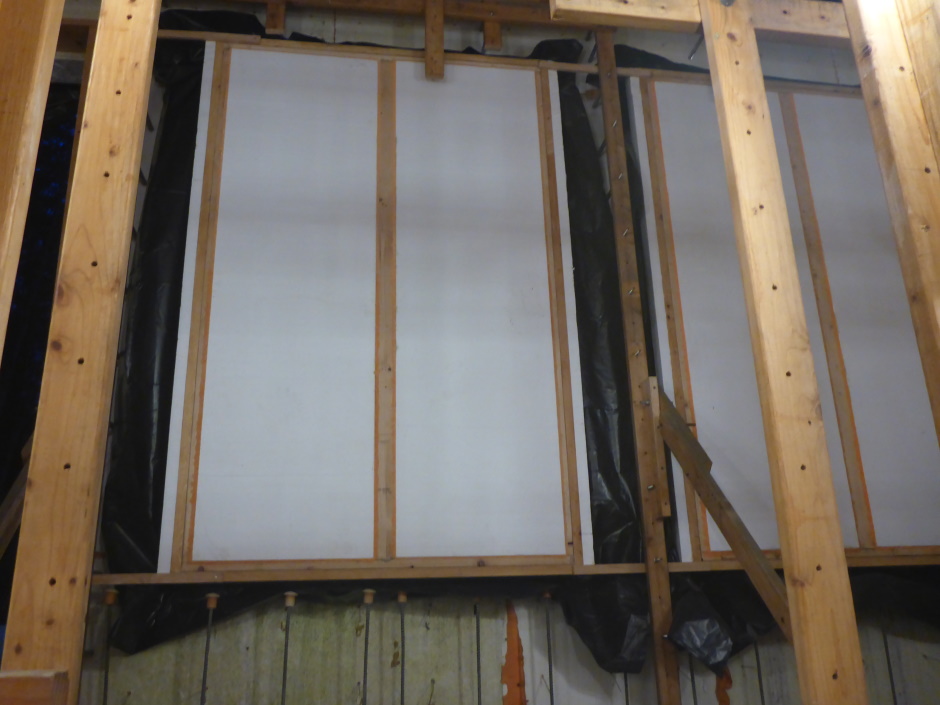
Screw on an edge for the plywood
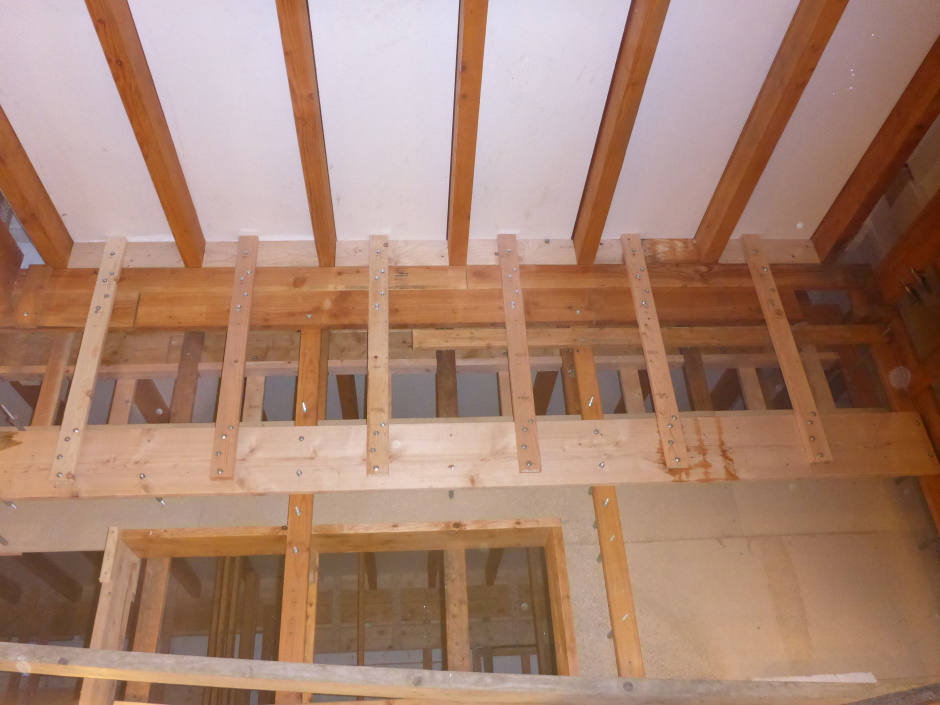
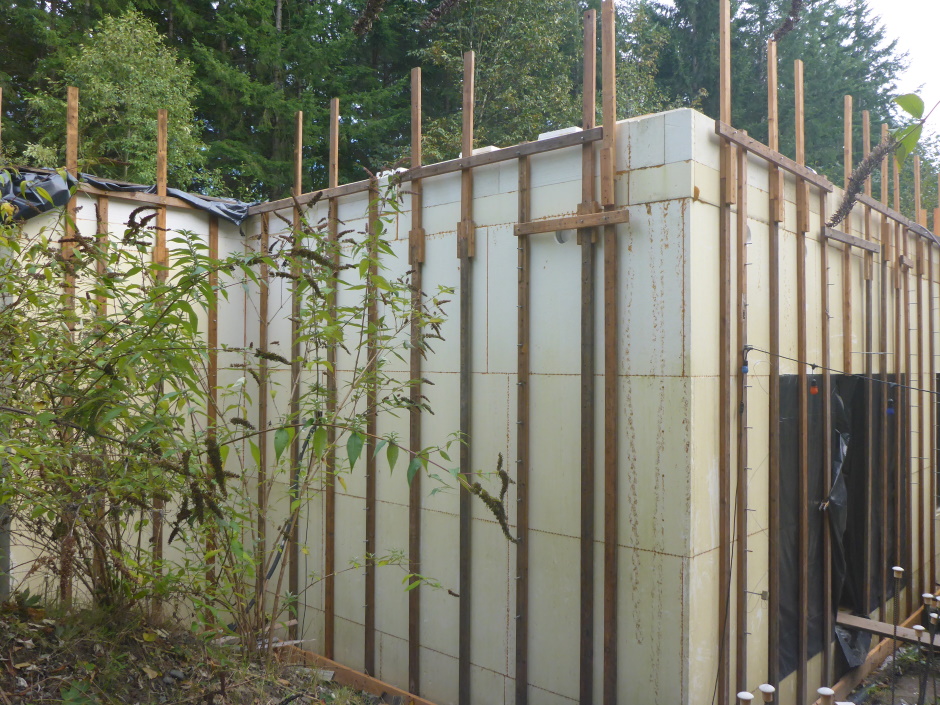
All around the outside (horizontally and vertically) screw on pieces of on-the-flat 2x4 between where the vertical 2x4 batons are. This is to prevent the plywood bowing out and spilling concrete.
True up everything
The bucking assembly needs to be exactly vertical in all dimensions. Use a self leveling laser and/or a spirit level. Fit appropriate wood spacers under the vertical 2x4 baton legs to get everything right.
Make the wood spacers from some spare 2-by. If needed, use a crowbar under the vertical batons to fit the shims.
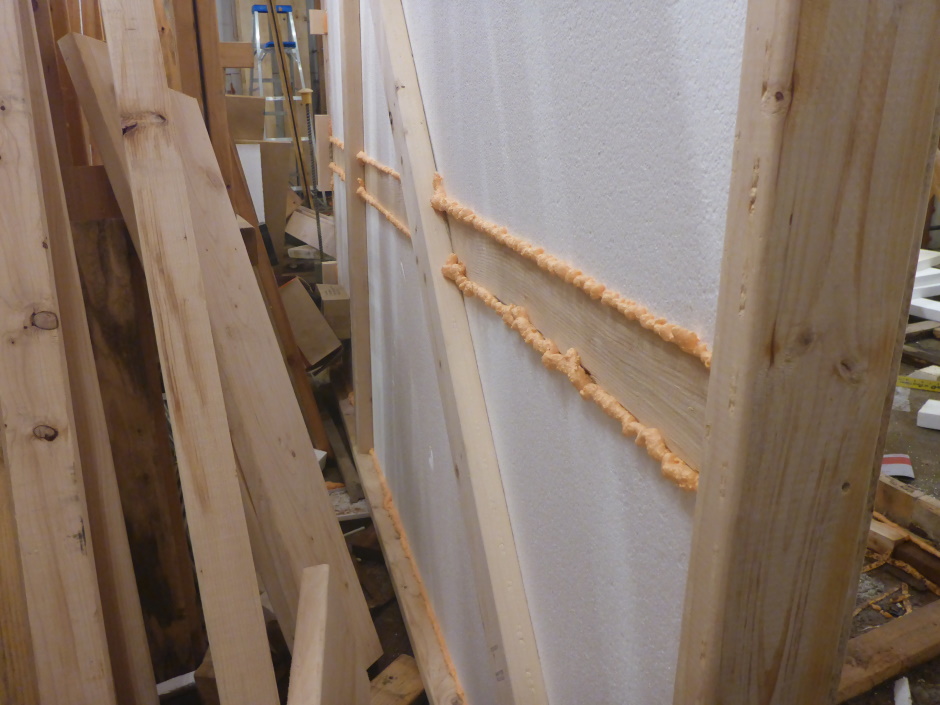
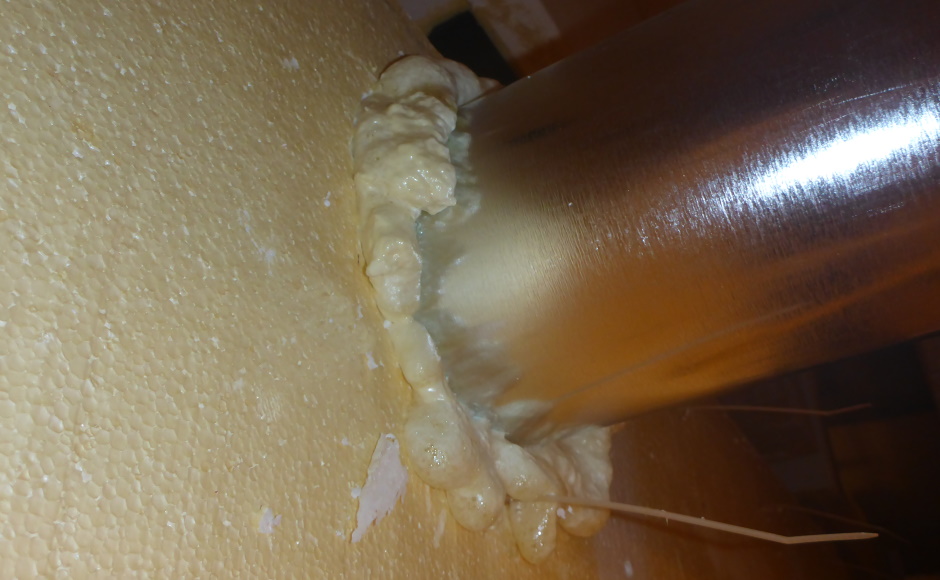
Fill round bucking with foam
There will be a bit of a gap between the protruding bucking and the wall EPS. Once the bucking is exactly square and vertical, fill the gap with foam gap filler.
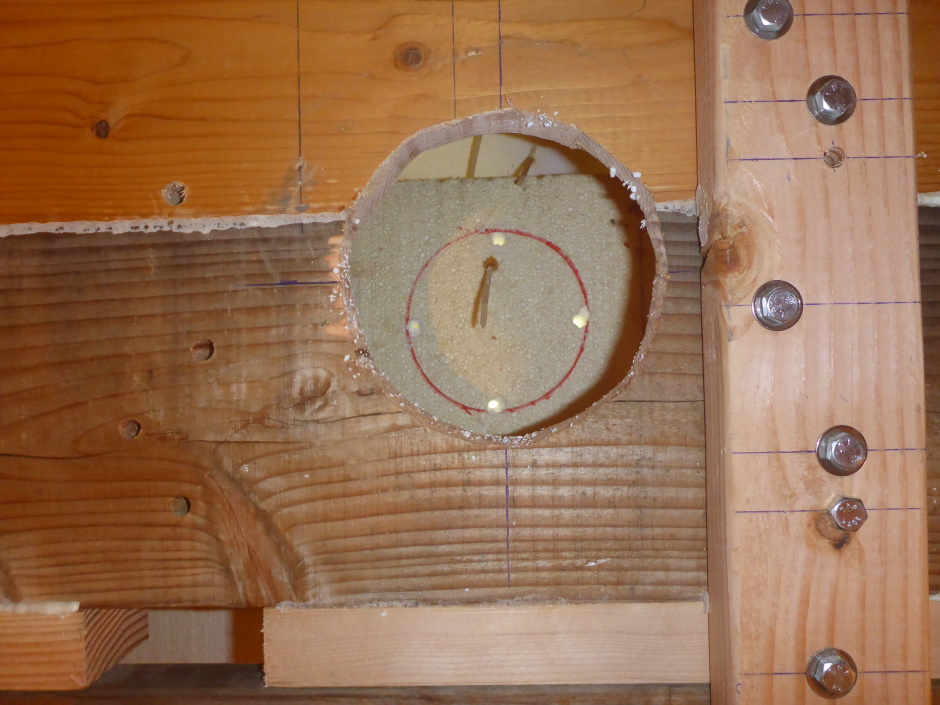
Make hole plugs and props
The holes used to fill under the bucking with concrete need to have wooden plugs so concrete does not escape when the walls are filled higher. The T shaped plugs (with bits that fit into the notches) are held in place by 2x4 props that go to the top of the Squaring Bucking.
Garage door

Internal concrete wall bucking
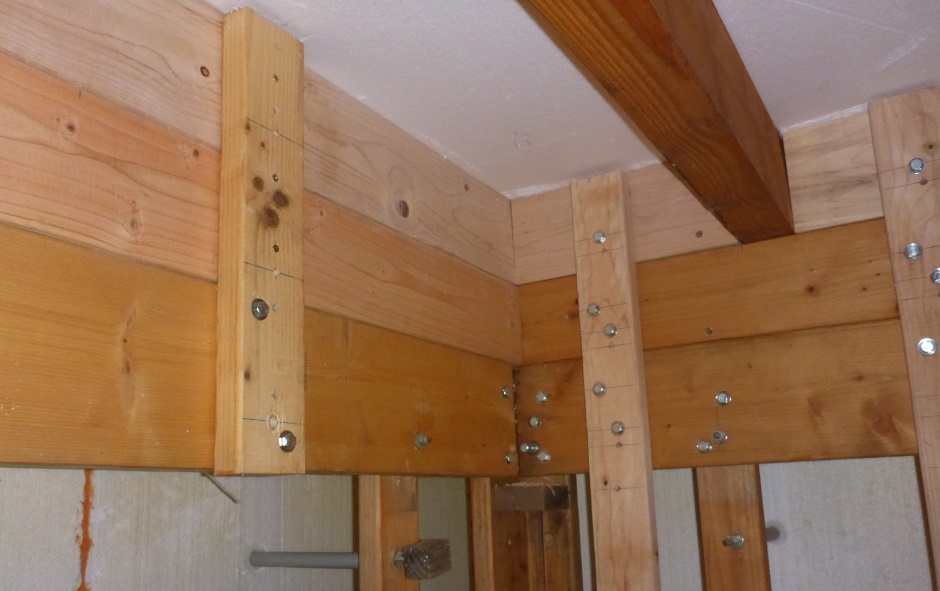
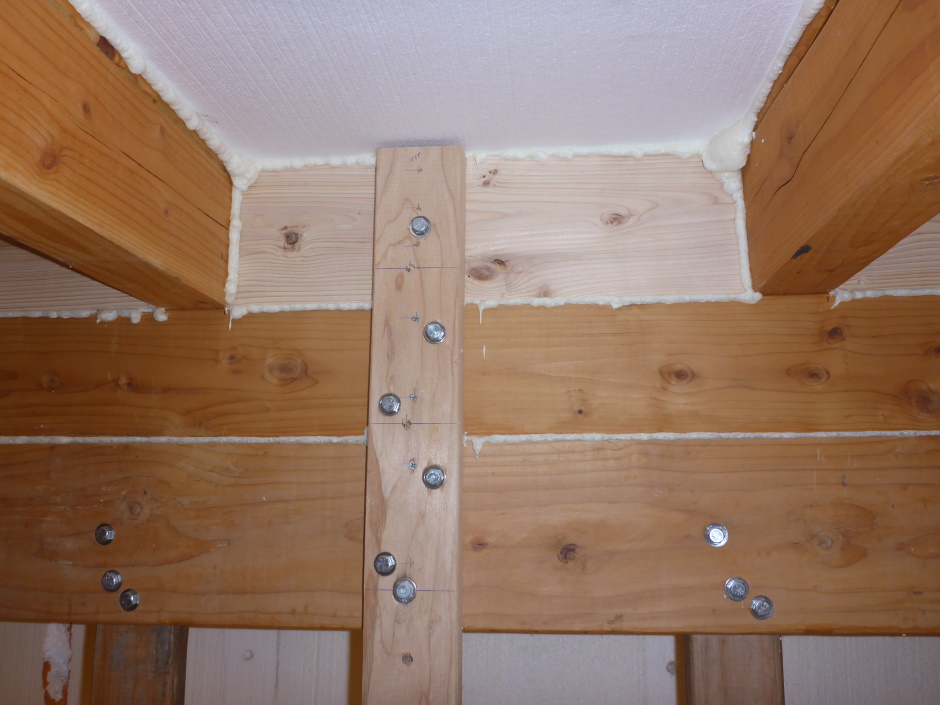
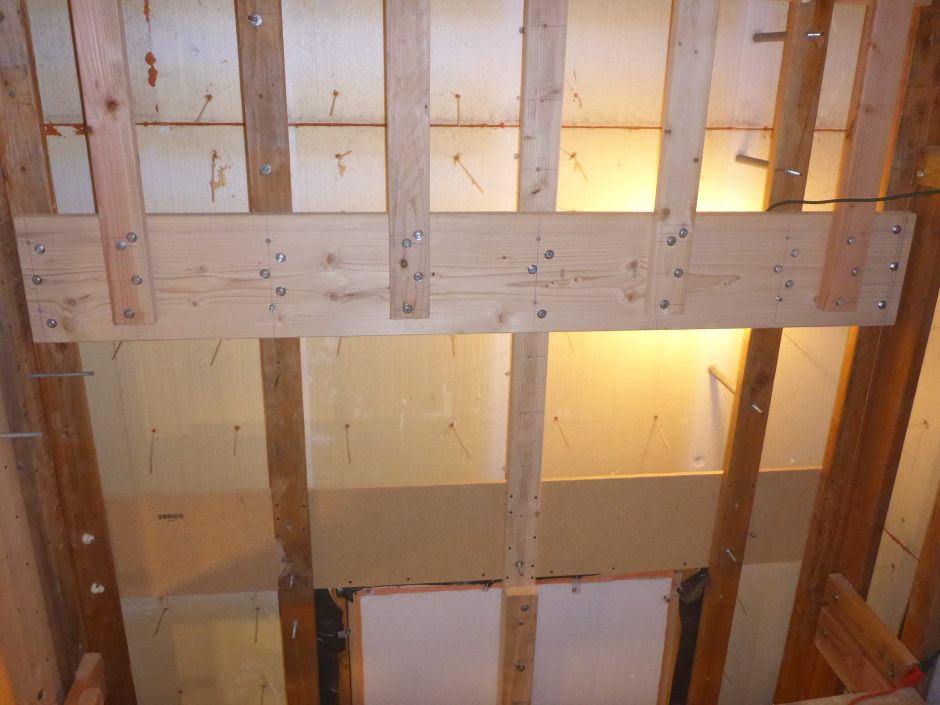
Top of Wall
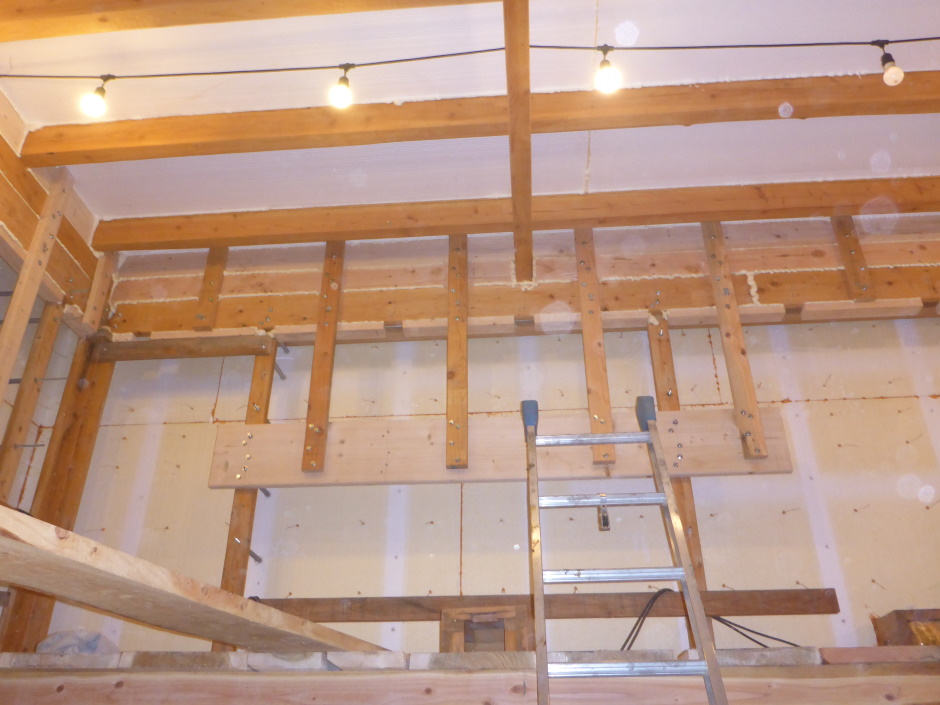
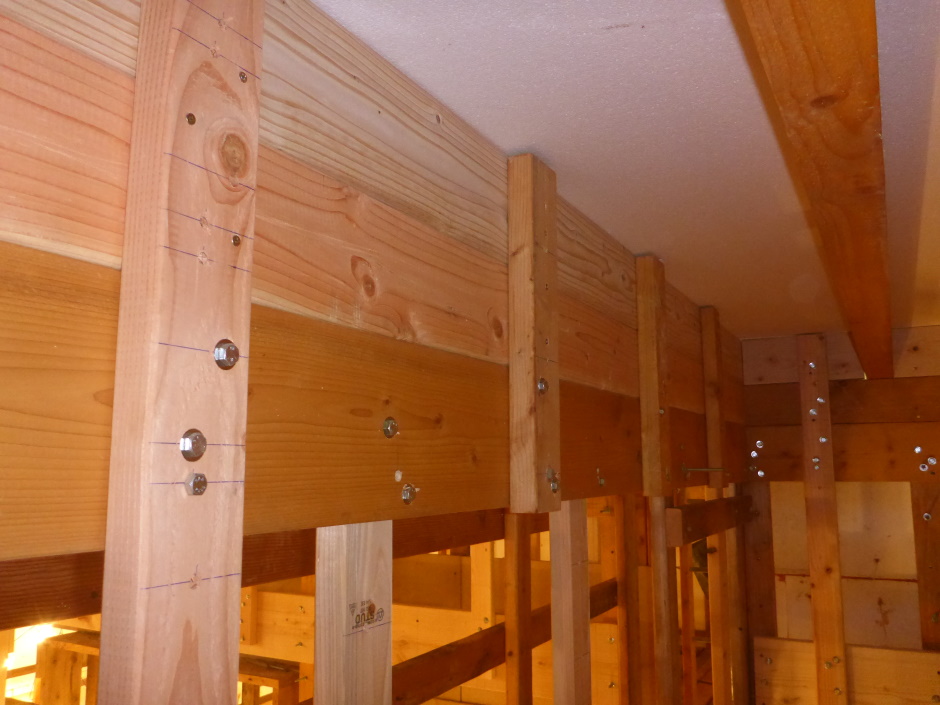
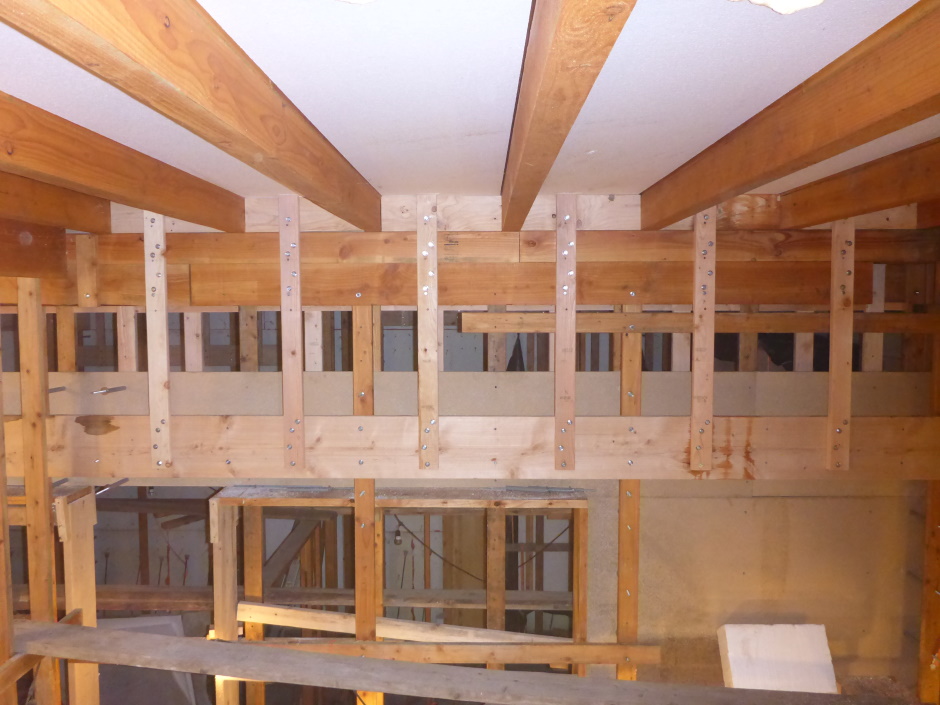
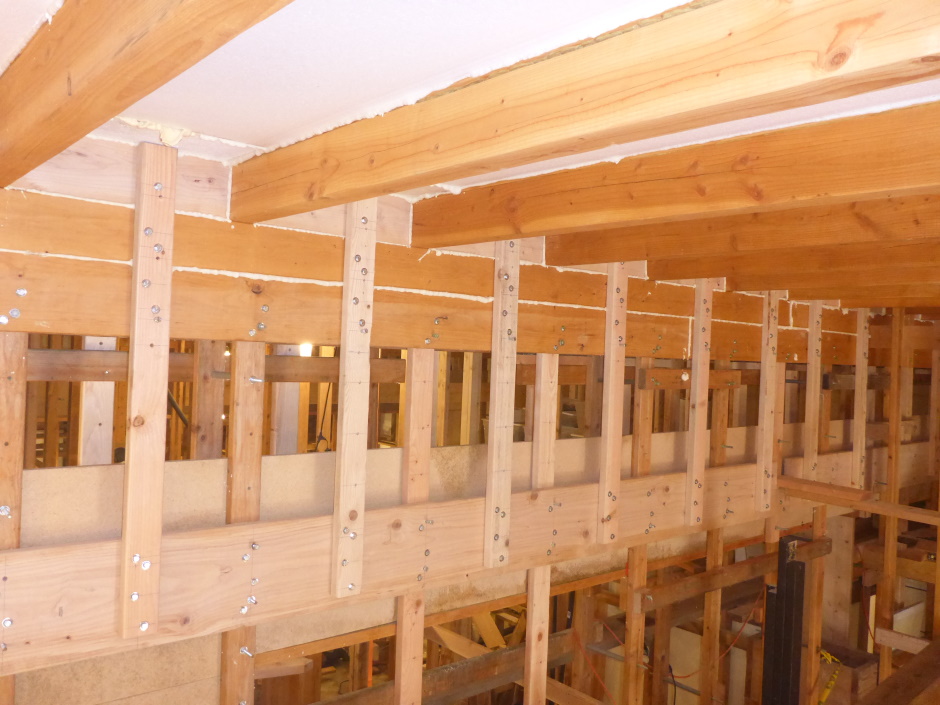
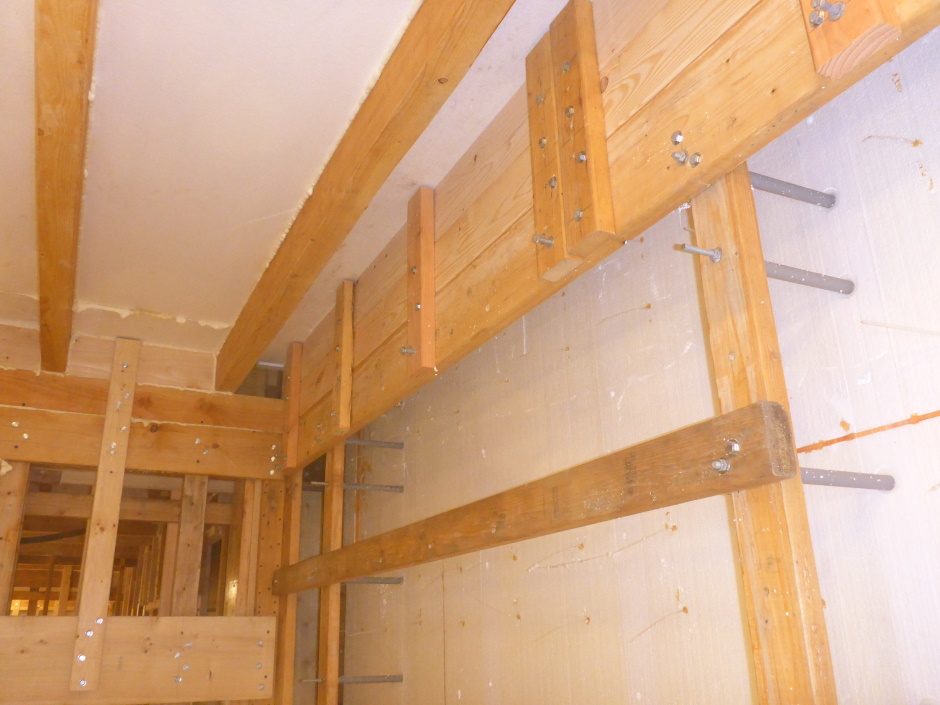
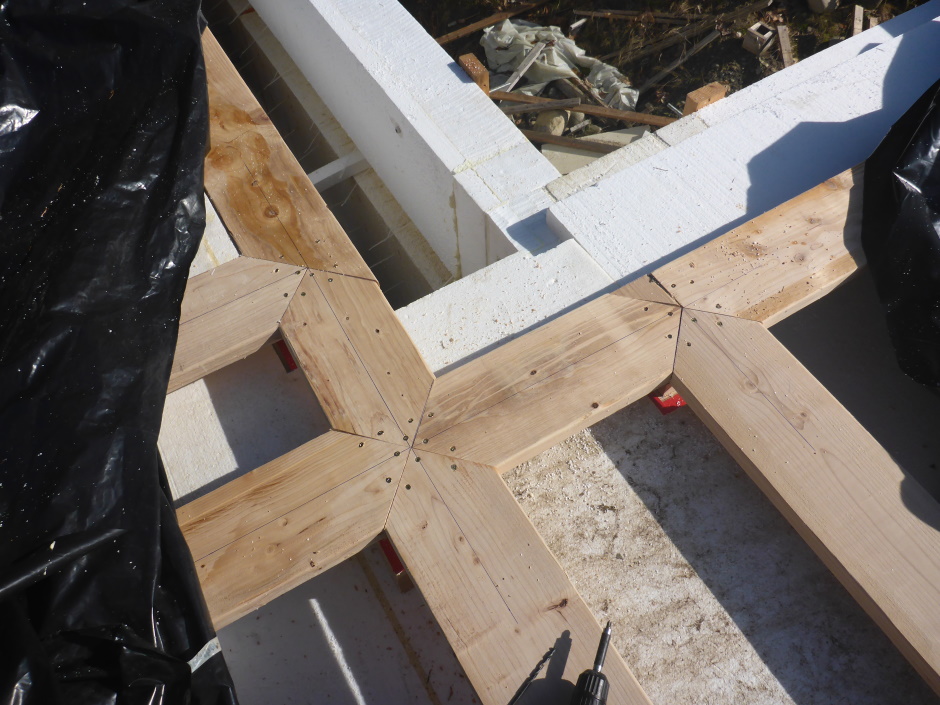
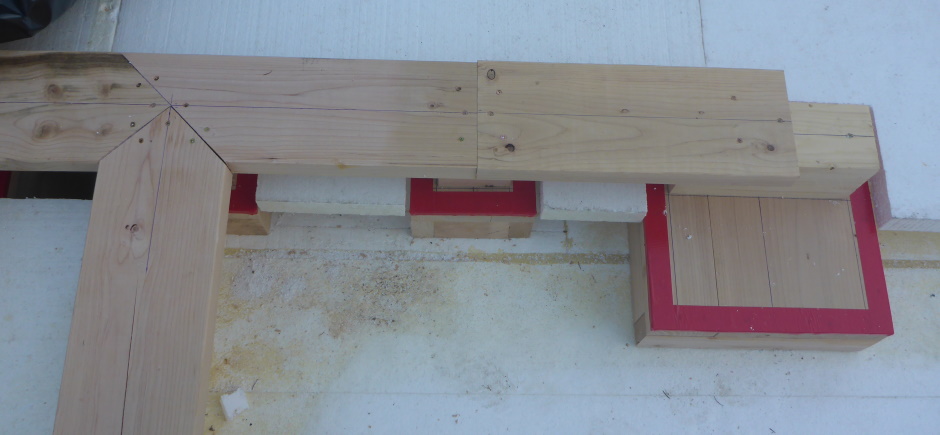
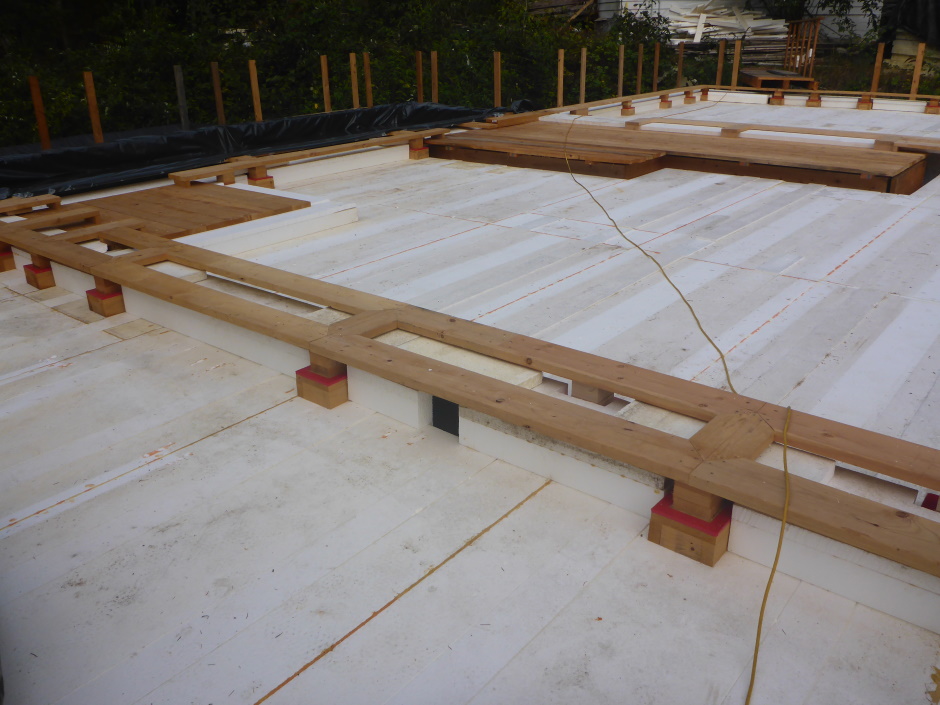
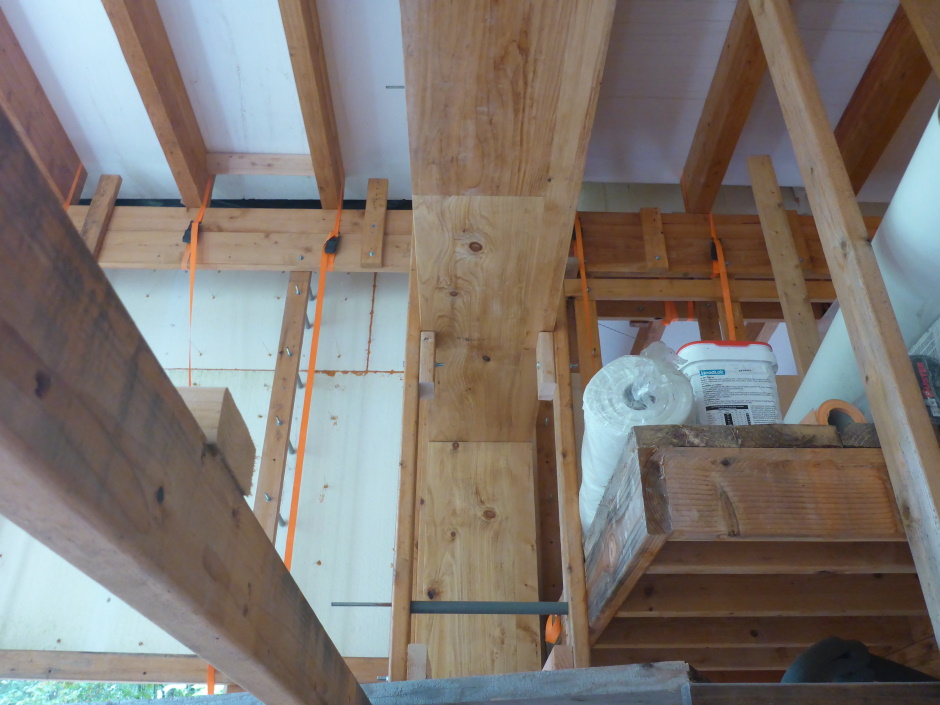
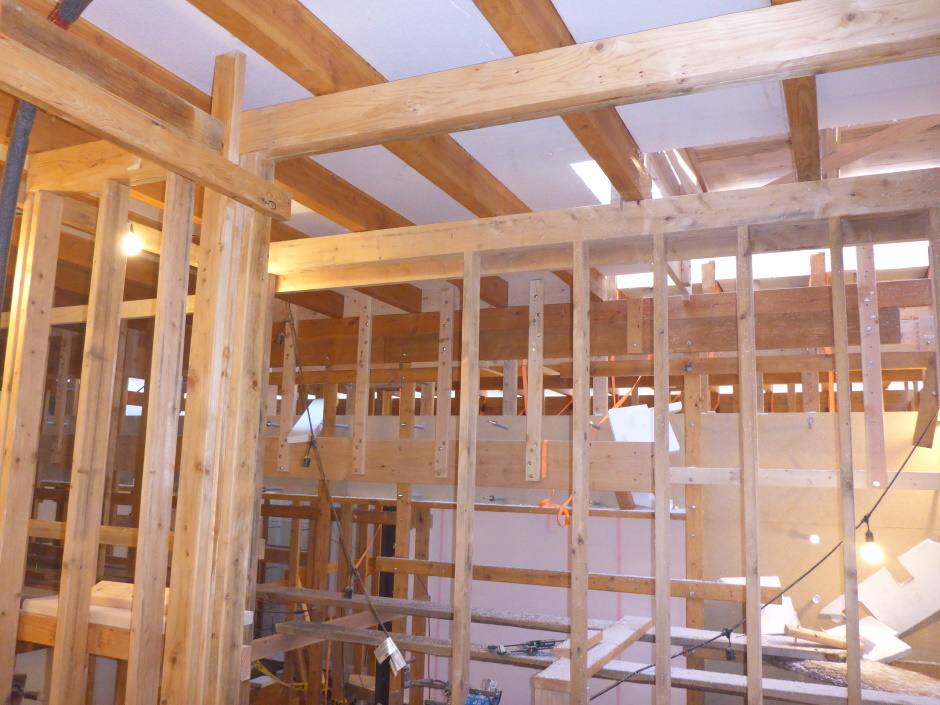
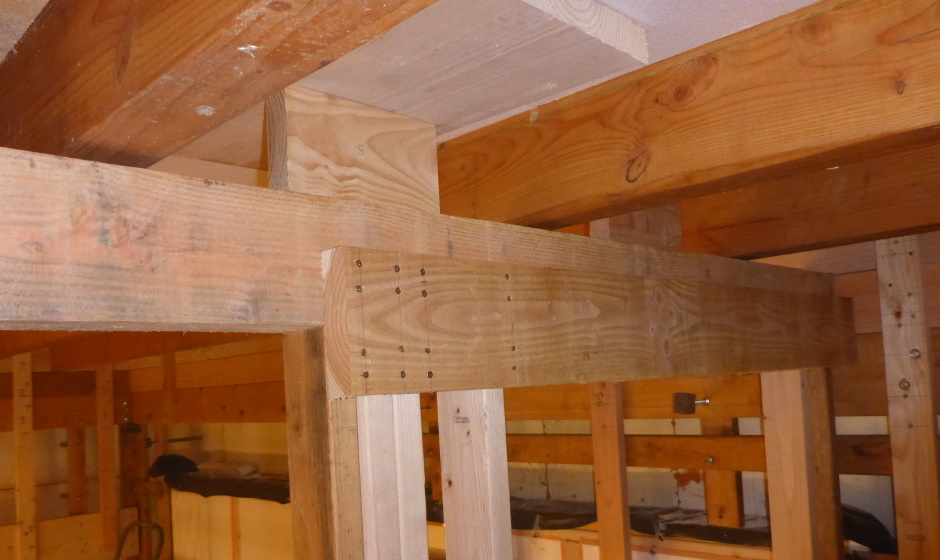
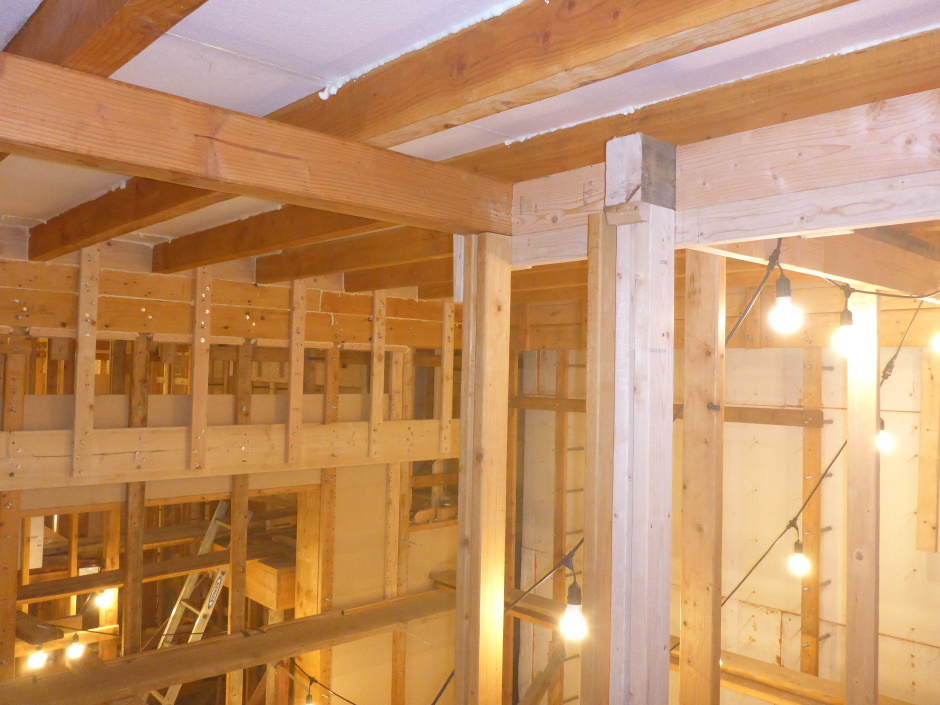
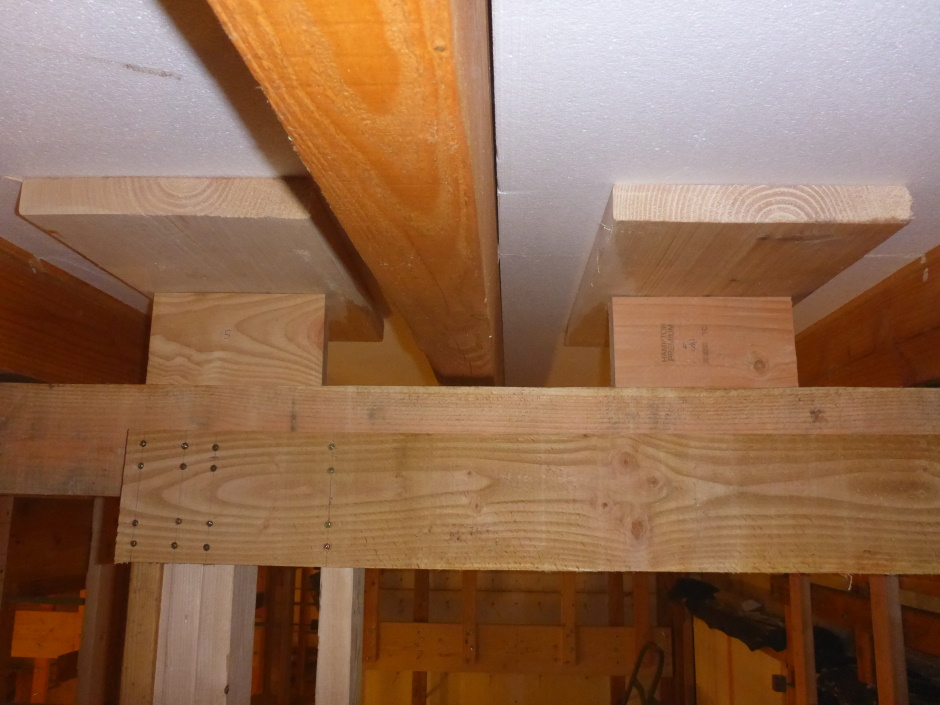
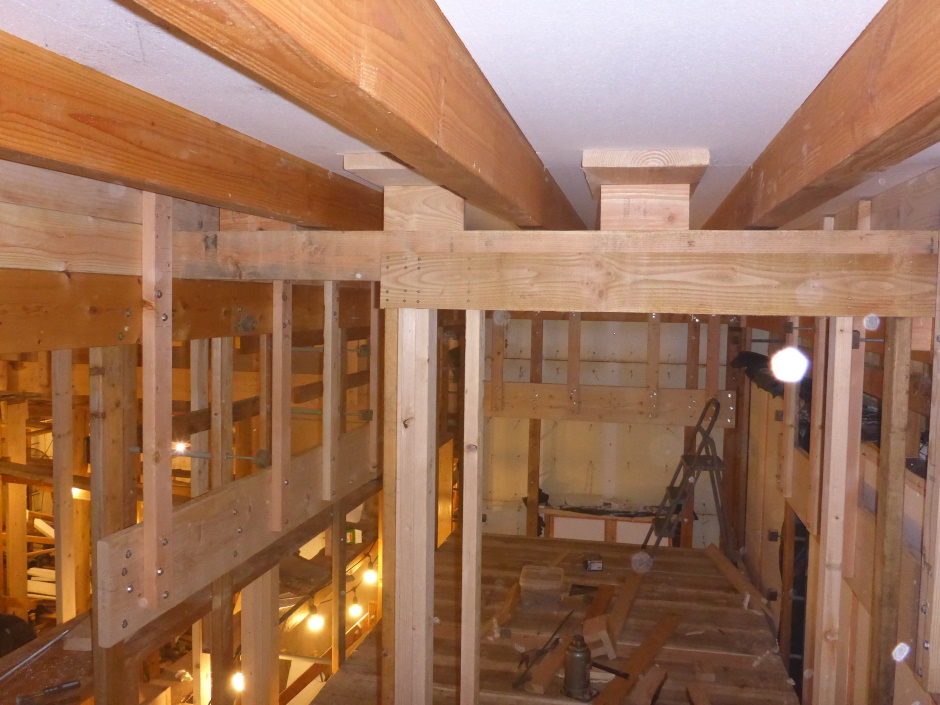
Internal wall support and beams
Floor Opening Edge
Particleboard

Bottom of wall

Bolts for Window plates
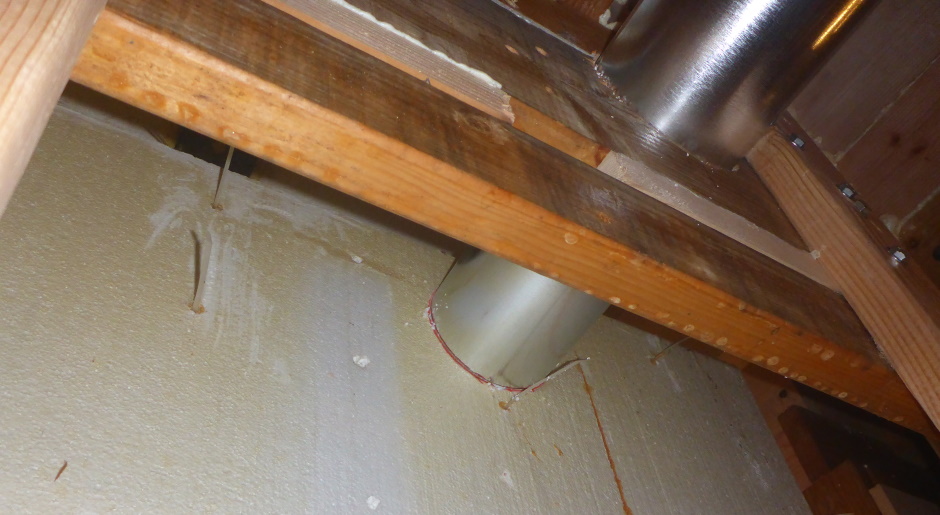
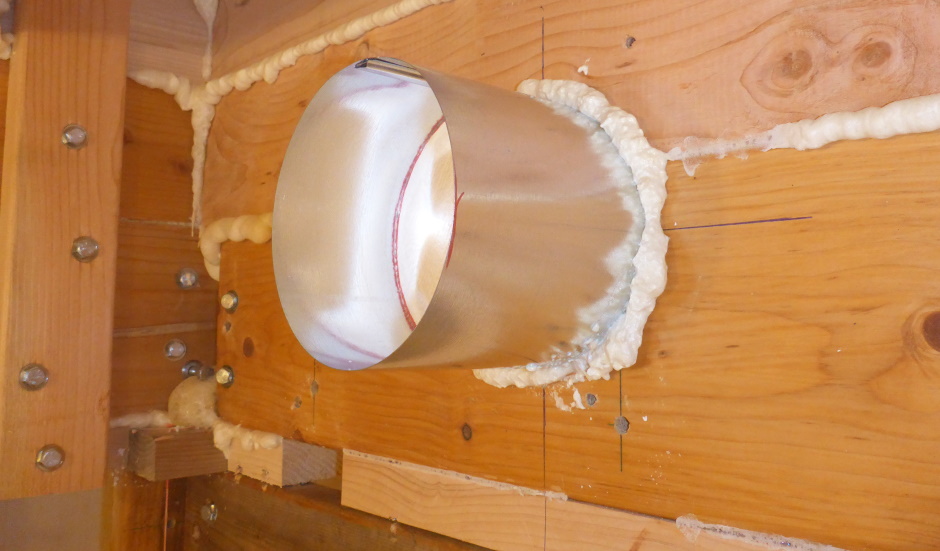
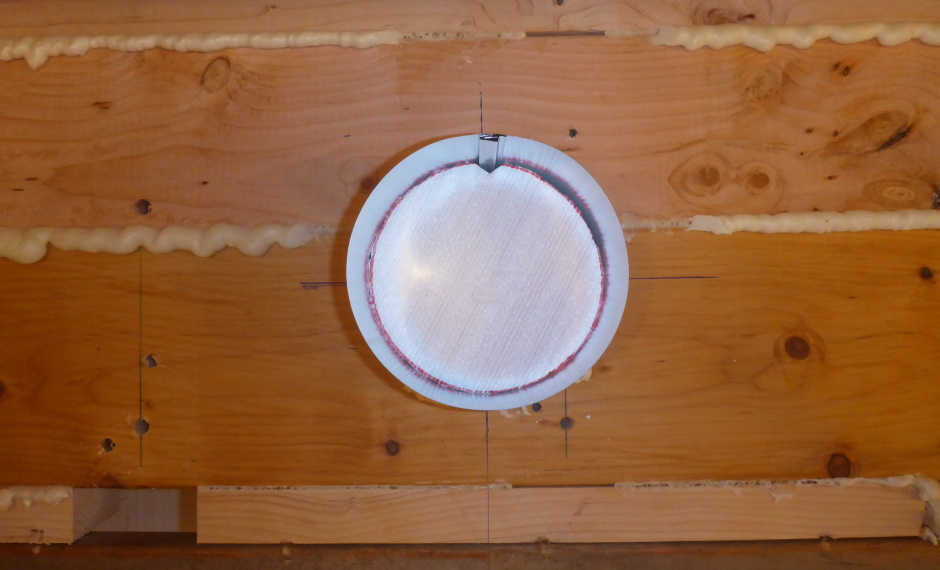
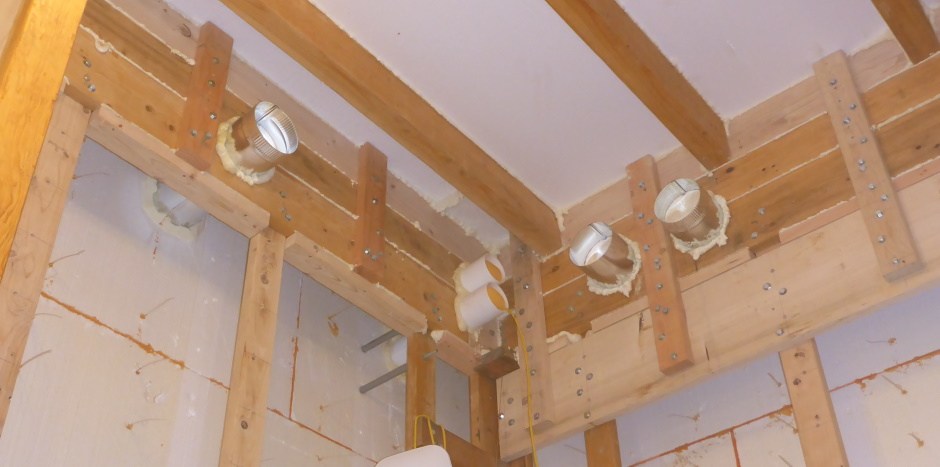
Vent holes

External vertical batons


Floor cubes and planks