


Home Site Map - Techniques - Structure -
Basalt Rebar Design - Stirrup Design
![]() This is a distillation of the ACI spec into useful take-aways
related to stirrup design.
This is a distillation of the ACI spec into useful take-aways
related to stirrup design.
Stirrup design
The important take-aways from ACI 440.1R-06 are...
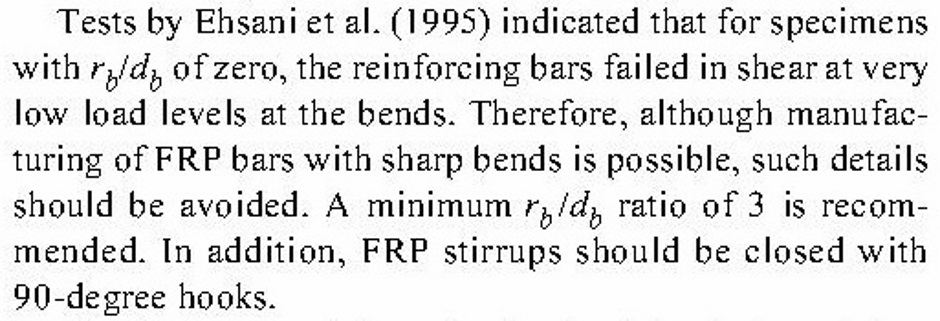
1) The minimum bend radius (measured on the inside of the bend) is 3 times the diameter of the basalt rebar bar used to make the stirrup.
2) The minimum tail length (measured from the center of the bend radius) is recommended to be 12 times the diameter of the basalt rebar used to make the stirrup.
Minimum Inside Bend Radius
Here are the relevant snippets from ACI 440.1R-06...

There's a useful article at http://www.mmsonline.com/columns/frp-rebar-shear-reinforcement-and-detailing .
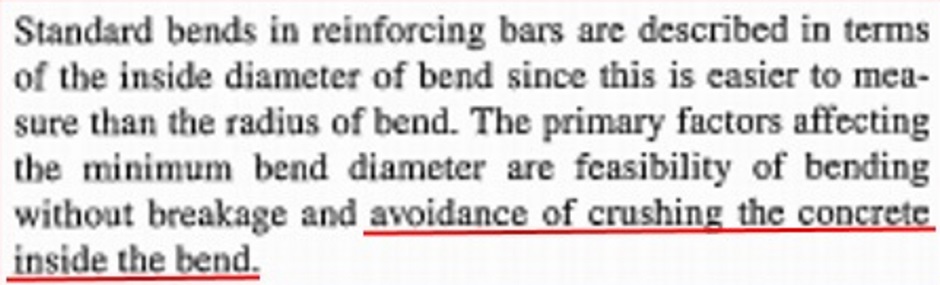
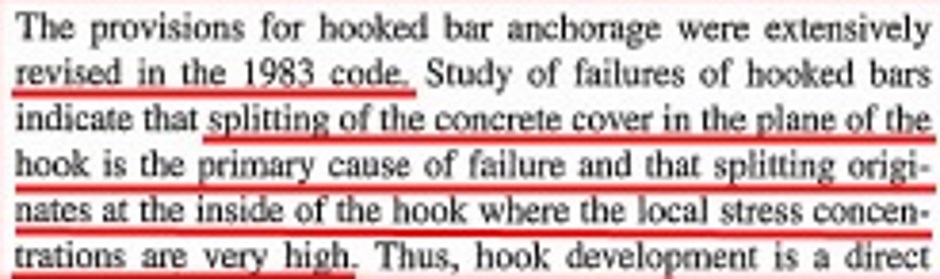
The minimum radius requirement is not just due to not wanting to excessively bend the basalt fibers. Tight bends also induce stress in the concrete. Here are some snippets from the web...
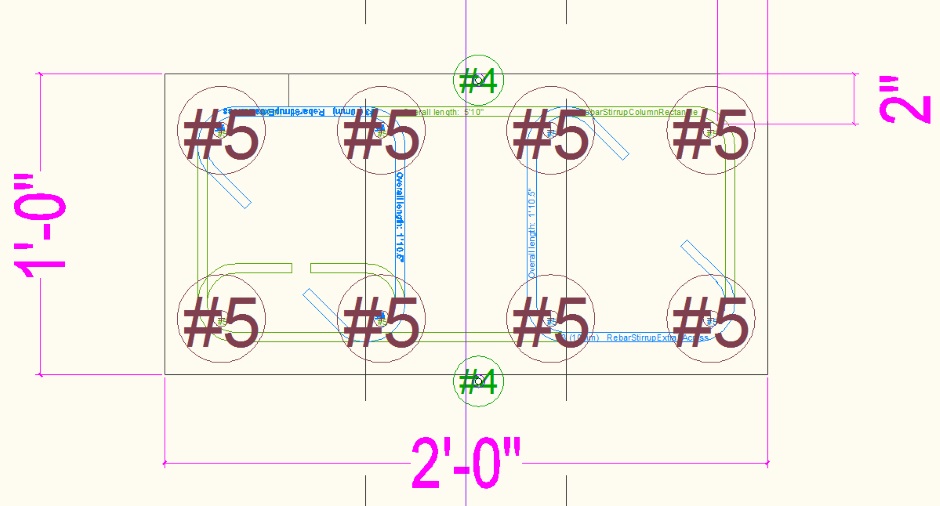
It would be nicer to use a tight bend because that would more accurately hold the longitudinal rebar in the correct location and also would allow the longitudinal rebar to be closer to the concrete edge (and still maintain the same concrete cover), but unfortunately it is necessary to abide by the 3d rule. Something like the following would be good for constraining the longitudinal rebar but is not allowed...
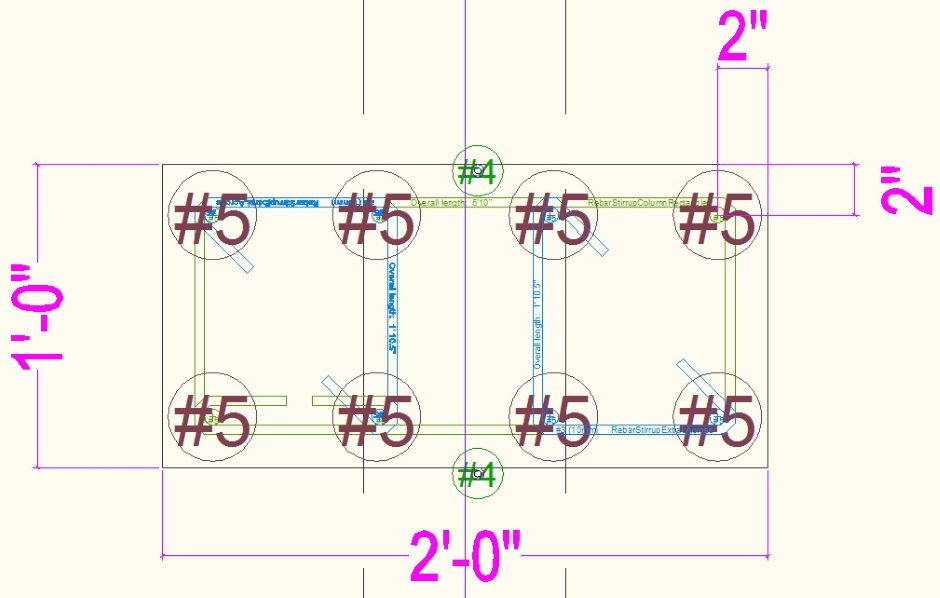
Compare this with the following stirrup design that does meet the rules. The #5 rebar longitudinal bars are not as well constrained and have had to move inwards by 1/4".
Tail length
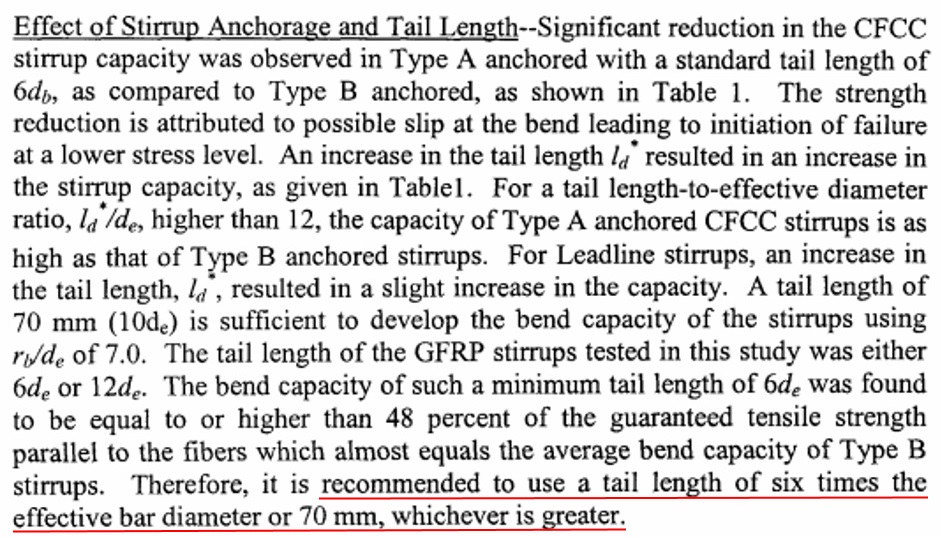
The 12 times diameter recommendation in ACI 440.1R-06 is primarily referring to tails for a 90 degree bend. If the bend is 135 degrees or 180 degrees then other research has shown that a tail of 6 times diameter and not less than 70mm has been found to be sufficient. Using 6d is also consistent with the guidelines and common practice for steel stirrups (that are 4d or 6d).

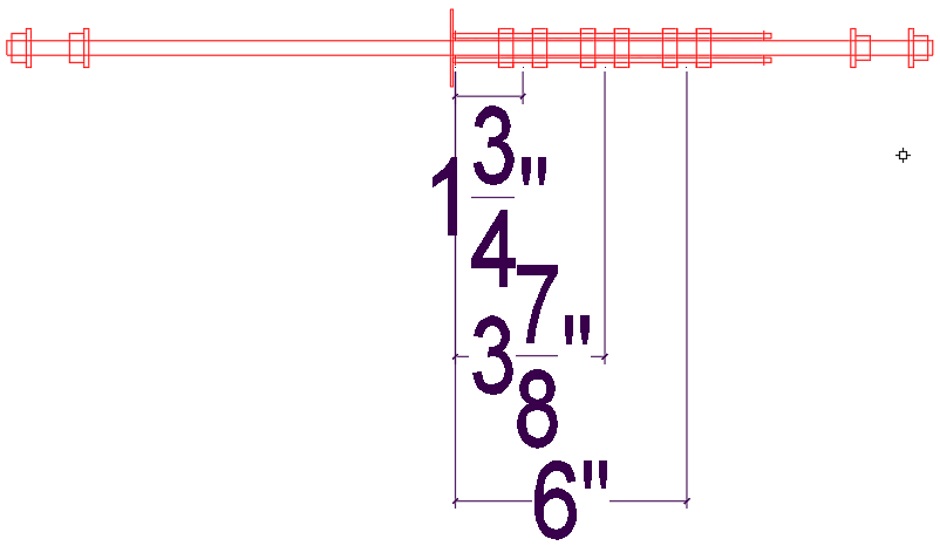
For a small stirrup designed to fit within an 8" cavity concrete wall it is not practical to use 12d, so 6d or 70mm is used (provided the hook bend angle is 135 degrees or greater). Where there is room to do it then it is good to use a 12d tail. When considering if there is enough room for a longer tail it is also important to think about whether a longer tail will impede the flow of wet concrete into the column.
For 10mm stirrups where space is limited, use a tail of 70mm or greater, and where space is not limited use 120mm.
For 13mm stirrups where space is limited use a tail of 80mm or greater, and where space is not limited use 160mm.
In some situations it is not possible to use even a 6d tail. It is ok to make the tail a little shorter as long as it is recognized that the stirrup will have a slightly reduced earthquakes resistance. The tail length used must not make it impossible to fit the stirrup after the longitudinal rebar has been approximately added (but not yet tied).
Bend angle
Where possible it is best to use a 180 degree bend on the end. This is not always possible because you need to ensure that it is possible to fit a stirrup after the longitudinal rebar has been approximately added (but not yet tied).
Concrete coverage
The majority of my stirrups are designed to provide 1.5" concrete coverage, ie no edge of basalt rebar closer to 1.5" from the edge. Sometimes the actual distance is an additional 1/16" or 1/8" from the edge.
Having 1.5" of concrete coverage is plenty as the concrete is not exposed to the weather and basalt rebar is not subject to corrosion. The figure could be smaller, but I wanted to ensure the concrete has room to flow around the rebar.
There are a few exceptions (eg floor beam stirrups) where the concrete coverage has to be less, but that is acceptable because basalt rebar does not corrode so doesn't actually need any concrete coverage.
Offset from standard vertical positions
When using Carnation Walling, the standard center of rebar vertical rebar positions measured from the outside of the wall concrete are 2-1/4", 4-1/2", and 5-3/4". For 12" wide concrete the numbers are 2-1/4", 4-1/2", 5-3/4", 8", and 9-3/4".


Because of the stirrup minimum bend radius it is necessary for vertical rebar (in horizontally placed rectangular stirrups) in the outside positions to move towards the center of the wall by 1/4". This is within the flex capabilities of basalt rebar.
Offset from standard horizontal positions
When using Carnation Walling, the standard center of rebar horizontal positions measured from the outside of the wall concrete for 8" wide concrete are 1-3/4", 4", and/or 6-1/4". For 12" wide concrete the numbers are 1-3/4", 4", 6-1/4", 8-1/2", and/or 10-1/4".
In practice I introduce a deliberate error relative to the calculated positions in order to provide an extra 1/4" of concrete coverage on the inside of the wall so the following positions are what I actually use...

Because of the stirrup minimum bend radius it is necessary for horizontal rebar (in inverted stirrups and cow heads) in the outside positions to move towards the center of the wall by 3/4" and upwards by 1/4". This is within the flex capabilities of basalt rebar.