


Home Site Map - Techniques - Plot Infrastructure -
Greenhouses - Thermal Mass Design
![]() Using thermal mass properly is the key to a year-round efficient
greenhouse.
Using thermal mass properly is the key to a year-round efficient
greenhouse.
Thermal mass is provided by the concrete of the north wall (and to a lesser extent other shorter walls) and by the concrete slab. The sun heats the thermal mass during the day and the heat is released at night to keep the frost away. It even works in the winter to extract heat from the sun's rays and keep the greenhouse warmer than it would otherwise be. A term often used is "Passive Solar". There's more info on the effect of thermal mass here . Concrete is not quite as good at providing thermal mass in a greenhouse compared with water (concrete and rocks is able to store 40% less heat than water), but it does have the additional use of providing structure for the building.
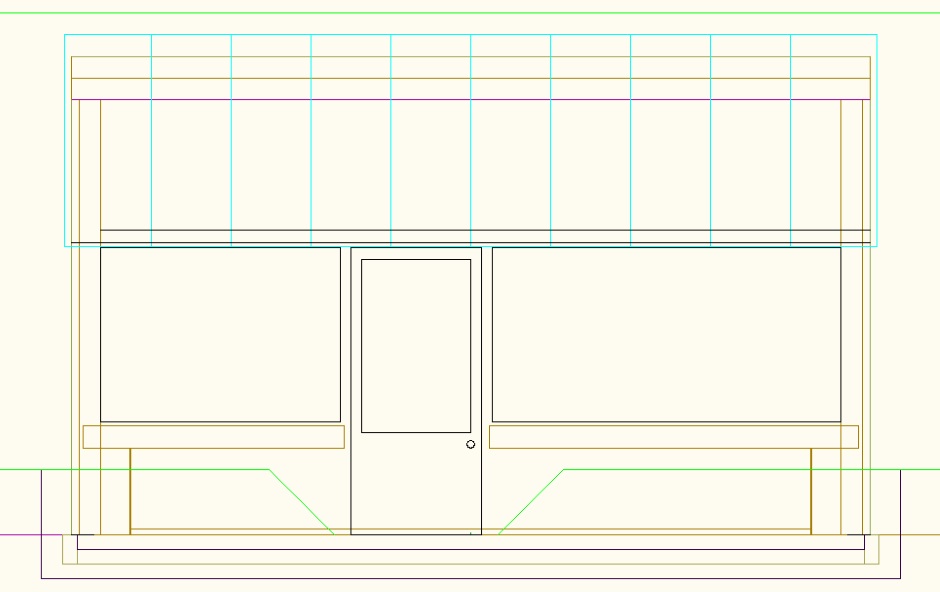
You need lots of windows facing the direction the sun is coming from and you need to insulate all the walls where the sun is not coming from.
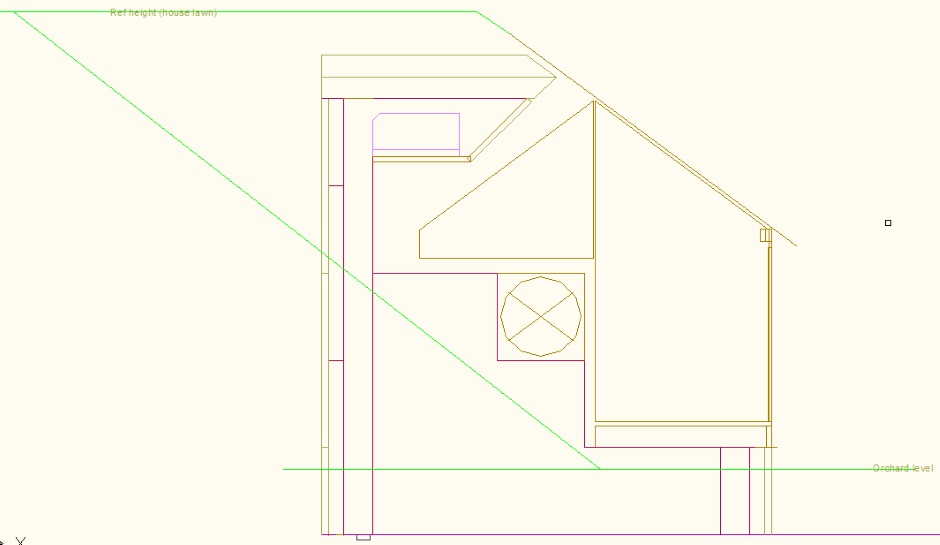
You should make the northern-most third of the roof non-transparent and well insulated. In the summer is stops the high in the sky sun from overheating the greenhouse and in the winter provides very little screening of the sun because the sun is lower in the sky. My design uses a thin strip of concrete flooring. This concrete roofing has polystyrene sheets above it and is strong enough to support 1 foot of soil above that, thus extending the lawn area.
Sinking the greenhouse into the ground by 2 feet is a good way to avoid frost without making much difference to the amount of useful sun rays you capture.
You ideally want the north wall to be white to reflect light back onto the plants and you ideally want it to be black to absorb heat. Gray (the natural color of concrete) is a good compromise between the two conflicting requirements.
Implementation notes
10' 9-1/2" deep x 18' 5-1/2" wide 10.79 x 18.46 = 199.18 sqft
Excavated "shire" level (the land on the south side) is 10'6" below ref grade.
Where there is a
slab then excavate down an additional 2'6".
This is 13'
below ref grade and 2'6" below "shire" level.
Top
of slab is 1'6" below "shire" level.
Slab is 4" of
concrete, on 4" of EPS, on 4" of crushed rock.
Two horizontal 8'x4' acrylic clear panels on south wall. One cut acrylic panel on east and west walls. Total $400.
A 4' wide grass slope is between the greenhouses so you can walk down and drive the ride-on lawnmower. It is also the separator between the allowed 200sqft buildings.
The transparent roof slope length is one 8' roof panel. Need 10 across width of roof (gives up to 1' overhangs, but it is best to overlap the sheets more and make the overlap only 2 inches). SunTuf is the best corrugated panel available. Total $220.
Carnation concrete walling for 10' north wall and 2' high south, east, and west walls. Against retaining wall the east and west walls are 6' high.
Under the concrete slab there is polystyrene (4"). The EPS extends up 4" to constrain the poured slab concrete. The slab is a raft of 4" thick concrete. There is rebar in the slab (1' grid) and it extends up into the walls with 1 foot on center.
The north edge of the roof uses a 4' strip of concrete flooring. A lip is formed to extend up an extra 9" to constrain the soil.
Bench on south side is 4' deep. Concrete short walls (2' high) support benches at a height of 2'6". North side of walkway is for tall plants and trees.
Waterproofing is needed on the backfilled walls and is best done with a 6mil polyethylene sheet. Put a drain round the foundations, done with 4" perforated pipe in crushed rock. Good drainage is important because it reduces pressure on the back wall.
Concrete block alternative
Instead of a poured concrete slab you can use concrete blocks for the slab. Under that is 4" of EPS, then 6mil Polyethylene sheet, then 1" of EPS for membrane protection, with 2" of gravel under that.
On the very outside of the backfilled wall is 2" of EPS. Glue this and make it square and vertical. Then the same 6mil polyethylene sheet that goes under the slab. Then 2" of EPS. Then concrete blocks (glued to the slab blocks). Glue to each other and also foam glue to the EPS.
Do the concrete blocks from the corners/edges and work towards the middle. There will be a gap left in the middle, but that can be filled with hand mixed bag concrete. Alternately on rows make the gap a single gap in the center and on other rows two gaps well spaced from the center. This ensures a better properly glued structure.
Don't make any holes in the EPS sheets as we want this to help with the waterproofing.
When backfilling, put some crushed rock or native rocks against the outer EPS so that water can run down to the crushed rock under the slab EPS.